
Different Types of Hydroponic Systems Explained
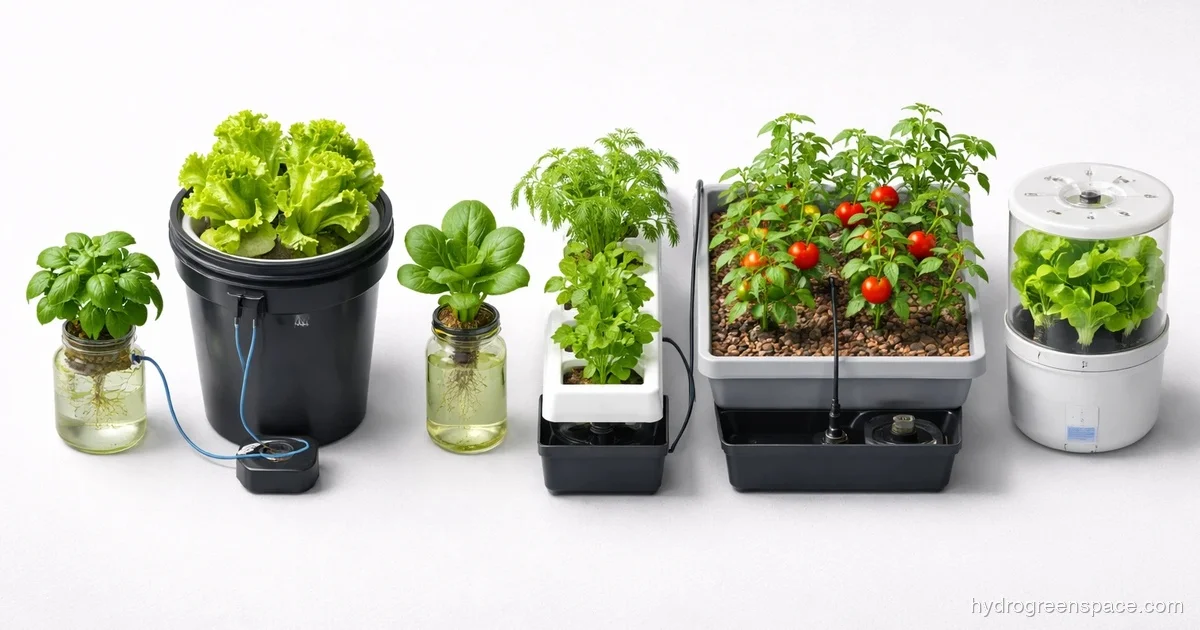
There are seven main types of hydroponic systems, and every one of them is “the best” depending on who you ask. The honest answer is that the right system depends on what you’re growing, how much space you have, and how much you want to babysit it. Growing herbs on a kitchen counter is a completely different problem than growing tomatoes in a basement. If you pick the wrong system for the wrong job, you’ll spend more time troubleshooting than harvesting. If you’re still deciding whether to go hydro at all, hydroponics vs soil covers that decision first. And if you want the full overview of what hydroponics is before diving into system types, that’s the place to start.
Passive vs Active Hydroponic Systems
Before you compare any specific systems, you need this mental model. Passive systems deliver nutrients without any pump or timer. They rely on capillary action, gravity, or simple water level management. Active systems use a pump (and often a timer) to move the nutrient solution around the root zone.
Passive systems are simpler and cheaper to run, but they have real limitations on what plants they can support. Active systems open up more options, but they also mean more parts that can fail.
The 7 Types of Hydroponic Systems
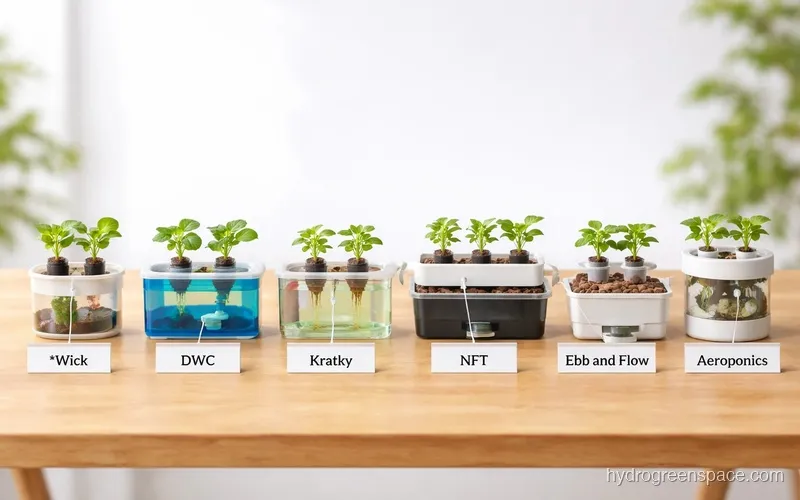
1. Wick System
How it works: A wick made of cotton, nylon, or rope draws nutrient solution up from a reservoir into the growing medium by capillary action. No pump, no timer, no electricity required. The plant sits above the reservoir and the wick does all the work.
Pros:
- Dead-simple setup, almost nothing to break
- Zero electricity cost for the system itself
- Cheap to build, you can DIY one for under $20
- Great for small spaces and travel (no timers to program)
Cons:
- Wick delivery is too slow for thirsty or fast-growing plants
- Can’t support large root systems or fruiting vegetables
- Oversaturation is possible if wick size isn’t matched to plant demand
- Genuinely difficult to scale up
Best for: Herbs like basil, mint, and cilantro. Beginners who want to understand the basics without any investment risk. Don’t try to grow tomatoes in this thing.
2. Deep Water Culture (DWC)
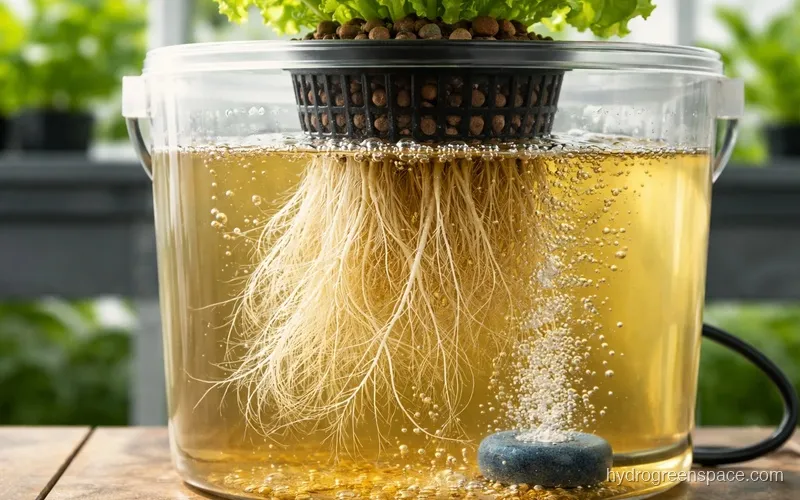
How it works: Plants sit in net pots suspended above a reservoir filled with nutrient solution. The roots hang directly into the water. An air pump runs constantly to oxygenate the solution and keep the roots from drowning. That’s the whole system.
Pros:
- Fast growth rates, especially for leafy greens and lettuce
- Simple design with very few failure points
- Easy to monitor and adjust nutrient levels
- Beginner-friendly once you understand pH and EC basics
Cons:
- Power outages are a real problem: roots die fast without oxygenation
- Reservoir temperature needs to stay below 70°F to prevent root rot
- Larger plants need more reservoir management
- pH can swing quickly in a small reservoir
Best for: Lettuce, herbs, and leafy greens for beginners and intermediate growers. DWC is the most forgiving active system for a first build.
What I’d do: If you’re completely new to hydroponics and want actual results fast, start with DWC. A 5-gallon bucket, an air pump, and a net pot lid is a $25 setup that will teach you everything you need to know about nutrient management.
3. Kratky Method
How it works: Kratky is DWC without the air pump. You fill a reservoir, suspend your plant above it, and leave a gap of air between the waterline and the net pot. As the plant drinks the solution down, that air gap grows and the roots access both water and oxygen naturally. You don’t top it off until it’s nearly empty.
Pros:
- Completely passive: no pump, no electricity, no timer
- Almost zero maintenance once set up
- Very low cost and easy to replicate
- Perfect for small grows and off-grid situations
Cons:
- You can’t easily adjust or top off mid-cycle without disrupting the oxygen gap
- Not suitable for long-cycle plants or anything that drinks heavily
- No safety net if the water level drops too fast
- Difficult to scale to commercial quantity
Best for: Lettuce, spinach, and compact herbs for total beginners or anyone who wants a completely hands-off setup. I’ve run Kratky lettuce on my kitchen counter and barely touched it for three weeks.
4. Nutrient Film Technique (NFT)
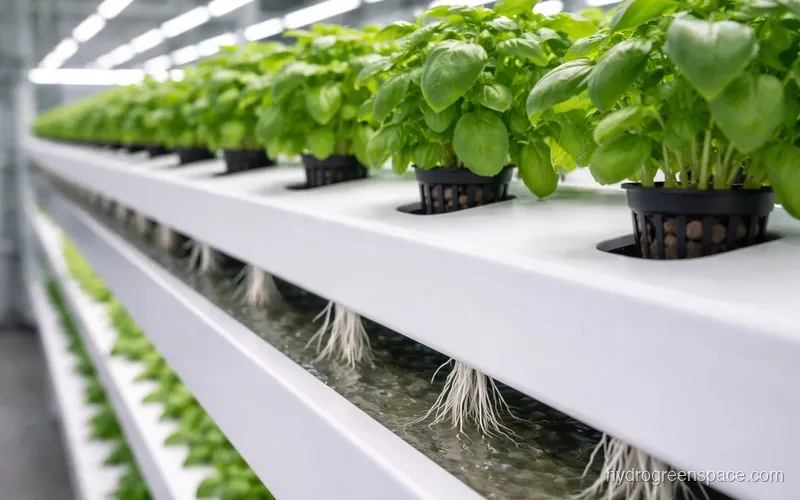
How it works: A thin film of nutrient solution flows continuously through a slightly angled channel. Plant roots sit inside the channel, with the tips touching the flowing film while the upper root mass stays exposed to air. A pump moves solution from the reservoir up to the top of the channels and gravity pulls it back down.
Pros:
- Excellent root oxygenation because roots are mostly in air
- Very water efficient; minimal solution is used
- Clean, modular design that scales well horizontally
- Fast growth for the plants it suits
Cons:
- Pump failure kills plants within hours, not days
- Root channels can clog if roots grow too large
- Not suitable for plants with large or heavy root systems
- Requires consistent slope and channel design to avoid dry spots
Best for: Herbs, lettuce, and strawberries at an intermediate skill level. NFT is not forgiving. If your pump fails at midnight, you may have dead plants by morning. That’s not fear-mongering, it’s just the tradeoff.
Warning: Don’t start with NFT if you don’t already understand your system’s failure points. It rewards experienced growers who stay on top of maintenance, and it punishes everyone else.
5. Ebb and Flow (Flood and Drain)
How it works: Trays or containers are periodically flooded with nutrient solution from a reservoir below, then drained back down by gravity. A timer controls the pump and flood cycles. Between floods, the growing medium dries out slightly, which pulls oxygen into the root zone.
Pros:
- Versatile, works with almost any growing medium
- The wet-dry cycles mimic natural soil conditions, which some plants respond well to
- Handles larger, heavier plants better than most systems
- Easy to customize flood depth and cycle frequency
Cons:
- Timer and pump failures cause problems fast
- More parts than DWC or Kratky (pump, timer, drain fittings, flood tray)
- Salt buildup in growing medium over long grows requires flushing
- Takes more space than a simple bucket setup
Best for: Tomatoes, peppers, cucumbers, and larger vegetables at an intermediate level. This is my go-to recommendation for anyone who wants to grow fruiting plants without jumping all the way to drip systems.
6. Drip System
How it works: A pump pushes nutrient solution through a network of tubing to drip emitters positioned above each plant. Solution drips slowly onto the growing medium and either drains back to the reservoir (recirculating) or runs to waste (run-to-waste). Timer control lets you dial in exactly how much water each plant gets.
Pros:
- Highly scalable; add more drip lines without redesigning the system
- Precise control over nutrient delivery per plant
- Works well for large plants with high water demand
- Industry standard for commercial grows for a reason
Cons:
- Drip emitters clog, especially with organic nutrients
- More complex setup than most beginner systems
- Recirculating systems require diligent reservoir management to prevent salt buildup
- Run-to-waste creates more nutrient runoff to dispose of
Best for: Tomatoes, cucumbers, and larger fruiting crops at an intermediate to advanced level. If you’re growing more than a handful of plants and want consistent results, drip systems are hard to beat for long-cycle crops.
7. Aeroponics
How it works: Plant roots hang in the air inside a dark chamber. High-pressure mist nozzles spray nutrient solution directly onto the roots at timed intervals, sometimes as often as every 30 seconds. Roots get maximum oxygen because they’re never submerged or packed into a medium.
Pros:
- Fastest growth rates of any hydroponic system when dialed in
- Maximum root oxygenation possible
- Very water and nutrient efficient compared to systems with reservoirs
- Excellent for root crops and plant propagation/cloning
Cons:
- High-pressure systems are expensive and technically demanding
- Mist nozzles clog easily and require constant maintenance
- Any interruption to the misting cycle damages roots quickly
- Not beginner-friendly at all; this is a specialist tool
Best for: Experienced growers doing serious production or R&D work. Leafy greens, roots, and propagation labs. The claims about aeroponics being the future of food production are real, but so is the complexity. Unless you have a specific reason to go this route, it’s not where most home growers should start.
Tip: High-pressure aeroponics and “aeroponics” marketed in cheap home kits are completely different things. The low-cost “aeroponic” tower gardens you see online are essentially just drip systems with a fancy name. True high-pressure aeroponics starts in the $300–$500 range for a very basic setup.
Hydroponic Systems at a Glance
| System | Active or Passive | Difficulty | Start-Up Cost | Best Plants |
|---|---|---|---|---|
| Wick | Passive | Beginner | $10–$30 | Herbs, lettuce |
| DWC | Active | Beginner | $20–$60 | Lettuce, herbs, leafy greens |
| Kratky | Passive | Beginner | $15–$40 | Lettuce, herbs, spinach |
| NFT | Active | Intermediate | $80–$200 | Herbs, lettuce, strawberries |
| Ebb and Flow | Active | Intermediate | $100–$250 | Tomatoes, peppers, cucumbers |
| Drip | Active | Intermediate | $80–$200 | Tomatoes, cucumbers, cannabis |
| Aeroponics | Active | Advanced | $200–$500+ | Leafy greens, roots, R&D |
How to Choose Your Hydroponic System
You don’t need a 20-question quiz. Three questions will get you to the right answer almost every time.
1. How much space do you have?
A windowsill or small shelf means you’re in Kratky or DWC territory. Both are compact, cheap, and don’t require drainage or a floor reservoir. If you have a 4x4 ft area or larger, ebb and flow or drip systems open up, and you can grow fruiting plants worth eating in real quantities.
2. What’s your budget to start?
Under $50: Kratky or DWC, full stop. You can have lettuce growing in a week for the cost of a dinner out.
$50–$150: DWC with better equipment, a basic NFT setup, or a small ebb and flow system. This is where most serious hobby growers live.
Over $150: Drip systems, larger ebb and flow builds, or an entry-level NFT channel setup. At this range you’re building something you can scale.
3. How much time do you want to spend maintaining it?
Honest answer: Kratky and wick systems are set-and-forget for short-cycle crops. You can leave them alone for days. DWC and ebb and flow need weekly checks at minimum, and NFT and drip need you to stay on top of emitter and pump condition. Aeroponics is essentially a part-time job if you’re doing it right.
What I’d do: If you’re a beginner growing leafy greens and herbs, start with Kratky. You’ll learn pH and nutrients without any risk of pump failure ruining your crop. If you’re an intermediate grower who wants to grow tomatoes or peppers, move to ebb and flow. It handles the wet-dry cycle that heavy feeders love without the complexity of a full drip setup.
Ready to commit to a system? Choosing your first hydroponic setup walks through exactly what to buy and how to set it up for your first grow.