
Basement Hydroponics: The Complete Beginner's Setup Guide
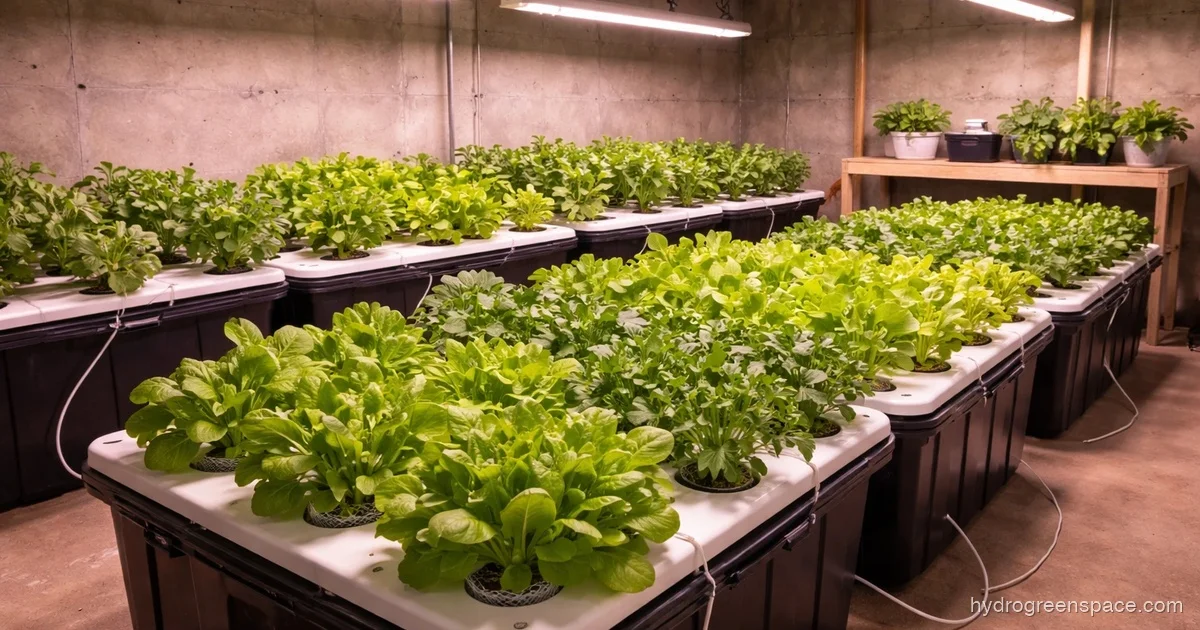
Your basement is doing nothing. It’s climate-controlled space sitting empty, and every month that passes is lettuce you’re not eating and herbs you’re buying at the grocery store.
Basement hydroponics is one of the smartest uses of underutilized space in a home. No weather. No seasons. No deer eating your basil at 2am. Just consistent, year-round growing under lights you control completely.
I’ve run DWC setups in basements for years, and the difference between growers who love it and growers who quit after two months almost always comes down to three things: humidity management, picking the right system to start with, and not spending a fortune on the first setup. Get those right and your basement becomes the most productive square footage in your house.
Is a Basement Good for Hydroponics?
Yes, genuinely. Basements are actually ideal for hydroponics in ways most people don’t realize until they’re a few grows in.
The case for basements:
- Temperature stability. Basements run cooler and more even than above-ground rooms. That stability is something growers in spare bedrooms spend money trying to achieve.
- Space. Most basements offer ceiling height and square footage that’s hard to match anywhere else in a home.
- Year-round growing. No frost, no heat waves, no seasonal gaps. Your harvest cycle doesn’t know what month it is.
- Isolation from outdoor pests. Aphids, fungus gnats, spider mites, whiteflies; none of these come from outside when you’re growing in a sealed basement environment.
The honest cons:
- Humidity. This is the real challenge. Basements often sit at 65–80% relative humidity naturally. Plants transpire and add more. You need to manage this actively.
- Temperature in cold climates. Unheated basements in northern winters can drop below 60°F, which creates root rot conditions and slows growth significantly.
- Electricity cost. Grow lights run for 14–18 hours a day. That adds up. We’ll look at the numbers directly later in this piece.
- Upfront investment. You’re building a complete environment from scratch. Lights, system, nutrients, environmental controls; it’s not a huge amount, but it’s more than filling a planter box.
None of the cons are dealbreakers. They’re just things to plan for rather than discover mid-grow. If you’re still weighing whether to go soil-free at all, the hydroponics vs soil breakdown covers the full comparison.
What You Need to Get Started
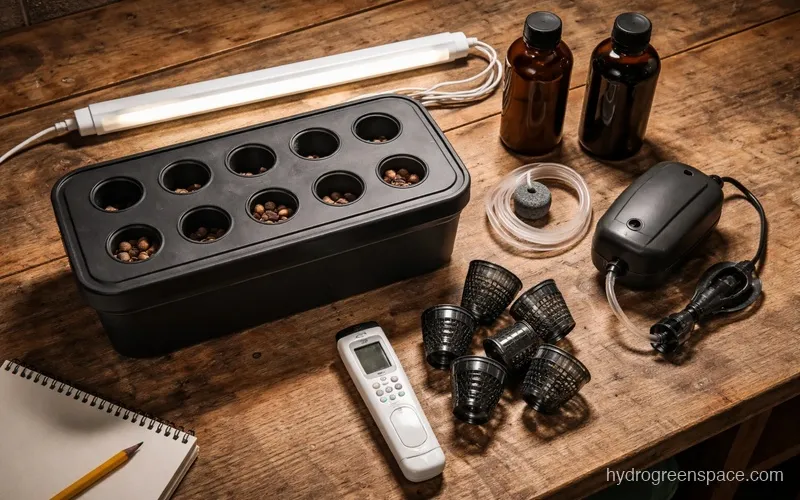
Before picking a system, get a clear picture of the full equipment list. This is everything a basement hydroponic garden needs to run properly.
Core growing equipment:
- Hydroponic growing system (reservoir, net pots, lid, or a premade kit)
- Full-spectrum LED grow lights sized to your grow area
- Hydroponic nutrients (a two-part or three-part formula like General Hydroponics Flora Series)
- pH meter and pH up/down solutions
- EC/TDS meter to check nutrient concentration
- Air pump and air stones (for DWC systems)
- Net pots and growing medium (hydroton, rockwool, or perlite)
Environmental controls:
- Dehumidifier (non-negotiable in most basements)
- Thermometer and hygrometer (combo units are inexpensive)
- Inline fan and ducting if you’re in an enclosed grow tent
- Space heater with thermostat if your basement runs cold
Timers and monitoring:
- Outlet timer for lights (keeps your photoperiod consistent without thinking about it)
- Optional: smart plug with energy monitoring to track electricity use
Tip: Buy a combo thermometer/hygrometer before you buy anything else. Run it in your basement for 48 hours. You need that baseline data before you design your setup around it. Basements vary enormously.
Best Hydroponic Systems for a Basement
This is where most beginners get paralyzed. DWC, NFT, Kratky, ebb and flow, aeroponics; the options multiply fast. If you want a full rundown of how each works, the guide to different types of hydroponic systems covers all of them. For a basement setup, three are worth your attention.
Deep Water Culture (DWC)
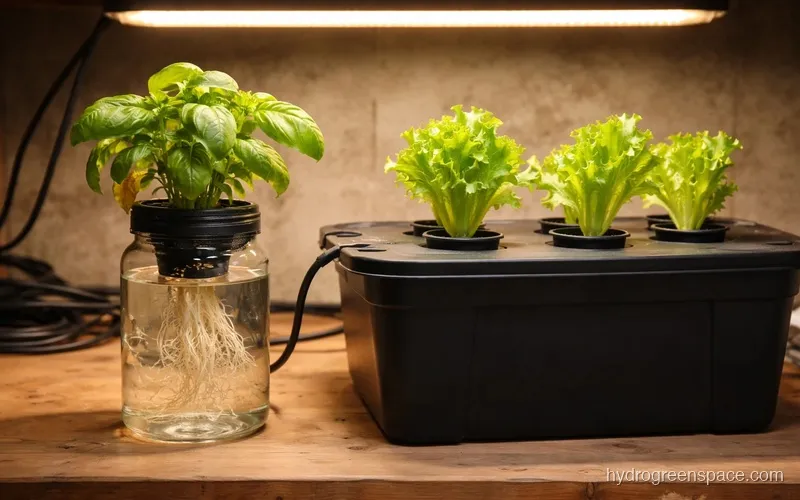
Plants sit in net pots over a reservoir of oxygenated nutrient solution. An air pump keeps oxygen levels high at the roots. It’s one of the fastest-growing methods available and scales well.
Best for: Growers who want faster growth and are ready to monitor water temperature, pH, and oxygen levels actively. DWC lettuce can be harvest-ready in 30–35 days.
Basement consideration: The reservoir needs to stay between 65–72°F. Cold basements can work against you here.
Kratky Method
A passive variation of DWC with no air pump. You fill the reservoir once, leave a small air gap above the solution, and the plant draws down nutrients as it grows. No electricity beyond the lights.
Best for: True beginners who want a working system with minimal moving parts. Herbs and lettuce thrive in Kratky. You can set it up in an afternoon with zero prior experience. See the full Kratky method guide for a step-by-step build.
Basement consideration: Kratky is forgiving. No pump means one less thing to fail.
Nutrient Film Technique (NFT)
A thin film of nutrient solution flows continuously through shallow channels past the plant roots. Very efficient with water and nutrients.
Best for: Growers who’ve run at least one other system and want higher throughput. NFT has a steeper setup curve and more points of failure than DWC or Kratky.
Skip it for your first basement grow.
The Recommendation
Start with Kratky for dead simplicity, or DWC if you want faster growth and are comfortable with a bit more monitoring. I’d lean toward DWC for most basement setups because the active oxygenation gives you more control over root health, and root health is the first thing to slip in improperly managed basement conditions.
The Three Basement Controls: Light, Temperature, Humidity
This is the most important section in this article. Everything else is equipment selection. This is what determines whether your plants grow or struggle.
Light
Your basement has no natural light worth relying on. You’re building a complete artificial light environment, which is actually an advantage: you control the photoperiod exactly.
What to use: Full-spectrum LED grow lights. Not blurple panels from 2015. Modern quantum board or bar-style LEDs (like HLG, Spider Farmer, or Mars Hydro) deliver the full spectrum plants need at a fraction of the electricity cost of HID lighting.
Coverage and intensity: As a baseline, plan for 30–40 watts of actual LED draw per square foot for leafy greens, and 40–50 watts per square foot for fruiting crops like tomatoes.
Photoperiod targets:
- Leafy greens and herbs: 14–16 hours of light per day
- Fruiting crops (tomatoes, peppers): 12 hours once flowering starts
- Seedlings and clones: 18 hours
Temperature
The target range for most hydroponic crops is 65–75°F air temperature and 65–72°F water/solution temperature. Both matter.
Below 60°F, root zone activity slows, nutrient uptake drops, and you’re creating ideal conditions for Pythium (root rot). Above 75°F in the reservoir, dissolved oxygen drops and pathogens thrive.
If your basement runs cold in winter, a space heater with a thermostat set to 68°F solves the air temperature side. For solution temperature, an aquarium heater in the reservoir keeps the root zone in range.
Humidity
Target range: 45–60% relative humidity. Most basements run well above this without intervention.
High humidity in a hydroponic basement creates two problems: mold on plant leaves (botrytis, powdery mildew) and condensation on walls and equipment that leads to structural moisture issues over time.
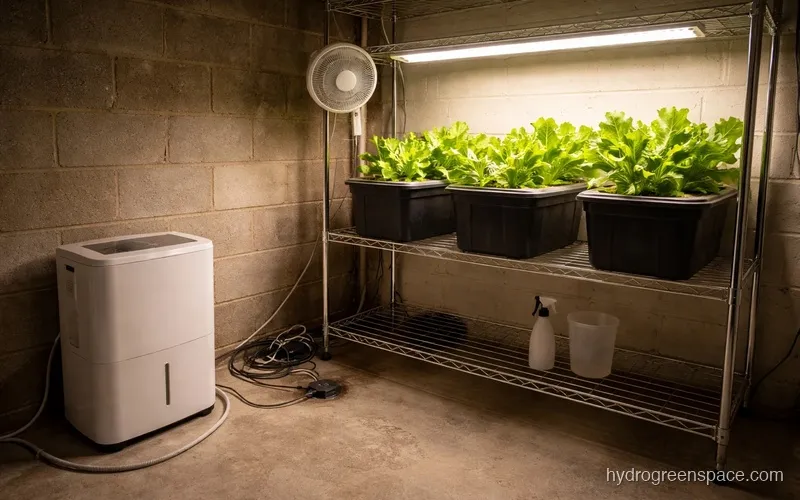
A quality dehumidifier is not optional. Size it for your space: a 30-pint unit handles a small setup in 200–400 sq ft, a 50-pint unit for larger spaces. Run it continuously and empty or drain it on a schedule.
Pair the dehumidifier with airflow. A small oscillating fan keeps air moving across the canopy, which reduces both humidity pockets and strengthens stems.
Warning: Don’t rely on opening a basement window to manage humidity. Outdoor air in humid summers or damp springs introduces more moisture than it removes. Controlled mechanical dehumidification is the right answer.
Best Crops for a Basement Hydroponic Garden
Start here. These crops are forgiving, fast, and will keep you motivated while you dial in your environment.
Lettuce is the baseline crop for basement hydroponics. It’s fast (30–45 days from transplant to harvest), doesn’t need high light intensity, tolerates a range of temperatures, and can be cut-and-come-again for continuous harvest. Any system works for lettuce.
Herbs are close behind. Basil, cilantro, mint, parsley, and chives all thrive in hydroponic setups. Basil loves warmth (keep it above 68°F), and mint will grow faster than you want it to. They respond well to Kratky and DWC both.
Spinach and kale work well with slightly cooler temperatures than lettuce, which makes them a good choice if your basement runs on the cooler end of the acceptable range.
Cherry tomatoes are possible in a basement, with caveats. They need high light intensity (at least 40–50W per sq ft actual LED draw), they get tall (plan for vertical space and training), and they need longer hours during vegetative growth. Don’t start with tomatoes. Grow a few successful lettuce cycles first, then scale into fruiting crops once you know your environment is dialed.
What I’d do: Run one 4-site DWC tote with lettuce for your first grow. Cheap to set up, fast to harvest, immediately useful, and it teaches you pH management, nutrient dosing, and water temperature monitoring in real conditions before you’re growing anything that takes months.
What Does It Actually Cost to Run?
This is the question growers don’t ask until after they’ve committed, which leads to unpleasant surprises. Here’s the honest breakdown.
Startup Costs (Small Basement Setup, ~4x4 ft)
| Item | Approximate Cost |
|---|---|
| LED grow light (quality 200W bar/quantum board) | $150–$300 |
| DWC system (4-site or 8-site tote) | $40–$100 |
| Nutrients (starter kit) | $40–$60 |
| pH meter + pH up/down | $25–$50 |
| TDS/EC meter | $15–$25 |
| Dehumidifier (30-pint) | $150–$200 |
| Thermometer/hygrometer | $10–$15 |
| Timer | $10–$15 |
| Fan | $20–$40 |
| Miscellaneous (tubing, air pump, net pots) | $30–$50 |
| Total | $490–$855 |
A more minimal Kratky setup can come in under $300 if you’re building it yourself and skipping the grow tent.
Running Costs (Monthly)
Electricity is the primary ongoing cost. The old fear about hydroponics electricity cost usually comes from HID lighting. A 1,000W HPS running 18 hours a day at $0.15/kWh costs around $81/month. That’s real.
A modern 200W LED running the same schedule costs about $16/month. The technology shift matters enormously here.
Nutrients for a small setup run $10–$20/month depending on how often you’re replacing solution and how many sites you’re running.
Total monthly operating cost for a small LED-based basement setup: roughly $30–$50/month including electricity, nutrients, and replacement supplies.
Common Mistakes (and How to Skip Them)
Skipping the dehumidifier. Almost every new basement grower does this. They tell themselves they’ll add it if humidity becomes a problem. Humidity is already a problem before you add a transpiring plant canopy to the room. Buy the dehumidifier first.
Starting too big. A 4x8 tent with 16 sites sounds exciting until you’re diagnosing pH swings across 8 gallons of solution, troubleshooting a pump failure, and trying to keep up with a full canopy all at once. Start small. Scale after your first successful harvest.
Ignoring water temperature. Air temperature gets watched. Water temperature gets ignored. Buy a cheap aquarium thermometer and check your reservoir temperature in the first week. Cold basements will surprise you here.
Not checking pH consistently. Nutrient lockout from pH drift is the most common reason plants stall in hydroponic systems. Most nutrients want a range of 5.5–6.5 for hydro. Check it every other day when you’re starting out. The full guide on how to adjust pH in hydroponics covers the process in detail.
Buying cheap pH meters. The $8 pen from Amazon will lie to you within two weeks. Spend $25–$40 on a decent meter and calibrate it monthly. Your entire nutrient program depends on accurate readings.
Over-ventilating with outdoor air. In humid climates, pulling in outside air makes your humidity problem worse half the year. Recirculate and dehumidify rather than exhausting to the outside, unless you’re in an arid climate.
Your basement can produce fresh food every month of the year. The path there is shorter than most people think: one simple system, the right lights, a dehumidifier that actually runs, and a commitment to checking your numbers for the first few weeks until everything stabilizes.
Pick your system, get your environmental baseline, and start with lettuce. For a complete overview of every indoor growing environment and how basements compare, the indoor hydroponic growing guide covers them all in one place. Once you’ve harvested your first tote, you’ll know exactly what to expand next.