
Closet Hydroponics: How to Set Up a Small Grow Space
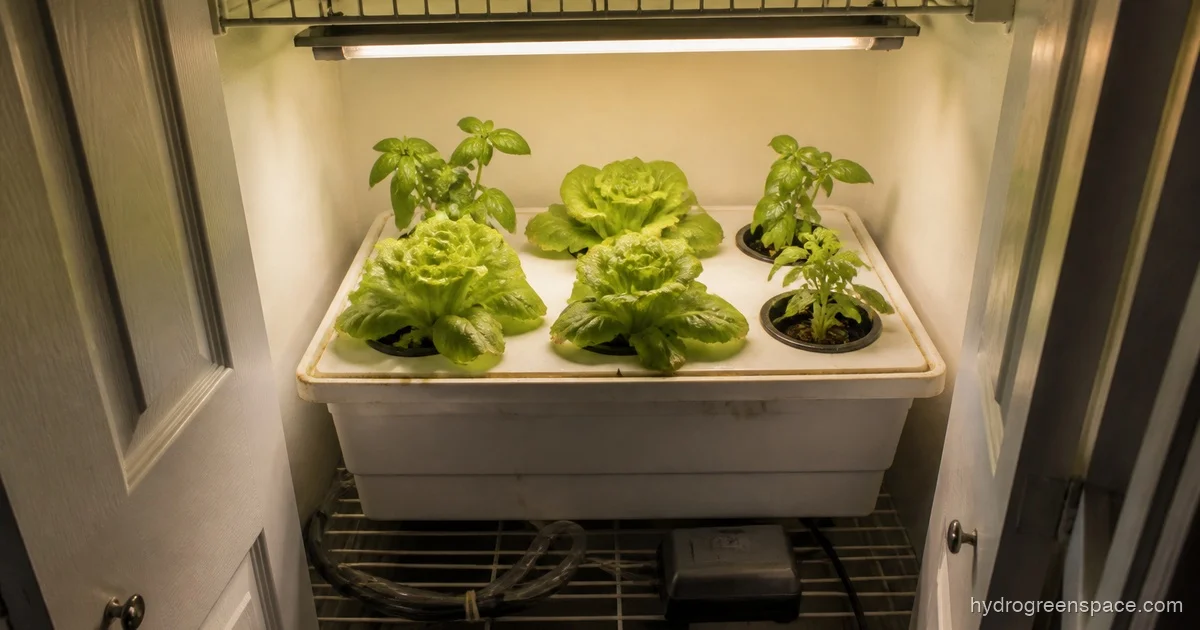
A spare closet sitting empty is one of the most underused growing spaces in any home. With the right lighting and a simple hydroponic system, a standard reach-in closet can produce fresh herbs and lettuce year-round, no soil, no outdoor access, no seasonal waiting.
This setup is built around food: herbs, lettuce, spinach, and small peppers. Real crops for real kitchens. Here’s exactly how to set one up, from choosing the system to keeping the air clean.
What Size Closet You Actually Need
The minimum workable closet for hydroponics is about 2 feet deep by 3 feet wide. That gives you room for a small grow tent or bare walls lined with reflective material, plus a reservoir underneath and lights overhead. A standard reach-in closet (typically 2x4 feet) is ideal for a beginner setup running 4-6 plants.
Bigger is better for airflow and equipment access, but bigger also means more light, more heat, and more cost. A 4x4 closet is genuinely comfortable to work in and can run 12-16 lettuce heads at once. For most home growers starting out, the 2x2 or 2x4 footprint is where it makes sense to begin.
If you’re thinking about a small apartment setup, the principles here apply just as well, check out hydroponics in a small apartment for how to adapt a constrained space.
Do You Need a Grow Tent Inside the Closet?
This is the top question people have, and the honest answer is: no, but it helps.
A grow tent gives you a pre-built reflective interior (keeps light where it belongs), easier ducting ports for ventilation, and a contained space that’s easier to keep clean. If your closet is an awkward shape, has carpet flooring, or has light leaks around the door, a tent inside the closet solves all of those problems at once.
If your closet has solid walls, a hard floor you can wipe down, and a door that seals reasonably well, you can skip the tent and line the walls with mylar reflective film or white poly sheeting instead. That saves $60-$120 on a small tent.
What I’d do: For a first closet grow, skip the tent, line two walls with white foam board (cheap, reflective, cleanable), and spend that money on a better light. You can always add a tent later if airflow or light containment becomes an issue.
For a deeper look at tent options when you’re ready to upgrade, how to set up a grow tent for hydroponics covers that whole decision.
Choosing the Right Hydroponic System for a Closet
The best systems for small closet setups are passive or low-maintenance active ones. You want something that fits the footprint, doesn’t generate excessive heat or noise, and doesn’t punish you if you skip a day of monitoring.
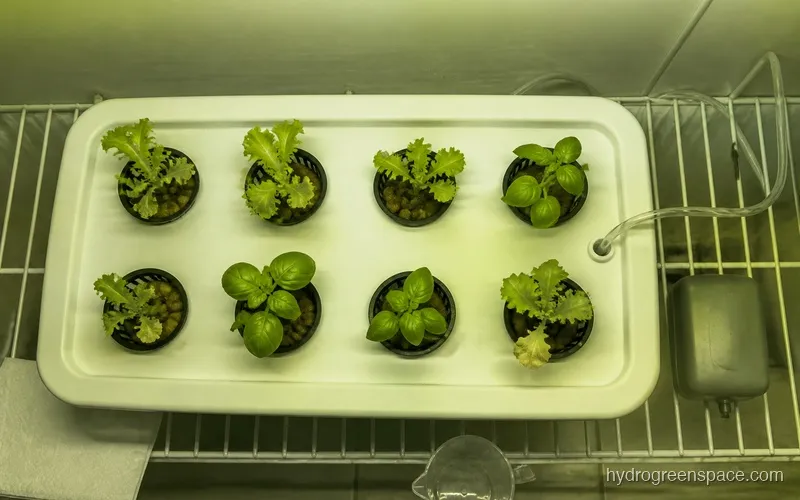
Kratky Method is the beginner favorite for good reason. It’s completely passive, no pump, no timers, no electricity beyond the light. You fill net pot containers with nutrient solution, plants sit in them, roots dangle, and the air gap that forms as the solution drops provides oxygen. It’s ideal for herbs and lettuce. The tradeoff is that you need to top up the reservoir every week or two and it doesn’t scale as cleanly for large plants. Learn more about the Kratky method if you want to start with zero infrastructure.
Deep Water Culture (DWC) is the step up, a reservoir with an air pump and air stone keeps roots oxygenated continuously, which means faster growth than Kratky and more consistent results across a wider range of crops. A single 5-gallon bucket can grow one large plant (basil, small pepper, or cherry tomato), or you can use a multi-site system for 6-8 lettuce plants. See how DWC works as a closet-friendly system for the full setup breakdown.
What to avoid in a closet: Nutrient Film Technique (NFT) requires a slope and return channel that eats horizontal footprint. Ebb and flow systems have more parts to fail. For a small enclosed space, simplicity wins.
Lighting for a Closet Grow
Light is where most beginners underspend and then wonder why their plants are stretching or yellowing. For a closet, you want LED grow lights, they run cool, draw less power than HID alternatives, and there are solid options at every price point.
For a 2x2 footprint, look for panels in the 100-200W true draw range (not “equivalent” wattage, check the actual draw from the wall). For 2x4, you need 200-300W. Blurple LEDs work, but a full-spectrum white LED in the same price range will produce better yields and is easier to see plant health under.
Mounting height matters. Most LED panels want to be 18-24 inches above the canopy for herbs and lettuce. In a closet with 8-foot ceilings, that’s plenty of room. In a closet with 7-foot ceilings, it gets tighter if you want to grow anything that gets tall.
Keep your light on an 18/6 cycle (18 hours on, 6 off) for herbs and leafy greens. Fruiting crops like peppers need 12-16 hours depending on the variety.
Ventilation and Heat Management
A sealed closet with a grow light will heat up. Even a 100W LED produces real heat in an enclosed space. Without airflow, you’ll see temperatures spike to 85°F or higher, which stunts growth and can trigger root issues.
The minimum setup: one small USB or 6-inch clip fan aimed at the canopy for air movement, plus a way to exchange air with the room. That can be as simple as leaving the closet door cracked a few inches or cutting a passive vent into the wall.
For a proper setup, a 4-inch inline fan exhausting air up through the closet door gap or into the ceiling space, paired with a carbon filter, handles both heat and odor. The fan should run continuously or at least during the light-on hours.
Carbon filter is worth addressing directly: if you’re growing herbs (basil, cilantro, mint), they produce a noticeable smell. It’s pleasant, but it’s strong. A small carbon filter rated for 150-200 CFM on a 4-inch duct loop will scrub most of it. If you’re growing lettuce and spinach, the smell is minimal and you might be fine without one.
Warning: Humidity in a sealed closet can build up fast, especially during lights-off when temperatures drop. High humidity above 70% opens the door to mold and root rot. A small hygrometer (less than $10) should be on your equipment list from day one. If humidity runs high, either increase air exchange or add a small USB dehumidifier.
Avoiding root rot in small enclosed systems starts with getting this air exchange right before you even plant.
What Crops Actually Work in a Closet
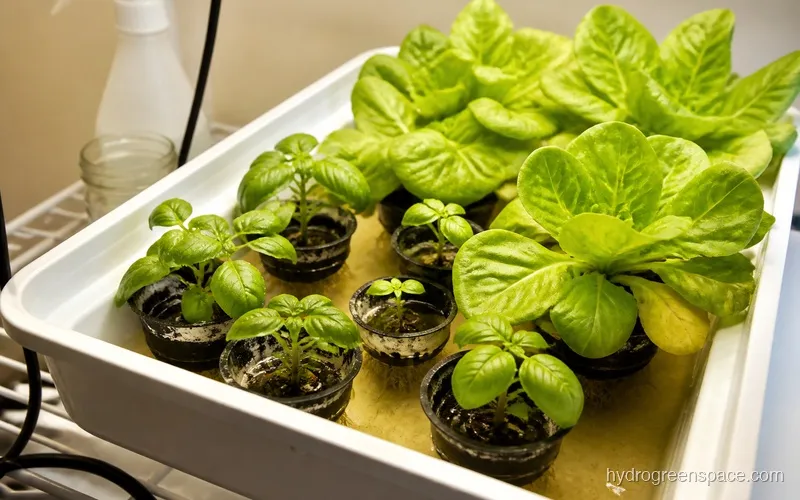
Stick to fast, leafy crops for your first run. They’re forgiving, harvest in 4-6 weeks from transplant, and give you quick feedback on whether your setup is dialed in.
Best choices for beginners:
- Butterhead or romaine lettuce (fast, low light tolerance, almost impossible to kill in Kratky)
- Basil (needs a bit more light, but grows aggressively and smells great)
- Spinach and arugula (prefer slightly cooler temps, great in a closet that stays around 65-70°F)
- Cilantro (bolt-prone, harvest early and often)
What to avoid for your first run:
- Tomatoes (need a lot more light, more nutrients, and taller vertical space)
- Cucumbers (vining, need trellising, want 12+ hours of bright light)
- Large peppers (fine to grow, but slow, 3-4 months to harvest means your closet is tied up longer)
For crop selection, the best seeds to start with in a closet setup breaks down varieties by system type.
Budget Breakdown for a Starter Closet Grow
Here’s what a beginner setup actually costs using a Kratky system in a 2x2 closet:
| Item | Approximate Cost |
|---|---|
| Net pot lids + 5-gallon bucket or tote | $10-$15 |
| Full-spectrum LED grow light (100W draw) | $35-$60 |
| Nutrient solution starter kit | $15-$25 |
| pH test kit or pen | $10-$20 |
| Mylar reflective film or white foam board | $10-$15 |
| Small clip fan | $10-$15 |
| Hygrometer | $8-$12 |
| Seeds | $5-$10 |
| Total | $103-$172 |
That’s the honest number for a working setup that will produce real food. You can trim it under $100 by buying a used light, skipping the foam board, and using litmus pH strips instead of a pen. See how much it costs to start hydroponics for a full breakdown across different system types.
Common Mistakes to Avoid in a Closet Setup
Overcrowding. A 2x2 space has room for 4 large heads of lettuce or 6-8 small herb plants. Packing in more doesn’t produce more food, it restricts airflow, increases disease pressure, and drops your yield per plant.
Ignoring pH. Tap water is usually 7.0-8.0 pH. Hydroponics needs 5.5-6.5 for nutrient uptake. Without adjusting, plants will show deficiencies even with a full nutrient solution, and you’ll spend weeks troubleshooting a $2 problem. A basic pH pen pays for itself on the first grow.
Letting algae get a foothold. Light leaking into your reservoir breeds algae fast. Black buckets, opaque tubing, and keeping reservoir lids sealed are the fix. If you’re using a clear tote, cover it with black tape or paint. Preventing algae in a sealed grow space goes deeper on this.
For the full list of first-timer errors, common mistakes beginner growers make is worth reading before you fill your first reservoir.
If you want to compare how closet setups stack up against every indoor option at once, the indoor hydroponic growing guide covers them all in one place. Setting up hydroponics in a basement and growing hydroponics in a bedroom go deeper on those specific tradeoffs: the closet wins on light containment and stealth, but basements win on temperature stability.
Once your first crop comes in, the natural next decision is lighting, whether to upgrade your panel or add a second system. That’s when LED grow lights for hydroponics becomes the most useful read in the toolbox.