
Foam Board for Hydroponics: EPS vs XPS Explained
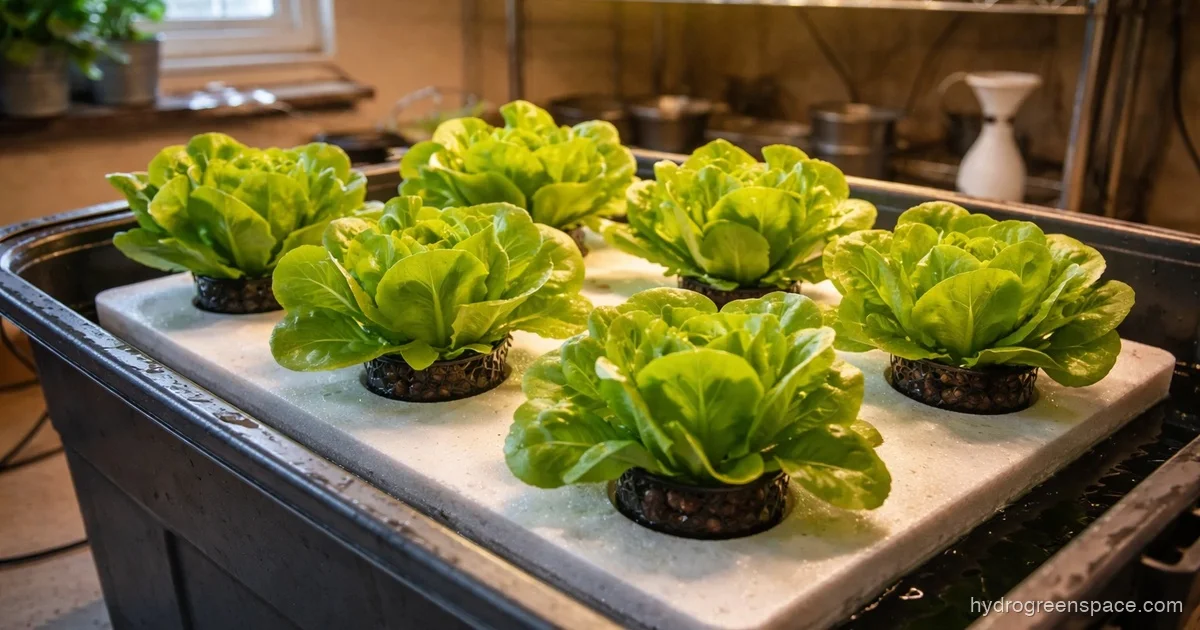
Picking up a sheet of foam board at the hardware store seems simple until you realize there are three different types on the shelf, none of them labeled “safe for food.” That confusion is real, and it stops a lot of beginners from ever building their first floating raft system. Here is what you actually need to know before you buy.
Foam board works in hydroponics because it floats, insulates the root zone from temperature swings, and does not absorb water the way wood or cardboard would. It holds net cups in place while roots dangle freely into oxygenated nutrient solution below. That is the entire mechanism of a deep water culture raft, and foam makes it possible at almost no cost.
EPS, XPS, and EPP: Which Foam Board to Buy
Not all foam is the same, and the type you choose matters for how long your system lasts and how safe it is for edible crops.
EPS (Expanded Polystyrene)
This is the white beaded foam you see in cheap coolers and packaging. It is inexpensive and widely available at home improvement stores as rigid insulation boards, usually in 4x8-foot sheets. EPS is the go-to for beginner builds because it is easy to cut, floats reliably, and costs almost nothing. The downside is that it is more brittle than the alternatives, and the beaded surface can trap biofilm between grows if you are not thorough with cleaning. For a first build or a single-season grow, EPS is the right call.
XPS (Extruded Polystyrene)
XPS is the pink or blue rigid foam board you see used as house insulation. It has a denser, smoother cell structure than EPS, which makes it stronger, more moisture-resistant, and much easier to clean between cycles. If you are building a system you want to reuse for multiple seasons, especially outdoors where UV and moisture are factors, XPS is worth the slightly higher price. Common brands include Owens Corning Foamular (pink) and Dow Styrofoam (blue).
EPP (Expanded Polypropylene)
EPP is the least common of the three in DIY builds but shows up in commercial raft systems. It is lighter, more flexible, and holds up better to repeated use than either EPS or XPS. You are unlikely to find it at a big box store, so unless you are sourcing it from a hydroponic supplier, ignore it for now. EPS or XPS will serve you well.
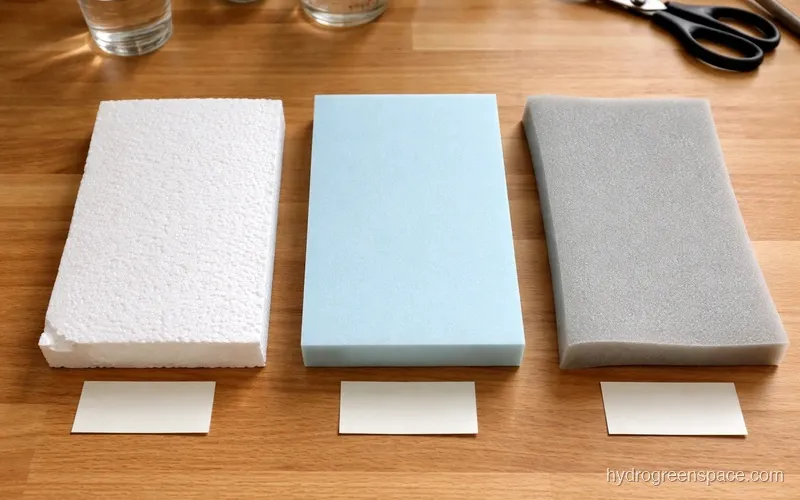
What I’d do: For a first floating raft build, buy a 1.5-inch XPS sheet (pink or blue board). It costs about $10-15 more than EPS but cleans up between grows without falling apart, which means you get multiple seasons from one sheet.
How Thick Should a Foam Board Be?
Thickness determines whether your board can support the weight of mature plants without bowing into the nutrient solution.
For small leafy greens and herbs, a 1-inch board is workable but borderline. A full head of lettuce can weigh 12 ounces or more, and once you multiply that across 10 or 12 net cups on a large raft, you can get enough flex in the center that net cups tilt and plants lean out. This is annoying at best and a crop loss at worst.
A 1.5-inch board is the practical minimum for most builds. It provides enough structural rigidity to span a standard 18-gallon tote or larger reservoir without bowing, and it gives you enough material depth to countersink net cups so they sit flush rather than wobbling.
For a large outdoor raft over a stock tank or IBC tote (a setup covered in the hydroponic tote guide), go with 2-inch board or double up two 1-inch sheets glued together with silicone.
Is Styrofoam Actually Safe to Use With Food Crops?
Standard EPS and XPS foam boards (polystyrene) are considered food-safe for indirect contact at ambient temperatures. They do not off-gas toxic compounds into nutrient solution under normal growing conditions. The foam types you need to avoid are PIR (polyisocyanurate) and ISO foam, which are often used as spray foam insulation or in some rigid board products. These contain isocyanates and flame retardants that can leach into solution.
The practical test at the hardware store: look at the label. EPS and XPS boards sold as rigid insulation are polystyrene-based. If the label says “polyisocyanurate” or “ISO board,” put it back. When in doubt, ask the staff for the product data sheet.
One real concern with any foam in a hydroponic system is not off-gassing at room temperature, but rather degradation from UV light over time. If your raft is outdoors and exposed to direct sun, the foam surface will yellow and become brittle within one to two seasons. Paint the top surface with latex paint (not oil-based, which can leach solvents) or cover it with reflective foil tape to slow UV degradation and keep the root zone dark.
Cutting Holes for Net Cups
Getting clean holes in foam board without cracking or crushing the edges takes the right approach.
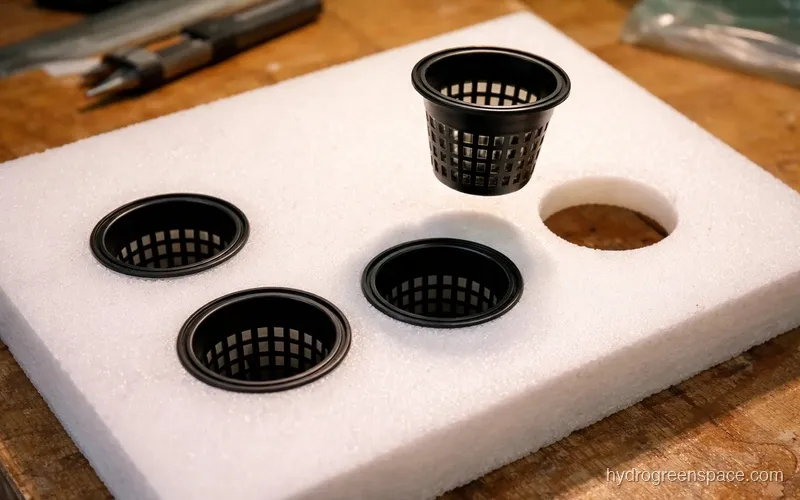
The right tool is a hole saw attached to a drill or a dedicated foam cutting drill bit. The trick is to run the drill in reverse when cutting foam. A standard hole saw spinning forward creates friction heat that melts and fuses the foam edge into a rough, uneven collar. Running it backward cuts instead of melts, and you get a cleaner hole with a flat edge that the net cup lip can sit against properly.
Size the hole based on your net cup diameter, not the net cup lip. If you are using 2-inch net cups (the most common size for lettuce and herbs), cut a 1.75-inch hole so the lip of the cup rests on the foam surface and the body drops through. A hole that is too wide lets the cup fall through and tip; too narrow and you will crack the foam forcing it in. For a deeper look at sizing and materials, the guide to choosing the right net cups for hydroponics covers the full range of options.
For spacing, here is a simple guide by plant type:
| Plant | Net Cup Size | Spacing |
|---|---|---|
| Lettuce, spinach | 2 inch | 6-8 inches |
| Basil, cilantro | 2 inch | 6-8 inches |
| Kale, chard | 3 inch | 10-12 inches |
| Larger herbs (dill, parsley) | 3 inch | 8-10 inches |
| Strawberries | 3 inch | 10-12 inches |
Common mistake: Cutting holes in a grid pattern that maximizes plant count on the raft. Packing plants too tightly causes shading, poor airflow, and increases the chance of fungus gnats and mildew on the foliage. Give leafy greens room to spread.
What Plants Work Best on a Foam Board Raft?
Foam board floating rafts are genuinely excellent for fast-growing, shallow-rooted plants. They are not the right fit for fruiting crops or anything with a heavy canopy.
Lettuce is the classic for good reason. A head of romaine or butterhead goes from seedling to harvest in 30-45 days in a well-oxygenated DWC setup, and you can run two or three cycles per season on the same board. Spinach, arugula, and kale all perform similarly well. Herbs including basil, cilantro, mint, and parsley thrive in a raft system, though mint will take over if you give it too much space.
If you are looking to expand beyond a single-tote setup, the same foam board principles scale directly into a full raft hydroponic system with multiple channels or tanks running in series.
For crops like tomatoes, peppers, or cucumbers, skip the foam board raft and look at DIY DWC setups where plants have individual larger reservoirs and more stable root zones.
Cleaning and Reusing Foam Boards Between Grows
This is a real advantage of XPS over EPS. The smooth surface of XPS wipes down without leaving root material embedded in the pores. After a grow cycle:
- Remove all net cups and shake off loose root material over a compost bin.
- Soak the board in a diluted hydrogen peroxide solution (3% hydrogen peroxide from the pharmacy works fine, mixed 1:1 with water) for 20-30 minutes. This kills algae, mold spores, and pathogens without leaving chemical residue.
- Rinse thoroughly and allow to air dry completely before storing or replanting.
EPS boards can be cleaned the same way but are more prone to surface pitting after two or three cycles, which makes biofilm harder to remove over time. If you notice the foam surface is flaking or the holes are cracking at the edges, retire the board and cut a new one. At $5-10 for a sheet, replacing EPS annually is cheaper than losing a crop to root rot from a contaminated board.
Starting Your First Raft Build
The full supply list for a foam board raft is short: one sheet of XPS foam board, a hole saw the right size for your net cups, a tote or reservoir, a growing medium for the net cups (clay pebbles or rockwool, covered in the growing media guide), nutrients, and an air pump and air stones to oxygenate the solution. If you are comparing options for the reservoir, the 5-gallon bucket hydroponic system is a good starting point for a smaller-scale build before committing to a full tote.
For air delivery, your system needs enough dissolved oxygen at the root zone to keep plants healthy. A good air pump for hydroponics sized to your reservoir volume, paired with quality air stones, makes a bigger difference than most beginners expect.
The foam board itself is not the hard part. Cut it, drill it, float it, and grow something. Your first head of lettuce from a setup you built for under $30 is a convincing argument for doing it again at a larger scale. A floating raft is one of the most beginner-friendly options in the DIY hydroponic systems lineup, and the same skills transfer directly to larger setups.