
DIY DWC Hydroponic System: Build One for Under $40
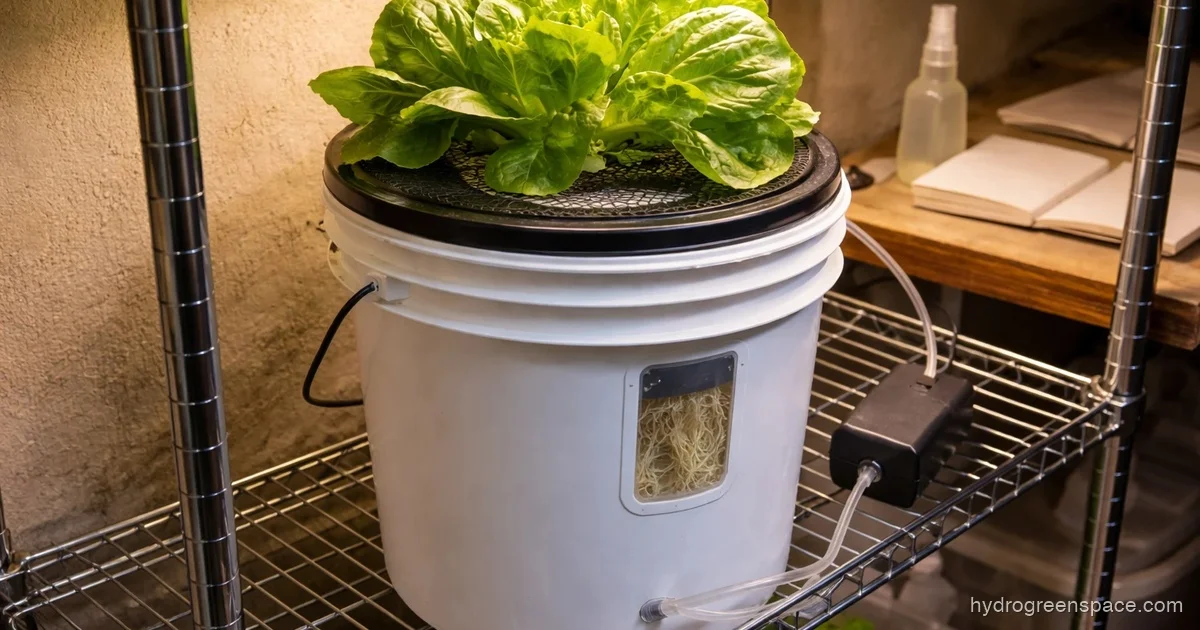
A single 5-gallon bucket, an air pump, and about $40 in parts from the hardware store. That is genuinely all it takes to build a DWC hydroponic system that can grow a head of lettuce in three weeks or a tomato plant that outpaces anything you have grown in soil. Deep water culture is the simplest, most forgiving active hydroponic method for a first-time grower, and building one yourself takes less than an afternoon.
This guide walks you through every step of the build: why each component matters, what goes wrong if you skip corners, and how to avoid the three failure points that kill most beginner DWC grows before they start.
If you are still deciding whether DWC is the right fit for you, choosing your first hydroponic system breaks down how it compares to other methods. And if budget is the deciding factor, know that a functional single-bucket DWC system lands between $30 and $70 depending on what you already have at home.
What You Need Before You Start: The Parts List
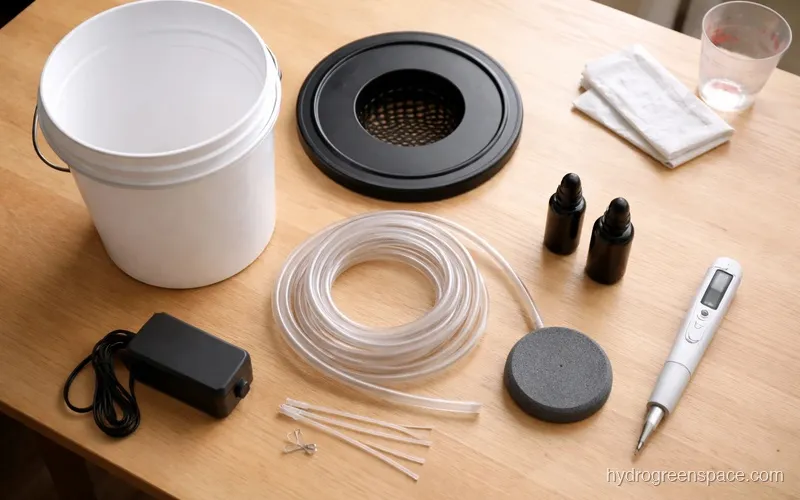
Get these parts together before you do anything else. Most are available at any hardware store or online.
Core components:
- 5-gallon bucket with lid (opaque, dark color; more on this below)
- 2-inch or 3-inch net pot (to fit the hole in the lid)
- Air pump (rated for at least 1–2 watts per gallon)
- Air stone (the cylindrical or disk type, not a novelty shape)
- Airline tubing (clear plastic, 4–6 feet)
- Check valve (prevents backflow into the pump if power cuts)
- Hydroponic nutrients (a two- or three-part liquid formula)
- pH test kit or digital pH pen
- pH Up and pH Down solutions
- Growing media: clay pebbles or growing media like hydroton work best in net pots
Optional but useful:
- Aquarium thermometer (clip-on or floating)
- Hole saw or step drill bit sized to your net pot diameter
- Water-resistant Mylar tape or black electrical tape
Total cost for a first build: $35–$65 if you buy a basic air pump and liquid nutrients. You can find full lists on a hydroponic equipment checklist if you want to compare component options before purchasing.
How a DWC System Actually Works
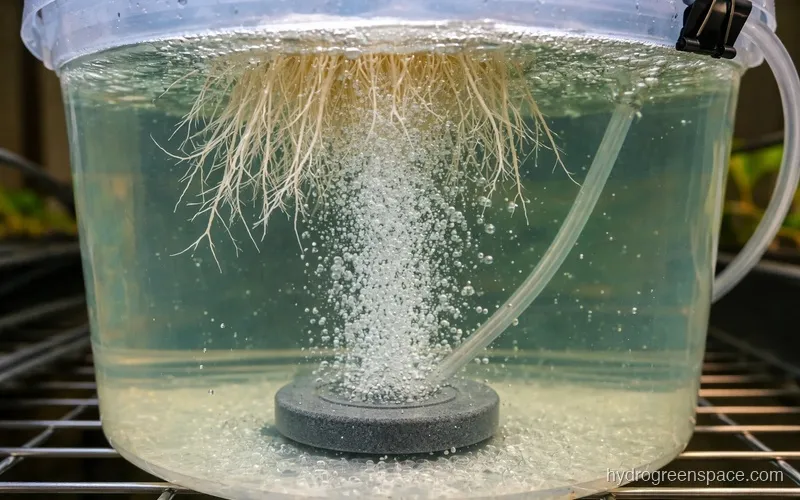
Before you drill anything, understand the basic idea. Your plant sits in a net pot suspended above a reservoir of nutrient-enriched water. The roots hang down through the net pot and dangle directly in that solution (or just above it, depending on the growth stage). An air stone connected to an air pump keeps that water oxygenated 24 hours a day. Without dissolved oxygen, the roots suffocate and rot within days.
That’s the whole system. No timers, no pumps cycling on and off, no spray nozzles to clog. Just roots, water, oxygen, and nutrients.
For a detailed breakdown of how this compares to other methods, different types of hydroponic systems covers the full landscape. If you are curious about the passive version of this style of growing, the Kratky method uses no air pump at all, worth knowing, though DWC gives you more control.
Building Your DIY DWC System: Step by Step
Step 1: Choose the Right Bucket
This sounds obvious, but the bucket choice matters. Your reservoir needs to be completely opaque. No light should pass through the sides or the lid.
Why? Light + water + nutrients = algae. Algae grows fast, competes with your plants for nutrients, and clogs the root zone. A transparent or semi-clear bucket is one of the most common beginner mistakes, and it is an entirely avoidable one.
Standard black buckets from a hardware store or garden center are ideal. If you already have a white or clear bucket, wrap it in black plastic sheeting or paint it. The lid matters too, so seal any gaps around the net pot hole with black electrical tape once the plant is in.
Warning: Do not use a bucket that previously held chemicals, paint, or cleaning products. Even thoroughly rinsed containers can leach residue into your nutrient solution. Food-grade buckets are best.
Step 2: Cut the Net Pot Hole in the Lid
Use a hole saw or step drill bit to cut a hole in the center of the lid. Match the bit to your net pot diameter (usually 2 inches or 3 inches). The net pot should drop in snugly without falling through. If it wobbles, add a bead of waterproof silicone around the rim to stabilize it.
Smooth any rough edges with sandpaper so the pot does not catch.
Step 3: Drill the Airline Hole
Drill a small hole near the rim of the lid, or near the top edge of the bucket wall, just large enough to pass the airline tubing through. You want a snug fit to minimize light entry. Thread the tubing through and seal around it with waterproof tape or silicone.
Step 4: Attach the Air Stone and Run the Tubing
Connect one end of the airline tubing to your air pump, run it through the hole in the lid, and attach the other end to the air stone. Drop the air stone to the bottom of the bucket. The air stone should sit flat on the floor of the reservoir, which maximizes bubble distribution throughout the water column.
Insert the check valve into the tubing between the pump and the bucket, with the arrow pointing toward the bucket. This prevents water from siphoning back into the pump if the power goes out. Skipping this step can burn out your pump.
Step 5: Mix and Fill the Nutrient Solution
Fill the bucket with water first, then add nutrients according to the package directions. Mixing nutrients directly into an empty bucket can cause precipitation (clumping) before the solution is diluted.
For a beginner, a simple two-part nutrient formula is the easiest starting point. Use your hydroponic nutrient calculator to get the right ratios for your plant type and growth stage. Different plants have different needs: lettuce wants a lower EC (electrical conductivity) than tomatoes.
Fill the bucket so the water level sits about an inch below the bottom of the net pot when the lid is on. During germination and early seedling stage, you can bring the water level up to just touch the bottom of the net pot. As roots develop and hang into the solution, lower the water level slightly to leave an air gap at the top of the reservoir.
Step 6: Adjust pH Before Adding Plants
This is the step most beginners underestimate, and it causes more crop failures in DWC than anything else.
Target pH: 5.5 to 6.2. DWC runs best around 5.8. Outside this range, your plant cannot absorb certain nutrients even if they are present in the water. You will see yellowing, stunted growth, or tip burn (symptoms that look like nutrient deficiency but are actually a pH lockout problem).
Use pH Down (phosphoric acid solution) to lower pH, pH Up (potassium hydroxide) to raise it. Add drops slowly, mix well, and retest. Tap water often comes in at 7.0–7.5 and needs to be brought down.
Check pH every two to three days. It will drift as plants feed and as water evaporates. A pH adjustment calculator can help you figure out how many drops to add based on your reservoir volume.
Step 7: Prepare the Net Pot and Growing Media
Rinse your clay pebbles thoroughly before use. They come coated in dust from manufacturing and that residue will cloud your reservoir. Soak them in water for a few hours, drain, then rinse again.
Place a small amount of rinsed clay pebbles in the bottom of the net pot. Set your seedling or rockwool cube in the center, then fill the sides with more clay pebbles to hold it upright. Do not pack too tight, as you want water and air to move through freely.
If you are starting from seed rather than a seedling, germinate in a small rockwool cube or rapid rooter plug before transferring to the net pot.
Step 8: Place the Net Pot and Start the Air Pump
Drop the net pot into the lid, set the lid on the bucket, and plug in the air pump.
Run the air pump 24 hours a day, every day. Not on a timer. Not just during “lights on.” Continuously.
This is one of the most common beginner errors: treating the air pump like a grow light and putting it on a 12- or 18-hour cycle. The moment oxygenation stops, the root zone becomes anaerobic. Roots begin to die within hours in warm conditions. If your air pump is loud, move it further from your sleeping area or add rubber feet to dampen vibration, but do not put it on a timer.
Step 9: Check and Top Off Water Levels
As your plant grows and the water evaporates, the reservoir level will drop. Top it off with plain, pH-adjusted water (not fresh nutrient solution) between full reservoir changes.
Why plain water? Because as plants absorb water faster than nutrients, the nutrient concentration in the reservoir actually increases over time. Adding more nutrient solution on top of that raises EC too high and can stress the plant. Add plain water, recheck EC and pH, and only add a small amount of nutrients if EC has genuinely dropped.
Step 10: Manage Water Temperature
Water temperature has a direct impact on dissolved oxygen and disease pressure. Warm water holds less dissolved oxygen than cold water, and at the same time, pathogens like Pythium (root rot) thrive above 72°F (22°C).
Target reservoir temperature: 65–68°F (18–20°C). In warm climates or during summer, this is harder to achieve than it sounds.
If your water runs warm, options include: placing the bucket in a cool room, wrapping it in foam insulation, using a small aquarium chiller (expensive but effective), or adding frozen water bottles to the reservoir temporarily.
Watch your root color as an early indicator. Healthy DWC roots are white or cream-colored. Tan or brown roots with a slimy texture are a sign of root rot, usually caused by warm temperatures or inadequate oxygenation.
Step 11: Full Reservoir Change Schedule
Every 7 to 14 days, do a full reservoir swap. Drain the bucket completely, rinse it out, mix fresh nutrient solution, adjust pH, and refill.
This resets nutrient ratios, removes any salt buildup from mineral accumulation, and prevents bacterial populations from establishing. Some growers stretch to 3 weeks between changes with healthy plants and stable conditions, but every 2 weeks is a reliable schedule for beginners.
When you drain, take a look at the root mass. Roots should be white, full, and spreading well. Thin or sparse roots in week 3+ usually indicate a pH or temperature problem worth investigating.
Step 12: Monitor, Adjust, and Learn
Check your plants daily during the first couple of weeks. In DWC, plants grow fast once the root system is established, sometimes visibly different from one day to the next. This also means problems escalate quickly.
Keep a simple grow journal: date, pH reading, EC reading, water temp, and any visual observations. When something goes wrong (and something will, the first time), that log is what helps you diagnose it fast. See common beginner mistakes in hydroponics for a reference on what to look for during those early weeks.
For a deeper understanding of how to dial in your feed schedule as the plant matures, feeding your hydroponic plants covers nutrient timing and ratios across growth stages.
Scaling Up: From One Bucket to Many
Once you have run one successful grow cycle on a single-bucket system, the natural next step is a recirculating deep water culture setup (RDWC). Instead of isolated buckets, RDWC connects multiple buckets through a shared reservoir with a central pump circulating solution through all of them. The advantage is consistency: pH and EC equalize across all sites automatically instead of drifting independently in each bucket.
For now, your single bucket will teach you more than any multi-site system could at the start. Get comfortable with pH management, root health, and reservoir timing before adding complexity.
The 5-gallon bucket hydroponic setup guide goes deeper on bucket-specific setup details if you want a companion reference. And once you are ready to think about equipment upgrades for a multi-bucket build, the rdwc-system-equipment-list covers what changes when you scale.
Get your first plant to harvest. That first crop, grown in a bucket you built yourself, with water you mixed and pH you adjusted yourself, hits differently than anything you have pulled out of soil. Once that first harvest clicks, the DIY hydroponic systems guide shows every direction you can scale from here.