
Bathtub Hydroponics: Build a DIY System That Works
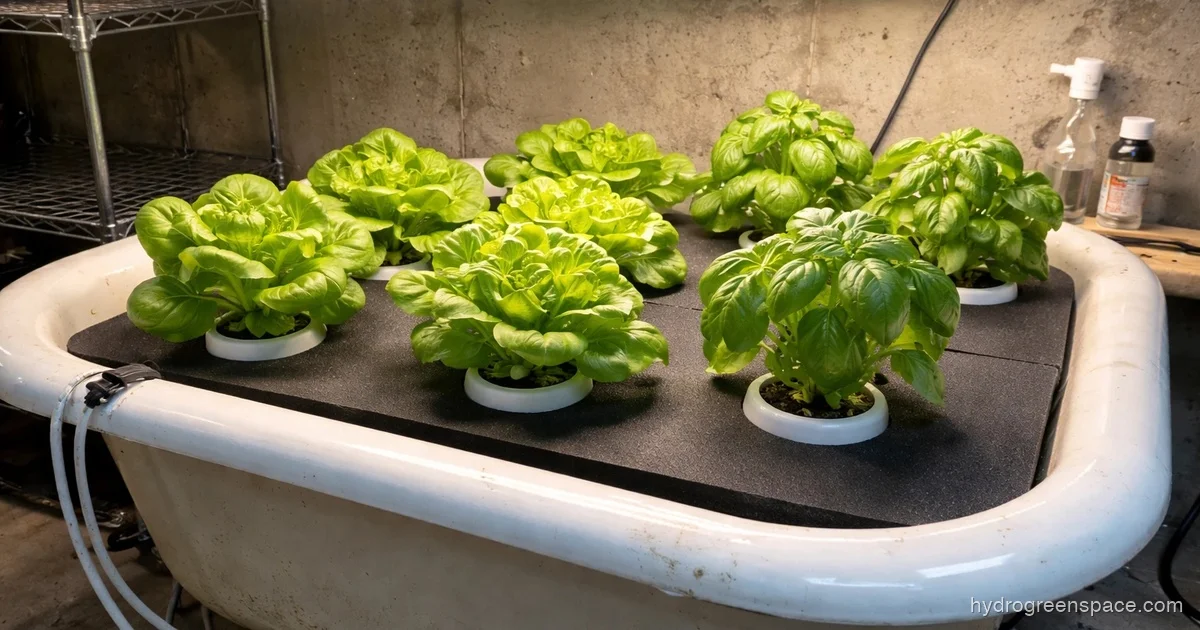
A bathtub sitting in your backyard or basement isn’t junk. It’s a 30-to-60-gallon reservoir waiting to happen. I’ve seen growers spend $80 on a plastic storage tote when they had a perfectly good cast iron tub gathering rust outside. The volume alone puts a bathtub ahead of almost every other cheap DIY hydroponic build in the beginner toolkit.
The catch is that a bathtub comes with quirks. The drain needs sealing or repurposing. The white enamel reflects light in ways that invite algae. And you need to decide upfront which system type you’re running before you buy a single net pot. Get those three things right and a bathtub hydroponic system can feed a family of four through a growing season.
Which System Actually Works in a Bathtub
Three methods are worth your time. Each suits a different grower and a different situation.
Deep Water Culture (DWC)
This is the most productive use of a bathtub. You fill the tub to about two-thirds capacity with nutrient solution, suspend net pots in a cover that floats over the water, and run an air stone along the bottom to keep oxygen levels up. The large volume (especially in a standard 5-foot tub) buffers temperature swings and pH fluctuations far better than a 5-gallon bucket hydroponic setup. That stability matters when you’re running fast-growing crops like lettuce or basil in warm weather.
You’ll fit 12 to 20 net pots across the surface of a standard bathtub, depending on spacing. A cast iron or porcelain steel tub handles the weight of that much water without any structural concern. An acrylic tub technically works too, but check that the floor isn’t flexing before you fill it, since some cheaper acrylic tubs weren’t designed to hold static loads for months at a time.
Passive Kratky
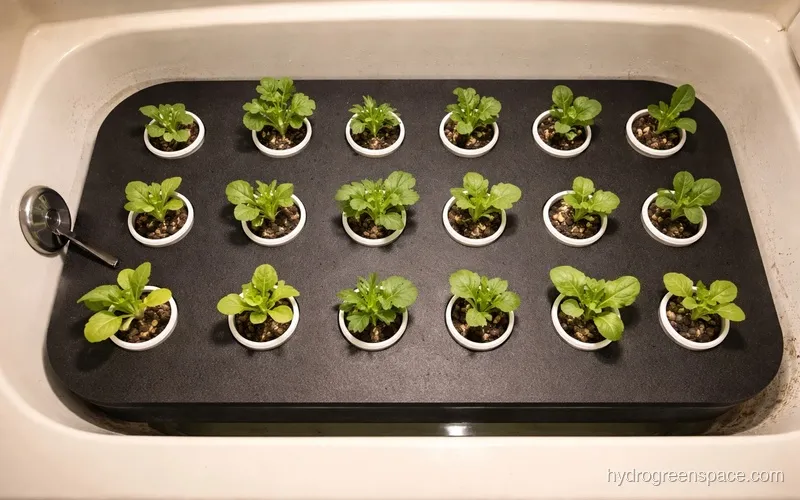
If you don’t want to run a pump or air stone, the Kratky method for passive growing adapts well to a bathtub, with one important adjustment. The standard Kratky gap between the net pot base and the nutrient solution needs to be maintained consistently. In a large reservoir like a bathtub, topping off the solution is easy, but you should mark a water level line on the inside of the tub so you always know where you stand without measuring.
Kratky in a bathtub works best for leafy greens and herbs. The passive approach means zero electricity (no pump, no air stone), which makes it ideal for outdoor setups or anywhere you don’t have a convenient outlet. The tradeoff is that fruiting plants like tomatoes or peppers will exhaust the oxygen in a stagnant reservoir faster than leafy greens, so DWC is the better call once you move to heavier crops.
NFT (Nutrient Film Technique)
You can use the bathtub itself as a catch basin rather than a grow bed for NFT. Lay PVC channels or gutter sections across the tub at a slight slope, run your nutrient pump from the tub up to the high end of each channel, and let the thin film flow back down into the tub. This is essentially using the bathtub as your reservoir and return sump, with the actual grow channels sitting above it.
This setup is more complex to build but it dramatically increases the number of plants you can run. It also keeps roots highly oxygenated without needing a separate air stone. If you’re thinking about repurposed containers for hydroponics, a bathtub as a sump is one of the more underrated configurations.
Dealing with the Drain
The drain needs a plan before you fill the tub, and getting it wrong will cost you water and time.
Option 1: Seal it. A rubber stopper from a hardware store costs $2. For a permanent setup, apply aquarium-safe silicone sealant around the stopper for a watertight seal. Test it with plain water for 24 hours before you add nutrients. If it holds, you’re done.
Option 2: Use it as an overflow valve. Set the stopper at a height where it only opens if the water level gets dangerously high. This protects the tub from overflowing during a pump failure or while you’re topping off. Some growers run a short piece of PVC into the drain so water only exits above a certain height, which gives you a passive failsafe.
Option 3: Drain for system flushes. If you’re running DWC, you’ll want to flush and replace the nutrient solution every two to three weeks. Leaving the drain functional means you can empty the tub without bucketing everything out by hand. Just make sure to re-seal it properly after each flush.
Tip: Cast iron bathtubs are heavy enough that they won’t move once placed, but they can rust where the enamel is chipped. Coat any exposed bare metal with food-safe epoxy paint before filling. Aquarium-safe coatings also work; anything rated for freshwater fish contact is fine for a nutrient solution.
Blocking Light to Stop Algae Before It Starts
Algae is the biggest ongoing maintenance issue in bathtub hydroponics, and the reason is simple: bathtubs are white or light-colored on the inside. That surface reflects light right into your nutrient solution, and algae uses that light to grow.
The fix is a light-blocking cover. For a DWC setup, cut a sheet of black foam board (also called black Kapa board or foam core) to fit the surface of the water. Cut holes for your net pots and let the board float. It blocks light, it’s lightweight, and it costs $6 at a craft store. For an outdoor setup or any situation where the foam board would get wet on top, use a sheet of black 6-mil plastic sheeting stretched across the tub instead and held in place with clips or bungee cords around the edges.
For more detail on managing this longer-term, read the full guide on preventing algae in your reservoir.
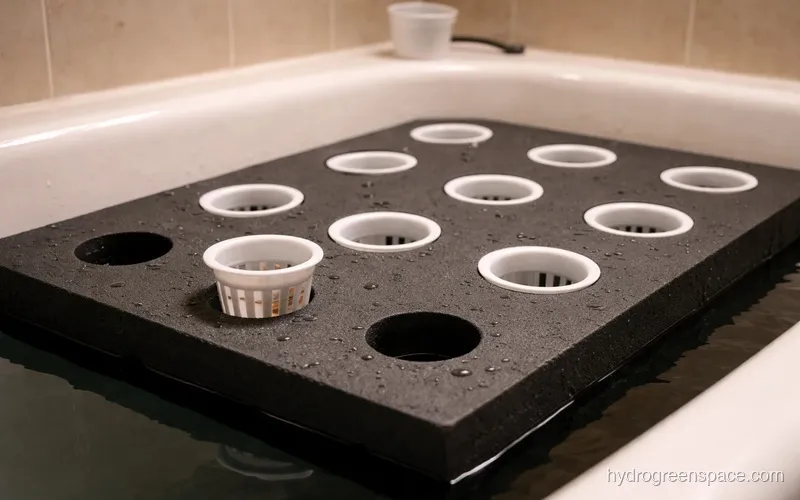
Common mistake: Cutting the net pot holes too large. If light gets through the gap around each net pot, algae will establish right there at the collar. The hole should be snug, just wide enough that the net pot rim rests on the foam without falling through, with no light gap.
Nutrient Solution in a Large Reservoir
A bathtub holds a lot of water, which is mostly good news, but it does require you to mix nutrients precisely. At a minimum, you’ll want a quality pH meter and a nutrient EC (electrical conductivity) meter. Eyeballing nutrients in 40 gallons of water is how you end up with tip burn on your lettuce by week two.
Mix nutrients in a small bucket first before adding to the tub. A dry mixing mistake in a full reservoir is much harder to correct than starting concentrated. For vegetative crops, target an EC of 1.2 to 2.0 mS/cm and a pH of 5.5 to 6.2. These ranges cover most leafy greens and herbs with room to adjust based on what you’re actually growing.
Large reservoirs also run warmer in summer. If your nutrient solution climbs above 72°F (22°C) consistently, root rot risk goes up fast. Look at the options in this guide on keeping reservoir water cool before it becomes a problem in mid-July.
Scaling from One Tub to Multiple Tubs
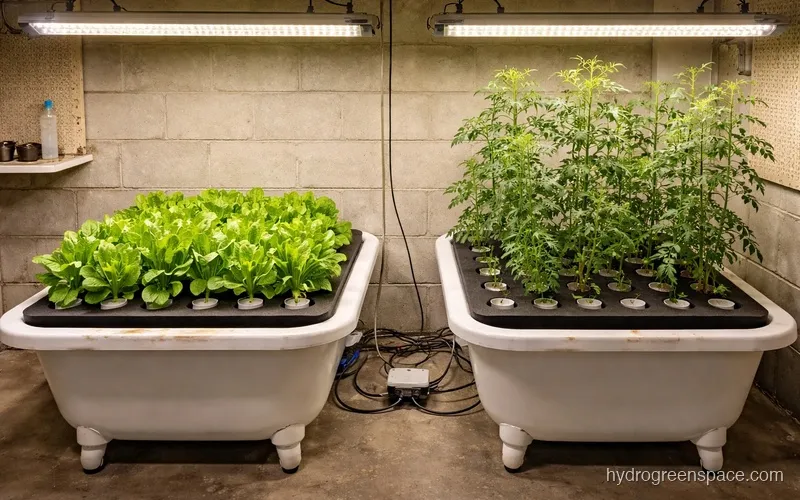
Once you’ve run a single tub through a full cycle, the next question is always how to scale. Two tubs connected in series give you more plants and natural redundancy. If one develops a problem, you can isolate it without losing everything.
The simplest setup: run both tubs with independent air stones and nutrients, managed separately. This keeps each tub isolated in case of disease or contamination. If you want to connect them, a shared reservoir approach works where one tub holds the nutrient solution and a pump circulates it to the second tub used as a grow bed. This is essentially a large-scale version of how a storage tote as a hydroponic reservoir scales up when you add more tote grow beds.
For anyone running beneficial bacteria in your reservoir, note that sharing nutrient solution between tubs means you get colonization across both systems simultaneously, which is actually a benefit rather than a concern.
What to Grow and How Many Plants
Leafy greens and herbs are the ideal first crop in a bathtub DWC system. Lettuce, spinach, arugula, kale, bok choy, basil, and cilantro all thrive in a shallow net pot setup and are ready to harvest within 30 to 45 days.
For spacing, use 6-inch net pots at 8-inch centers for lettuce, which gives you about 15 plants across a standard 5-foot tub. Basil does better at 10-inch centers because the canopy spreads more. Tomatoes and peppers are absolutely possible in a bathtub DWC setup, but each plant needs a full 12-inch net pot and you should not try to run more than 6 to 8 of them in a single tub. They’re heavy feeders and the root mass is substantial.
If this is your first build and you want to keep it simple before committing to a full tub setup, start with a few small-scale passive hydroponics jars to get your nutrient mixing and pH dialing dialed in first. Then move to the tub when you’re confident in the fundamentals.
Pick up a bag of clay pebbles (also called hydroton or LECA) for your growing medium. Rinse them thoroughly before use: a full 10 minutes under running water to flush out the dust, which will otherwise cloud your nutrient solution for days. At 2 to 3 inches of clay pebbles per net pot, a 50-pound bag handles 15 to 20 plants easily.
A bathtub turns a single growing season into a serious operation. A tub build is one of the most underrated large-format options in the DIY hydroponic systems toolkit. Once you’ve run your first cycle and seen what 15 heads of lettuce look like coming out of a system that cost you almost nothing to set up, the math on whether to run a second tub answers itself.