
DIY Hydroponic Systems: Every Build Worth Making
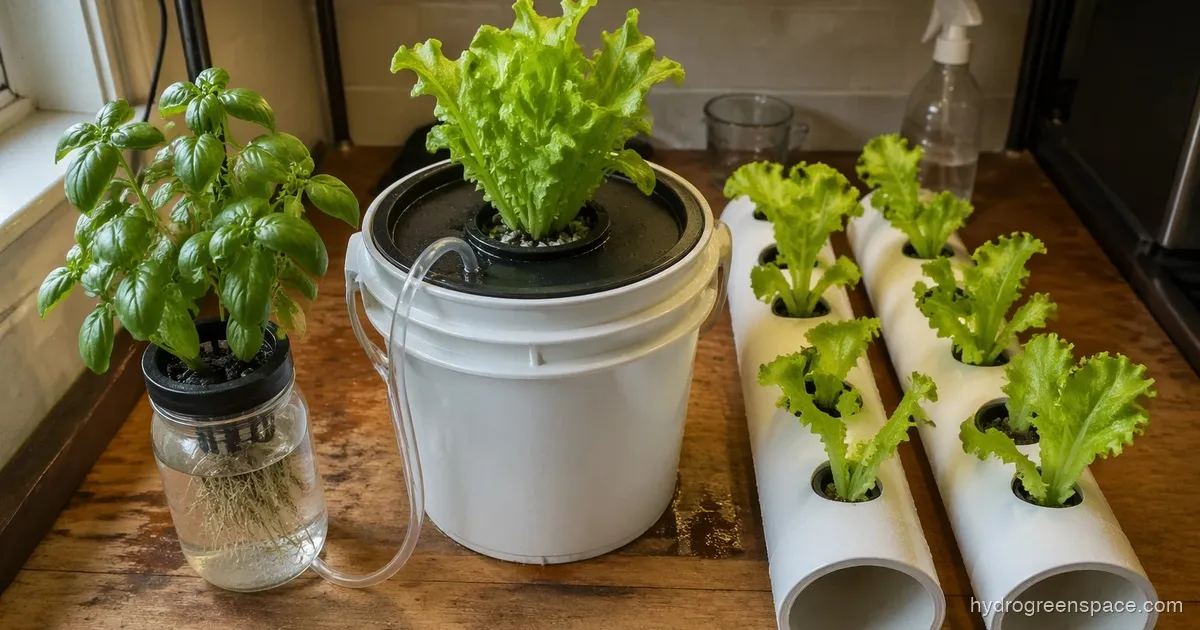
Building a DIY hydroponic system is less complicated than most beginners expect. A net pot, a container with a lid, some nutrient solution, and maybe a $12 air pump from the hardware store: that is genuinely everything a first system requires. The internet makes this look harder than it is by jumping straight to complex multi-plant recirculating builds before covering the basics.
This page covers every DIY hydroponic system worth building at home, organized by how growers actually think about this decision: what type of system fits your situation, what your budget allows, how many plants you want to start with, and which components and upgrades matter. Each section gives you the core idea and links to the full step-by-step build guide.
The real answer to “which system should I build?” depends on three things: how much space you have, what you want to grow, and whether you want a pump or not. Some of the most productive setups on this site cost under $20 and fit on a windowsill. Others use six buckets and a central reservoir and grow enough vegetables to supply a kitchen for months. The right build is the one you will actually complete and maintain.
There is one thing worth settling before you read further: DIY hydroponics is absolutely worth it compared to buying a kit, if you approach it correctly. A basic Aerogarden-style kit runs $80-$150 and holds six small plants under weak lights. For that same money, you can build a 10-gallon tote DWC that grows eight plants under real grow lights with far more water volume and flexibility. The kits win on convenience. Homemade hydroponic systems win on everything else.
The pain points that stop beginners are predictable: light leaks cause algae, nutrient pH swings stress plants, and first-timers overbuild when a simple setup would have worked. This guide addresses each of those directly so you can start with the right system and scale when you are ready.
Systems by Type: Find the Right Growing Method First
Before you buy a single part, the most important question is what type of hydroponic system fits your situation. Each method has different electricity requirements, complexity levels, and crop suitability. Get this decision right and everything else falls into place.
Here is a quick way to think about it: DWC and Kratky are the easiest to build and maintain. NFT and drip systems scale better but require more attention to flow rates and timers. Vertical tower systems make the most of limited space. All of them can be built from materials found at a hardware store or ordered online for under $50 on a first build.
Deep Water Culture (DWC)
A DWC system keeps plant roots submerged in oxygenated nutrient solution around the clock. An air pump and air stone handle the oxygenation. It is one of the fastest-growing methods available and the most forgiving for beginners because the large water volume buffers against pH swings and temperature changes.
The most common DIY version is a 5-gallon bucket with a net pot lid, a setup that can grow a tomato or pepper plant faster than a soil garden. If you want a proper DWC build with exact parts and step-by-step wiring, the 5-gallon bucket DWC system guide walks through everything from drilling the lid to the first nutrient mix.
For the low-budget version of the same system, the DIY DWC system under $40 guide covers how to get a working single-bucket build together for under forty dollars in parts.
Kratky Method (No Pump Required)
The most common question from new growers is whether a hydroponic system actually needs a pump. For the Kratky method, the answer is no. Plants sit in net cups over a reservoir, roots extend into the nutrient solution, and as they drink the water level drops, leaving a gap of moist air between the solution surface and the growing medium. That air gap gives roots the oxygen they need without any electricity.
Kratky is ideal for herbs, lettuce, and leafy greens. It struggles with fruiting plants like tomatoes that need more oxygen and longer grow cycles. Most beginners who want to avoid electricity entirely and grow basil or salad mix should start here. The most common mistake is topping off the reservoir before enough of an air gap has formed, which suffocates roots. The Kratky system build guide covers three builds: a mason jar version for herbs, a storage tote version for lettuce, and a 5-gallon bucket version for larger plants, along with exactly how to manage that water level gap.
NFT (Nutrient Film Technique) with Gutters and Downspouts
NFT systems run a thin film of nutrient solution along the bottom of sloped channels continuously. Plants sit in net cups along the channel with their roots trailing in that film. The system is excellent for lettuce, herbs, and leafy greens at scale. The slope of the channel matters more than most growers realize: too shallow and solution pools and goes stagnant, too steep and roots dry out between passes.
Rain gutters from the hardware store work perfectly as NFT channels and cost a fraction of specialty hydroponic tubing. The gutter hydroponics build guide explains how to set up a complete NFT system with proper slope, flow rate, and light blocking for under $60.
Vinyl downspouts are an even cheaper and more enclosed alternative. They block light naturally, reducing algae problems, and come in sizes that fit standard net cups. The downspout hydroponics guide covers both recirculating NFT builds and passive Kratky channel configurations, including a stacked rack design that turns a small footprint into a serious growing operation.
Drip Systems
A drip system feeds nutrient solution to each plant through individual drip emitters on a timer. It is probably the most forgiving hydroponic setup you can build for fruiting plants like tomatoes, peppers, and cucumbers that need intermittent feeding rather than constant submersion. Growing medium selection matters here: coco coir and clay pebbles both work, but each needs different timer settings because they hold moisture differently.
The two main variants are recovery (solution drains back into the reservoir and gets reused) and non-recovery (solution drains away). For home growers, recovery systems waste less nutrient solution and are worth the slightly more complex plumbing. The biggest failure point in DIY drip setups is clogged emitters from mineral buildup, which is easy to prevent with a weekly rinse cycle. The DIY hydroponic drip system guide walks through both options and how to build a functional 2-to-4-plant system for under $50, including the timer settings that prevent root zone dry-out.
Vertical and Tower Systems
Vertical systems are the answer when floor space is limited. A PVC tower can hold 20 or more plants in the footprint of a single bucket. Nutrient solution pumps to the top and flows down through the tower, feeding each plant’s root zone as it goes. What most people do not account for at first: vertical towers dry out faster than horizontal systems because the solution travels further and there is more surface area exposed to air. Pump sizing and grow medium selection matter more here than in any other build.
There are two common vertical PVC builds. The DIY PVC hydroponic tower guide covers the basics of cutting pipe, sizing holes, and building the reservoir. The vertical PVC hydroponic system guide goes deeper on design configurations, pipe diameter choices (4-inch vs. 6-inch), plant density, and indoor versus outdoor setup considerations. If you are building this indoors, the outdoor guide is still worth reading because the pump sizing and flow rate math applies regardless of location.
Systems by Budget: What You Can Build Tonight
Here is what it actually costs to build a DIY hydroponic system:
The short answer: a working system costs anywhere from $5 (a mason jar Kratky setup using supplies you already own) to a few hundred dollars for a multi-bucket recirculating system. The budget breakdown below covers the most practical builds at each price point.
Under $15: Mason Jar Kratky
A wide-mouth mason jar, a net cup that fits the lid opening, some perlite or clay pebbles, and a bottle of hydroponic nutrients. That is a complete system. The jar blocks out enough light if you wrap it, or you can start seeds in an opaque container.
This is the cheapest DIY hydroponic setup that actually works. It will not grow tomatoes, but it grows perfect basil, cilantro, and butterhead lettuce. The mason jar hydroponics guide covers jar sizing, net cup fitting, nutrient mixing ratios, and the algae problem (hint: the light leak from a clear jar is the only real maintenance issue).
$25–$35: Storage Tote DWC
A 10-to-18-gallon opaque storage tote with a foam board or lid drilled for net cups, a small air pump, air stone, and tubing. This runs 4 to 8 plants off a single reservoir and is a massive upgrade over individual jars.
The hydroponic tote system guide explains why the tote beats the single bucket for most growers (larger water volume means more stable pH and temperature), walks through the 6-step build, and covers what to expect in the first two weeks.
For the specific $10–$50 budget breakdown across three builds, the DIY hydroponic systems under $50 guide compares the mason jar, tote, and 5-gallon bucket builds side by side so you can see exactly what each dollar buys you.
$50–$80: PVC Tower or NFT Gutter System
At this budget, vertical systems and NFT channel builds become realistic. A vertical PVC tower with pump and reservoir can hit this price range if you source the pipe from the lumber aisle instead of hydroponic specialty suppliers. A two-channel gutter NFT system runs similarly.
These builds grow more plants per dollar of floor space than any horizontal setup. A commercial tower garden equivalent costs $500 or more.
$100 and Up: Multi-Bucket Systems
Three or more buckets wired together with a shared air pump and managed as a single system. At this scale, hydroponics stops being a countertop experiment and starts producing meaningful quantities of food. The 3-plant hydroponic system guide covers the sweet spot for new growers: enough plants to produce real harvests, small enough to manage without a lot of equipment.
The materials you can skip at any budget: specialized hydroponic grow tents (a light-proofed room works fine), pH-perfect premium nutrients when off-brand two-part nutrients do the same job, and any automated dosing equipment on a first build. Get the basics working first, then upgrade what you actually need.
Systems by Size: Start Small, Scale Smart
The number of plants you want to grow changes which build makes the most sense. A single-plant system has completely different considerations from a 6-bucket setup.
One to Two Plants
A single plant needs its own container with a net pot, a nutrient solution, and either a pump or the passive Kratky approach. The one-plant hydroponic system guide covers three viable options (Kratky, DWC, and wick) with exact container sizing for each.
Two plants can each get their own standalone bucket and share a single air pump. The 2-plant hydroponic system guide walks through both separate-bucket and shared-reservoir approaches, and briefly covers when it makes sense to connect them into a recirculating system.
For growers who only have a sunny window available, the DIY hydroponic window garden guide is worth reading before buying anything. Window direction determines whether your light situation is workable, and the two builds it covers (Kratky windowsill and hanging bottle farm) suit the constraints of a single window well.
Three to Six Plants
Three plants is the practical starting point for growing enough herbs or leafy greens to actually use in the kitchen on a regular basis. The 3-plant system guide (linked above in the budget section) covers DWC, Kratky, and NFT options at this scale, with a full parts list and a realistic cost under $100.
The single bucket hydroponic system guide is worth reading alongside it if you want to understand the difference between a true single-bucket grow and a scaled multi-bucket setup. A single bucket can grow one full-size tomato vine that out-produces most container gardens.
Six buckets is where the setup starts to resemble a serious operation. DWC at that scale becomes much easier to manage if the buckets share a central reservoir (recirculating DWC, or RDWC). The 6-bucket hydroponic system guide covers the standalone versus RDWC decision, the complete parts list, and a water change schedule that keeps a multi-bucket system healthy.
Unconventional Containers
Some of the best DIY builds use containers most growers already own or can source for free. A bathtub is a 30-to-60-gallon reservoir, which puts it ahead of almost every dedicated hydroponic container at that price point. The light-blocking challenge is real since most bathtubs are white and translucent at the rim, but a $5 roll of black poly sheeting solves it. The bathtub hydroponics guide covers which system types actually work in a bathtub, how to handle the drain, and what to grow.
Pool noodles cut into rings work as a net pot substitute in passive Kratky builds. The pool noodle hydroponics guide covers whether they are safe (yes, with the right foam), what plants work in them, and when you should use actual net cups instead. The cost difference is real: a bag of 50 net cups runs $8 to $10, while a pool noodle gives you 15 to 20 rings for $1.
What I’d do: If you already own a storage tote, a bathtub, or any large opaque container, use it. The biggest advantage of building your own system over buying a kit is using what you have. A $0 container and a $12 air pump beats a $150 kit that limits you to small plants under inadequate lighting.
Components and Upgrades: The Parts That Matter
Once you have chosen a system type, budget, and scale, the supporting components determine whether the build actually performs well or becomes a problem to troubleshoot. Most system failures come down to two things: inadequate aeration and reservoir temperatures that creep too high. Both are fixable with cheap DIY solutions.
Foam Board Rafts
Floating raft systems use foam board to suspend plants over a reservoir. Not all foam is safe for food contact, and the three types on the shelf (EPS, XPS, and EPP) behave very differently. The foam board for hydroponics guide identifies which type to buy, how thick it should be, and how to cut clean net cup holes without the foam crumbling.
Air Stones and Aeration
An air stone is what keeps roots from drowning in a DWC system. Placement and sizing both matter: too small a stone in too large a reservoir leaves the far corners of the root zone oxygen-starved. The DIY air stone hydroponics guide covers two DIY air stone methods, correct sizing for common reservoir volumes, and the cleaning schedule that keeps them from clogging.
Water Temperature Management
Warm reservoir water is one of the fastest ways to lose a hydroponic crop. Root rot sets in quickly above 70 degrees Fahrenheit, and most indoor spaces get warmer than that in summer. The symptoms look like overfeeding or pH problems at first (yellowing, slimy roots, wilting), which leads growers to chase the wrong fix. Check temperature first, always. The DIY water chiller for hydroponics guide covers four methods: frozen water bottles for small systems, fan circulation with insulation, an ice chest coil loop for medium setups, and a repurposed water cooler compressor for serious growers.
Pick a build, run one full crop cycle, and then decide what to change. Most growers who stick with hydroponics through the first harvest end up expanding the same system rather than switching methods entirely. The first grow teaches you more than any amount of planning.
For the complete deep dive on any of the builds above, follow the links in each section. Every guide covers the full parts list, step-by-step instructions, and the specific problems you are most likely to hit on that build.