
5-Gallon Bucket Hydroponic System: Build Guide
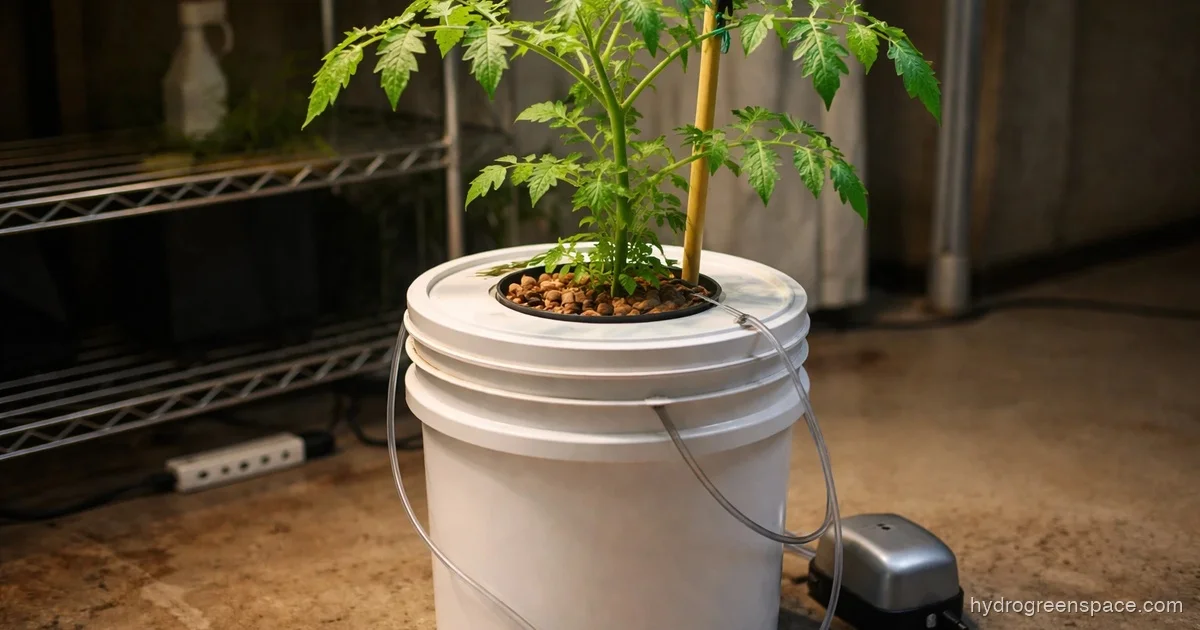
A five-gallon bucket is probably sitting in your garage right now, and it can grow a tomato plant faster than your garden bed ever did. The 5-gallon bucket hydroponic system is the easiest entry point into deep water culture: cheap, fast to build, and forgiving enough for a first-timer to get a real harvest on their first attempt.
This guide is written for people who want to grow food: tomatoes, peppers, basil, cucumbers, and everything in between. By the end, you’ll know exactly what to buy, how to put it together, and what to do when something goes sideways.
What You’ll Need Before You Start
Keep the materials list simple. You can build a functioning single-bucket DWC system for $30 to $50 if you buy the components separately from a hardware store and a hydroponics supplier.
Materials list:
- 1 food-grade 5-gallon bucket with lid (black or opaque, light must not pass through)
- 1 net pot, 3.5 to 4 inches in diameter (sized to fit a hole cut in the lid)
- Air pump (a basic single-outlet aquarium pump rated for 10–20 gallons works fine)
- Air stone (round disk style gives good bubble distribution)
- Air tubing (food-safe, 1/4 inch diameter)
- Check valve (prevents water from siphoning back into the pump)
- Expanded clay pebbles (hydroton), rinsed and pre-soaked
- Hydroponic nutrient solution (a two-part or three-part liquid nutrient designed for DWC)
- pH meter or pH test strips
- pH up and pH down solutions
- A hole saw or drill bit sized to your net pot diameter
Tip: “Food-grade” on a bucket means it was certified for food contact. Look for the fork-and-spoon symbol on the bottom, or buy a new bucket from a restaurant supply or home improvement store. Never repurpose a bucket that held chemicals or cleaning products.
The bucket must be opaque. Clear or translucent buckets let light into the reservoir, and algae will follow within days. Black buckets are ideal. If you already have a white or orange bucket, wrap it in black duct tape or paint it.
How a 5-Gallon Bucket DWC System Actually Works
How hydroponics works gives a full explanation of the science, but here’s the short version for this setup.
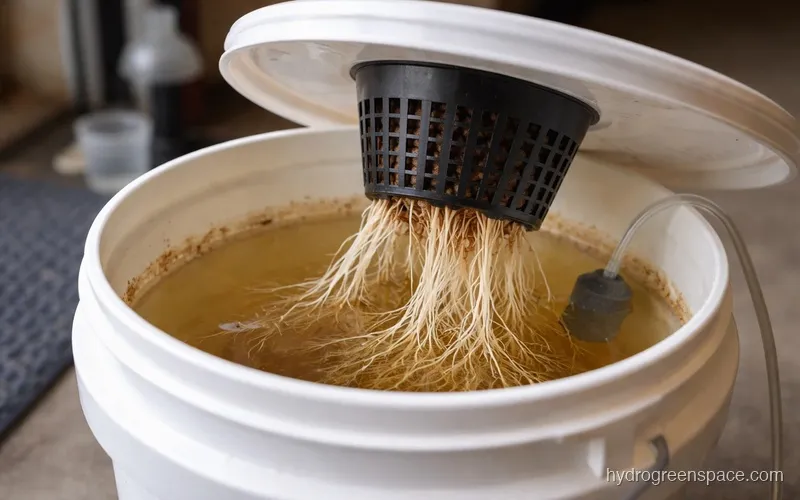
Your plant sits in the net pot at the top of the lid, roots hanging down into the nutrient solution below. The air pump pushes bubbles through the air stone at the bottom of the bucket, which does two things: it oxygenates the water (roots need oxygen or they rot) and keeps the nutrient solution circulating so it doesn’t stratify. The plant pulls up water, nutrients, and oxygen directly through its roots without any soil acting as a middleman.
That direct access is why hydroponic plants grow faster. There’s no energy wasted searching for nutrients through soil. They’re right there, dissolved and available.
Step-by-Step Build Guide
Step 1: Cut the net pot hole
Measure your net pot against the center of your bucket lid. A 3.5-inch hole saw is the most common fit for standard 4-inch net pots. Drill or cut from the top side of the lid. Test the fit: the net pot lip should rest on the lid without falling through.
Step 2: Set up the air system
Feed the air tubing through a small hole drilled near the rim of the bucket (or run it under the lid, either works). Attach the air stone to one end and drop it to the bottom of the bucket. Connect the other end of the tubing to the air pump, with the check valve inline between the pump and the bucket. The check valve arrow should point toward the bucket; this stops water from back-flowing into the pump if the power cuts out.
Step 3: Mix and add your nutrient solution
Fill the bucket with water to about two inches below the bottom of the net pot. This air gap matters. During the seedling stage, you want the roots to grow downward toward the solution rather than sitting submerged from day one. As roots develop and dip into the solution, the plant establishes faster.
Mix your nutrients according to the manufacturer’s instructions for the vegetative or seedling stage. Check the pH and adjust to the 5.8 to 6.2 range. For most vegetables, 5.8 to 6.0 is the sweet spot.
Common mistake: Skipping the pH check on day one. Tap water commonly sits at 7.0 to 7.5, and nutrients shift that further. At pH 7.5, your plant physically cannot absorb iron and manganese even if they’re present in the solution. A $15 pH meter pays for itself on the first grow.
Step 4: Add growing media and plant
Rinse your expanded clay pebbles thoroughly (they ship dusty), soak them for an hour, then fill the net pot about halfway. Set your seedling or rooted cutting in the center, fill in around the roots with more pebbles, and seat the net pot in the lid.
Plug in the air pump. You should hear it running and see bubbles in the bucket if you peek inside with a flashlight.
Step 5: Monitor weekly, top off as needed
Check the water level every two to three days. As the plant drinks and evaporates water, the level drops. Top off with plain pH-adjusted water (not a fresh nutrient solution) between full reservoir changes to maintain nutrient concentration.
Do a full reservoir swap every 7 to 14 days. In a small 5-gallon system, nutrients get consumed and pH drifts quickly. A full change resets both.
Do You Actually Need a Pump?
No, and this is worth knowing before you spend money on equipment.
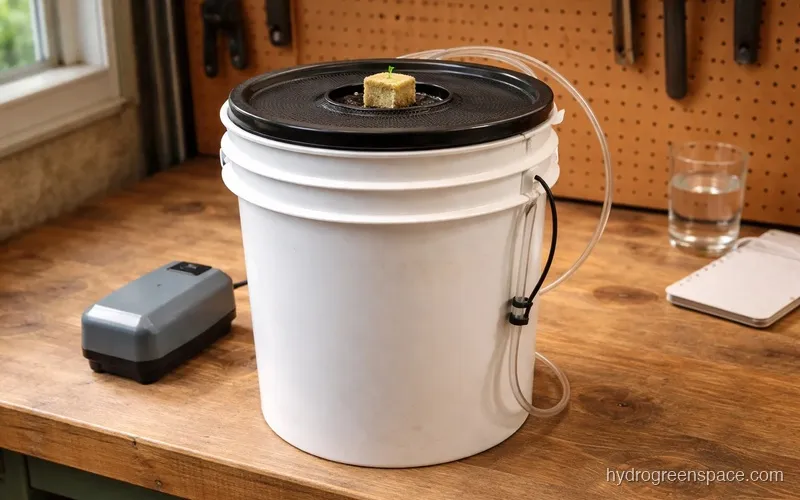
The pumpless version of bucket hydroponics is called the Kratky method. Instead of oxygenating the water with an air stone, you leave a deliberate air gap between the waterline and the net pot. As the plant drinks the solution down, that gap grows, and the exposed roots absorb oxygen from the air. It’s passive, silent, and requires zero electricity beyond your grow light.
Kratky works well for fast-growing, low-demand crops: lettuce, spinach, herbs, arugula. It struggles with heavy feeders like tomatoes and peppers because a 5-gallon reservoir doesn’t hold enough solution to carry them through a full growth cycle without the grower constantly intervening.
For vegetables that produce fruit over weeks or months, the air pump DWC setup is worth the small extra cost. The additional oxygen and nutrient availability makes a real difference in yield. If you want to try Kratky first to test the concept, how to make a Kratky hydroponic system walks through that setup in detail.
What Plants Work Best in a Single Bucket
One bucket means one plant, in most cases. That’s worth stating plainly, because a lot of beginners try to cram two or three plants into one container and wonder why growth stalls.
Excellent choices for a 5-gallon DWC bucket:
- Tomatoes (especially determinate or compact varieties like Bush Early Girl or Patio)
- Bell peppers and hot peppers
- Cucumbers
- Basil (one large plant or two small ones)
- Swiss chard
Plants that don’t need a full bucket:
Lettuce and herbs are better suited to a multi-site setup (a net pot tote, a Kratky jar system, or a small NFT channel). You’re wasting space growing a single head of lettuce in a 5-gallon bucket when that same bucket could support a pepper plant for four months. Check the list of hydroponic vegetables to see how different crops compare.
What I’d do: Start with a cherry tomato or a compact pepper variety. They’re forgiving, they produce a lot, and watching a pepper plant absolutely thrive in a bucket is the thing that makes hydroponics click for most new growers.
If you want to scale up from here, the natural next step is a multi-bucket recirculating system. A 6-bucket hydroponic system is a much larger jump in complexity, but this single-bucket setup is the right place to learn the fundamentals first.
Troubleshooting: The Two Problems Every New Grower Hits
Green water / algae growth
Your water turned green. This happens when light gets into the reservoir. Algae needs light and nutrients, and your bucket has plenty of nutrients, so blocking the light is the fix.
Check the lid for gaps around the net pot. Wrap foam weather stripping around the net pot rim if there’s a gap. Check the sides and bottom of the bucket for any translucency by holding a flashlight against the outside in a dark room. Anywhere you see a glow, wrap it with black tape.
Once algae is established in a bucket, do a full reservoir change, rinse the bucket with a 1% bleach solution, rinse again with clean water, and refill. Algae itself won’t kill your plant immediately, but it competes for oxygen and nutrients and is a sign the system is letting in light it shouldn’t. For a deeper dive into the causes and prevention strategies, see algae growth in hydroponics.
Root rot
Brown, slimy roots with a foul smell mean root rot, almost always caused by insufficient oxygenation or high water temperatures. Check your air pump first. If the stone isn’t producing vigorous bubbles, replace it or upgrade the pump. If the reservoir temperature is above 72°F (22°C), that’s your primary problem. Warm water holds less dissolved oxygen and creates ideal conditions for the pathogen responsible for root rot.
Keep reservoir temps between 65°F and 70°F (18°C to 21°C). In a warm room or basement in summer, a small aquarium chiller or even a frozen water bottle dropped into the reservoir temporarily can help. Root rot in hydroponics covers the full diagnosis and treatment protocol if you’re dealing with an active infection.
What Comes Next
A single 5-gallon bucket system is genuinely enough to produce meaningful harvests. A healthy pepper plant in DWC can outproduce a garden-bed plant growing in the same space. But once you’ve dialed in the basics (pH management, reservoir changes, light discipline on the bucket) you’ll naturally start thinking about more plants and whether it’s worth connecting multiple buckets into a recirculating system.
That’s when the DIY hydroponic systems guide becomes your next read. It covers every configuration from this simple bucket setup through more complex multi-plant builds. For now, get the first bucket running. The learning curve is steeper in theory than it is in practice. Most growers have their first system bubbling away within an afternoon.