
DIY Hydroponic Window Garden: Two Easy Builds
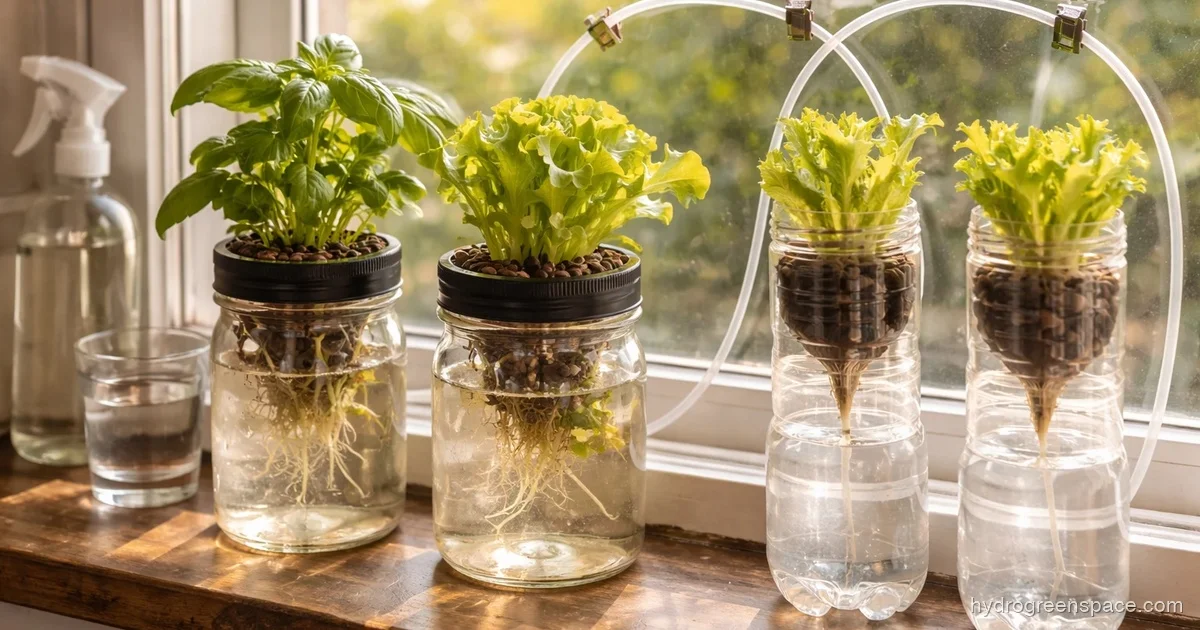
Your window is either an asset or a liability for hydroponics, and the direction it faces determines which one before you spend a single dollar. A south-facing window in a small apartment can grow more herbs than most people eat. A north-facing window without a grow light will slowly starve your plants of the one thing they need most. Get that part right first, and a simple DIY hydroponic window garden becomes genuinely easy and cheap to build.
This guide covers two builds: a passive Kratky windowsill setup (no pump, under $20, good for herbs and small greens) and a hanging window farm using recycled bottles and an air pump (great for more plants, a bit more involved). You’ll know exactly which one suits your window and your goals by the time you finish reading.
Which Window Direction Actually Works
Before anything else, point yourself toward your windows and figure out which direction they face.
South-facing (best): A south-facing window in the northern hemisphere gets 6-8 hours of direct sun on a clear day. Basil, green onions, arugula, and most lettuce varieties will grow well here from spring through fall. In winter, days shorten and sun angle drops; you may need to supplement with a small grow light for herbs that need higher light levels like basil.
East or west-facing (workable): East windows get gentle morning light, west windows get stronger afternoon light. You’ll get 3-5 hours of direct sun depending on the season. Lettuce, mint, green onions, and chives will do fine. Basil will grow, but stretch a bit more between nodes. These windows work for 8-9 months of the year in most climates without supplemental light.
North-facing (not enough): Indirect light all day. You can grow some herbs, but they’ll be leggy, slow, and often disappointing. A north-facing window without grow lights is where herb gardens go to die slowly. If that’s what you have, add even a basic LED strip and you’re back in business. See our guide on building an indoor hydroponic system with grow lights for that route.
Tip: Hold your phone’s compass app up to your window at noon. If the shadow from the windowsill falls straight back into the room, you’re facing roughly south. That’s the simplest test.
One more thing on light: if your window gets direct afternoon sun through glass in summer, south and west windows can get hot enough to warm your nutrient solution. Warm water encourages root rot. A simple white curtain sheer cuts intensity without blocking much light.
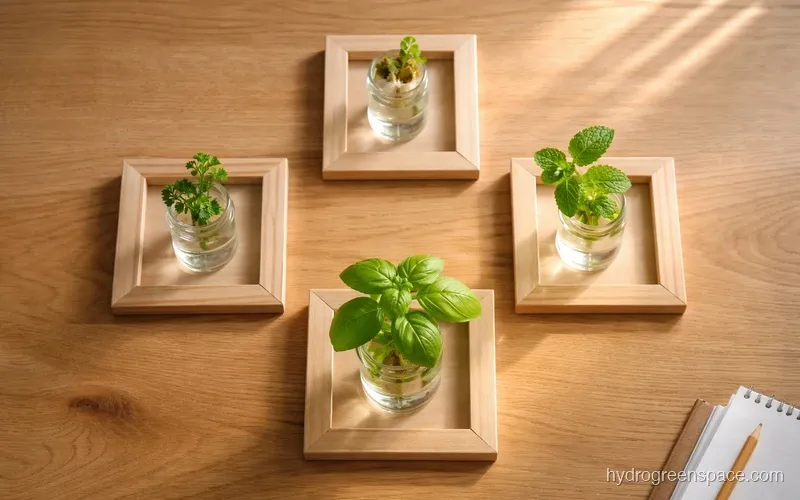
Build Path 1: Passive Kratky Windowsill Setup
This is the lowest-barrier hydroponic setup you can build. No air pump, no electricity, no timers. The Kratky method works by leaving a gap between the water surface and the net cup so plant roots can access both nutrients and oxygen at the same time. You refill the reservoir occasionally and that’s basically it.
What You Need
| Item | Cost (approx.) |
|---|---|
| Mason jars or dark bottles (32 oz, quart size) | $0-8 (repurpose or buy) |
| Net cups (2-inch) | $4-6 for a pack of 10 |
| Clay pebbles (growing medium) | $8-10 for a small bag |
| Hydroponic nutrient solution (liquid concentrate) | $10-15 |
| Seedlings or seeds | $2-5 |
| Total | $24-44 |
You can build a 4-6 plant setup for under $30 if you reuse dark glass jars or paint clear mason jars black to block light (light on the roots encourages algae growth). The mason jar hydroponics guide goes deeper if you want a more detailed walkthrough of this exact setup.
How to Build It
-
Prepare containers. If using clear glass, spray paint or tape the outside black or brown. Leave the lid area clear so you can check water levels without removing lids.
-
Cut or drill a hole in the lid. The hole should fit your 2-inch net cup snugly. A hole saw or sharp utility knife works. The net cup should sit in the hole with its rim resting on the lid’s surface.
-
Rinse your clay pebbles. Rinse them for 2-3 minutes under cold water until the water runs mostly clear. Dusty clay pebbles will cloud your nutrient solution.
-
Mix nutrient solution. Follow the product’s instructions for seedling-stage dilution, usually around 50% strength for the first two weeks. Fill each container so there’s about a half-inch gap between the water surface and the bottom of the net cup.
-
Add seedlings or germinate seeds. Tuck your seedling into the net cup with clay pebbles supporting it. Roots should dangle down toward (but not submerged in) the nutrient solution within a few days.
-
Place on the windowsill and top off weekly. Check water levels every 3-4 days initially. As the plant grows and the reservoir drops, maintain that half-inch air gap. Full refills every 1-2 weeks depending on plant size.
Build Path 2: Hanging Window Farm with Recycled Bottles
A window farm takes the same hydroponic principles and stacks them vertically in your window frame. The classic version uses plastic water bottles arranged in a hanging column, with nutrient solution pumped up to the top bottle and dripping down through each one. This setup fits more plants into the same window and looks impressive.
The original window farm community from the early 2010s documented this well, but most builds you’ll find are dated. Here’s an updated take that works reliably.
What You Need
| Item | Cost (approx.) |
|---|---|
| 2-liter plastic bottles (4-6) | $0 (save empties) |
| Small aquarium pump + tubing | $10-15 |
| Net cups (2-inch, pack of 10) | $4-6 |
| Clay pebbles | $8-10 |
| Hydroponic nutrients | $10-15 |
| Fishing line or cord for hanging | $2-3 |
| Command hooks or curtain rod | $3-5 |
| Total | $37-54 |
This gets you 4-6 plants in a vertical column that fits neatly inside most standard window frames without blocking all the light.
How to Build It
-
Prepare bottles. Cut a rectangular opening in the upper face of each bottle (the side that will face you). This is where the plant sits. In the bottom of each bottle, drill or poke a small drainage hole so water flows from one bottle down to the next.
-
Stack and connect. Hang the bottles in a vertical line with 6-8 inches between each. The drainage hole of the upper bottle drips into the lower bottle. The bottom bottle acts as the reservoir.
-
Run pump tubing. The aquarium pump sits in or near the bottom reservoir bottle. Run flexible tubing from the pump output up to the top bottle. You can run the tube along the fishing line to keep it tidy.
-
Set the pump timer. You don’t need continuous flow. Running the pump for 15 minutes every 2-3 hours is enough to keep roots moist without oversaturating them. A cheap mechanical outlet timer costs about $5 and is worth it.
-
Add growing medium and plants. Fill each opening with rinsed clay pebbles and tuck in a seedling or germinated seed. Roots will establish within 1-2 weeks.
-
Mix and add nutrient solution. Fill the bottom reservoir with mixed nutrient solution. The pump circulates it up and gravity brings it back down through all the plants.
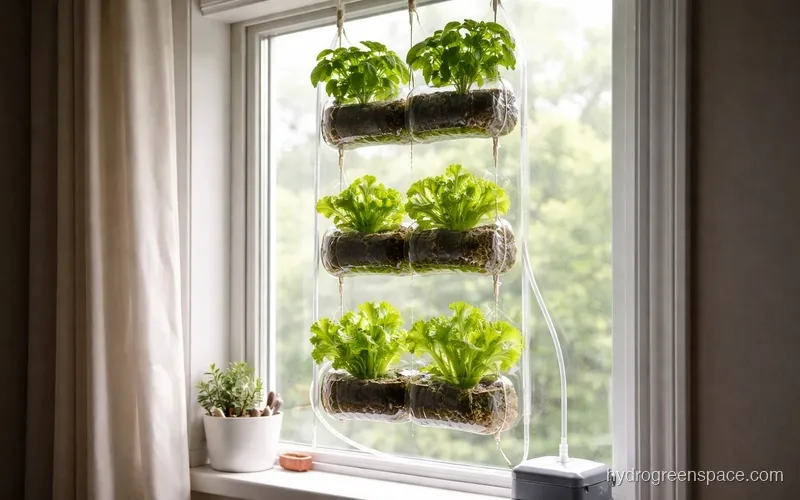
What I’d do: Wrap the outside of the bottles with dark tape or fabric before hanging. Clear plastic lets light through to the roots and nutrient solution, which breeds algae fast. A quick layer of electrical tape on each bottle adds maybe 10 minutes to your build and saves a lot of headaches.
For more vertical build ideas using different materials, the vertical PVC hydroponic system build is a natural next step when you’re ready to scale up.
What to Grow (and What to Skip)
Both setups work best with fast-growing, shallow-rooted plants. Here’s what performs well:
Best performers:
- Basil: grows quickly in south or west windows, harvest by pinching tops
- Green onions: near-zero effort, regrow from cuttings, fine in east-facing light
- Mint: vigorous grower, does well in lower light, spreads fast
- Lettuce (butterhead, romaine, leaf types): thrives at cooler temps, fine in east windows
- Arugula: faster than lettuce, slightly spicy, low light tolerant
- Cilantro: grows well until it bolts; cooler windows extend its harvest window
Skip these for a window setup:
- Tomatoes, peppers, cucumbers: need more light, more root space, more nutrients than a window garden delivers
- Strawberries: technically possible but slow and disappointing without high light levels
If you want to grow those heavier feeders indoors, they need supplemental lighting. The grow light distance from plants guide covers setup for that.
Nutrient Solution Basics for Both Builds
You don’t need to overthink nutrients for a window garden. A general-purpose liquid hydroponic nutrient concentrate (like General Hydroponics Flora Series or MaxiGro) covers what herbs and leafy greens need. Mix at half-strength for the first two weeks, move to full-strength after that.
Check and top off your reservoir every 3-5 days. The nutrient concentration increases as plants drink more water than nutrients. Every 2-3 weeks, dump and replace the full reservoir rather than just topping off. This prevents salt buildup that will eventually affect nutrient uptake.
Aim for 65-72°F (18-22°C) for your nutrient solution. Warmer than 75°F and you’ll start seeing root issues, especially in the hanging bottle setup where temperatures fluctuate more with the window glass.
If you want to understand the full equipment picture before you buy anything, the hydroponic equipment checklist is a practical overview of what’s essential vs. optional for small home setups.
Winter Growing: Adjusting for Shorter Days
A south-facing window that grows beautiful basil from May through September will drop to 3-4 hours of direct light by December in most of the northern hemisphere. Day length matters as much as intensity.
For leafy greens and herbs that can get by on lower light (mint, green onions, lettuce), a south or west window usually still works through winter. For basil specifically, you’ll notice it slowing and starting to look pale around October. That’s the light dropping, not a nutrient problem.
A simple fix: add an inexpensive LED grow bulb in a clip-on lamp angled at your plants for 4-6 hours in the evening to extend the photoperiod to 14-16 hours total. You’re not replacing the window; you’re extending the day. This keeps basil and most herbs productive year-round without converting your setup to a full indoor hydroponic garden for beginners build under artificial light.
Choosing Between the Two Builds
If you’re deciding between the Kratky windowsill jars and the hanging window farm, here’s the practical comparison:
| Kratky Windowsill | Hanging Window Farm | |
|---|---|---|
| Cost | $20-30 | $37-54 |
| Plants | 3-6 (depends on windowsill width) | 4-6 (vertical) |
| Electricity | None | Small pump (~5W) |
| Maintenance | Top off water, full refill 2x/month | Clean pump monthly, replace tubing annually |
| Best for | Herbs, quick setup, no tools | More plants in narrow window, visual appeal |
| Light needed | Same window, same rules | Same window, same rules |
Neither requires a grow light if your window gets 5+ hours of direct sun. Both can be running with plants in them within a weekend.
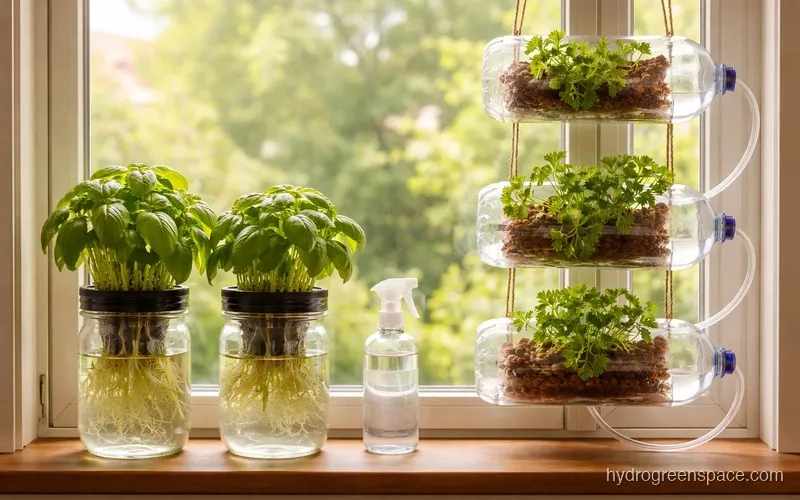
If you want to skip the pump entirely and keep it as simple as possible, the hydroponic garden without pump guide covers more passive setups in the same spirit as the Kratky build above.
Pick your window, check the direction, and start with whichever build matches your budget and how much space you’re working with. Most growers start with 2-3 Kratky jars, get hooked when they harvest their first basil, and end up building the hanging farm a month later. Either way, you’re a weekend away from fresh herbs growing in your apartment without a single bag of soil. When you’re ready to expand beyond a windowsill, the DIY hydroponic systems guide covers every step from small passive builds to full DWC setups.