
Hydroponics Seedling Care Guide: Week-by-Week
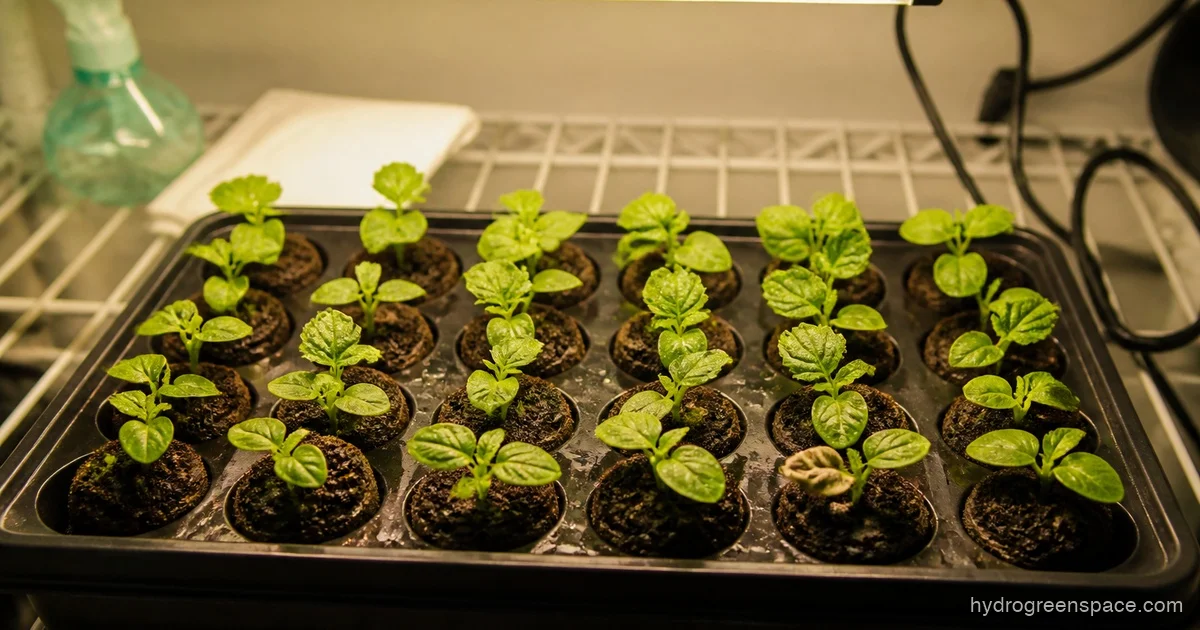
The seed has sprouted. Now what? Most growers obsess over germination, but the window between sprout and a transplant-ready seedling is where crops actually succeed or fail. Get this phase right and you’ll transfer healthy, root-loaded plugs into your system. Get it wrong and you’ll spend two weeks watching seedlings slowly collapse (no obvious cause, no obvious fix).
This hydroponics seedling care guide breaks the first four weeks into a clear weekly progression so you know exactly what to do, when, and why.
Week 0–1: The Seedling Doesn’t Need Nutrients, It Needs Moisture
Germination is about warmth and moisture, not nutrition. Your seed has everything it needs to push through the shell and reach for light. The job right now is to not interfere with that process.
Keep your propagation plugs (whether Rapid Rooters, rockwool cubes, or peat pellets) consistently moist but not dripping. If you squeeze a plug and water runs out, it’s too wet. If it feels stiff and dry, give it a few milliliters of plain, pH-adjusted water (target 5.5–6.0 pH). No nutrient solution yet.
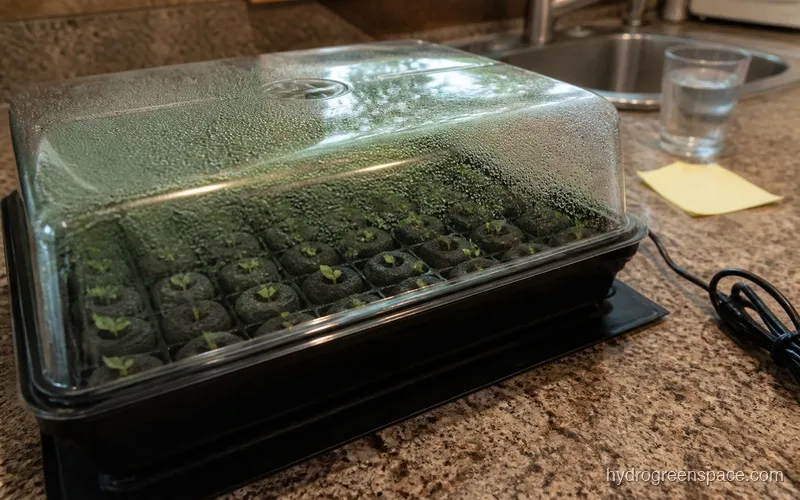
Temperature is a critical variable at this stage. The sweet spot for most vegetables and herbs is 75–80°F (24–27°C) at the root zone. A heat mat under your tray is one of the best investments for consistent germination. Keep a humidity dome in place to hold moisture and prevent the plug surface from drying out between checks.
What I’d do: Check plugs every 12 hours during this window. Not because they constantly need water, but because catching a drying-out plug early is far easier than reviving a seedling that got crispy overnight.
If you’re still figuring out which medium to start in, the Rapid Rooter vs. rockwool comparison lays out the tradeoffs clearly, including how moisture management differs between the two.
Week 1–2: Light Comes In, Dome Comes Off (Gradually)
Once cotyledons open and reach for light, the seedling has crossed its first real threshold. This is when you introduce light, but the transition needs to be gradual.
Start with 14–16 hours of light per day. A T5 fluorescent or low-intensity LED panel works well here. Keep it close: 2–4 inches above the tops of the seedlings. If you’re using a high-intensity grow light meant for flowering, raise it significantly or you’ll stress seedlings that haven’t had time to harden.
Crack the humidity dome slightly for the first couple of days, then remove it entirely. This step helps prevent damping off, a fungal condition where seedling stems rot at the soil line. Damping off thrives in the stagnant, high-humidity environment under a dome that’s been closed too long. Good ventilation is the cheapest prevention available. More on diagnosing and preventing it in the dedicated damping off prevention guide.
Water during this period is still plain pH-adjusted water. The cotyledons are photosynthesizing now, but the root system is too small and fragile to handle nutrient salts. Adding nutrients too early causes tip burn, wilting, or root stunting even at very low concentrations — it’s one of the most common reasons seedlings stall in weeks one and two.
Week 2–3: First True Leaves and First Nutrients
When the first set of true leaves appears (not the rounded cotyledons, but the leaves that actually look like the plant’s mature foliage), the seedling is ready for its first taste of nutrients.
Start at quarter-strength. If your base nutrient solution at full strength targets an EC of 2.0, you’re aiming for EC 0.4–0.8 at this stage. That’s a TDS/PPM equivalent of roughly 200–400 PPM depending on your meter’s conversion factor. Mix a fresh batch, check pH (keep it at 5.5–6.0), and use it to water your plugs from above.
Don’t flood the plugs, and don’t let them sit in standing solution. At this stage, you’re still hand-watering into the plug from above rather than running a full recirculating system.
This is also the point where airflow becomes a factor. A gentle fan running for several hours a day stimulates the stem to build structural strength, a process called thigmomorphogenesis. Seedlings grown without any air movement tend to be leggy and weak, which makes transplanting harder. You don’t need a wind tunnel; a small fan on low directed near (not directly at) the tray is enough.
Light distance: if you’re using LEDs, check your manufacturer’s recommendation for seedling stage. A 100W LED panel is often pushed further away (12–24 inches) than growers expect. If seedlings are stretching upward with visible stem gaps between leaves, the light is too far. If leaf tips are whitening or curling, too close.
For growers starting seeds directly in net pots, the approach to moisture management changes significantly, which the net pot seed starting guide covers in full.
Week 3–4: Building Toward Transplant
By week three, your seedling should have two or more sets of true leaves, a visible root system starting to exit the plug, and a stem sturdy enough to stand on its own. Now you can push nutrients up to half-strength, targeting EC 0.8–1.2 (roughly 400–600 PPM).
At this EC level, you’ll start to see how your particular seedlings respond to nutrition. Watch leaf color: pale yellow suggests nitrogen deficiency, which is common if you’ve held back nutrients too long. Curling leaf edges or brown tips suggest early nutrient burn, which means you bumped up concentration too fast. Pull back and flush with pH-adjusted plain water for a day if tips are burning.
The clearest sign a seedling is transplant-ready isn’t time, it’s roots. When you see white roots visibly extending out of the bottom or sides of the plug, the plant has outgrown its starter environment. Roots should be white (not brown, not slimy), and the plant above should look healthy and vigorous.
Tip: Hold the plug gently and check the underside every couple of days during week three. When roots are 1–2 inches out of the plug, you have a short window before they start circling and becoming hard to handle without damage.
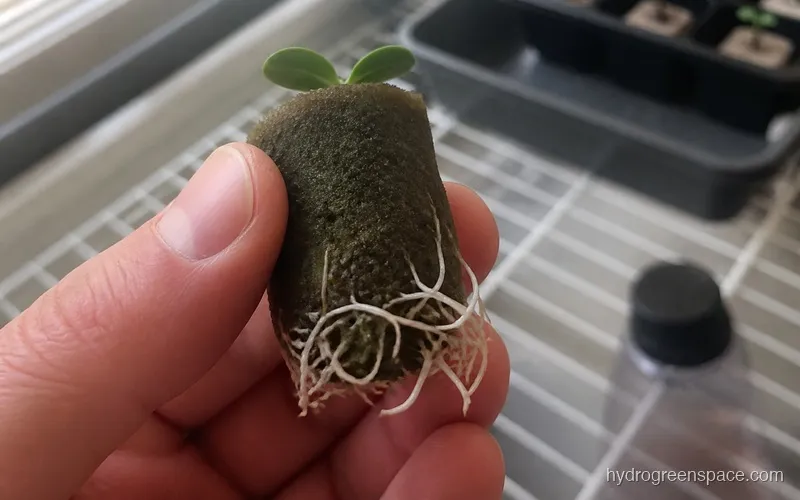
A healthy seedling ready to transfer will also tolerate slightly higher EC than what you started with, which is a good sign its root system has developed enough to absorb nutrients efficiently. The transplanting seedlings to hydroponics guide covers how to move them into your system without shocking the roots.
The EC/PPM Progression at a Glance
| Week | Stage | EC Target | Light Hours | Notes |
|---|---|---|---|---|
| 0–1 | Germination | None | 0 (covered) | Plain pH water only, heat mat 75–80°F |
| 1–2 | Cotyledons | None | 14–16 hrs | Remove dome gradually, watch for damping off |
| 2–3 | First true leaves | 0.4–0.8 EC | 14–16 hrs | Quarter-strength nutrients, add gentle airflow |
| 3–4 | Transplant-ready | 0.8–1.2 EC | 16–18 hrs | Half-strength nutrients, roots visible outside plug |
This progression matters because jumping straight to full-strength nutrients the moment you see leaves is the fastest way to stall a seedling’s development. Each phase has a specific physiological reason for the EC level, not just an arbitrary “start low, go slow” rule.
What to Do When Seedlings Go Wrong
If your seedlings are dying after sprouting, the cause almost always falls into one of these categories:
Damping off: Stem collapses at the base, plug is soggy. Fix: better airflow, reduce moisture, ensure dome is vented or removed.
Nutrient burn: Tips brown and curl up. Fix: flush with plain water, cut EC, wait 24–48 hours before reintroducing nutrients at a lower level.
Light stress: Leaves pale or white where light hits them directly. Fix: raise light, check distance again. Seedlings are far more light-sensitive than mature plants.
Root problems: Roots turn brown or slimy when you pull the plug. This usually happens when plugs stay too wet. Fix: let the medium approach dry (not fully dry) before re-watering, ensure drainage.
Stretching: Long gaps between leaves, thin weak stems. Fix: lower the light, add a fan.
If you’re starting seeds without rockwool and experiencing germination issues before you even get to this stage, working through the rockwool-free germination methods can help rule out medium-related causes.
The difference between seedlings that thrive and ones that limp into transplant is almost always about these four weeks. Get the environment right (temperature, humidity, airflow, light distance, and a slow nutrient ramp) and you’ll have plugs that hit your hydroponic system with the root mass needed to take off fast.