
How to Germinate Seeds Fast for Hydroponics
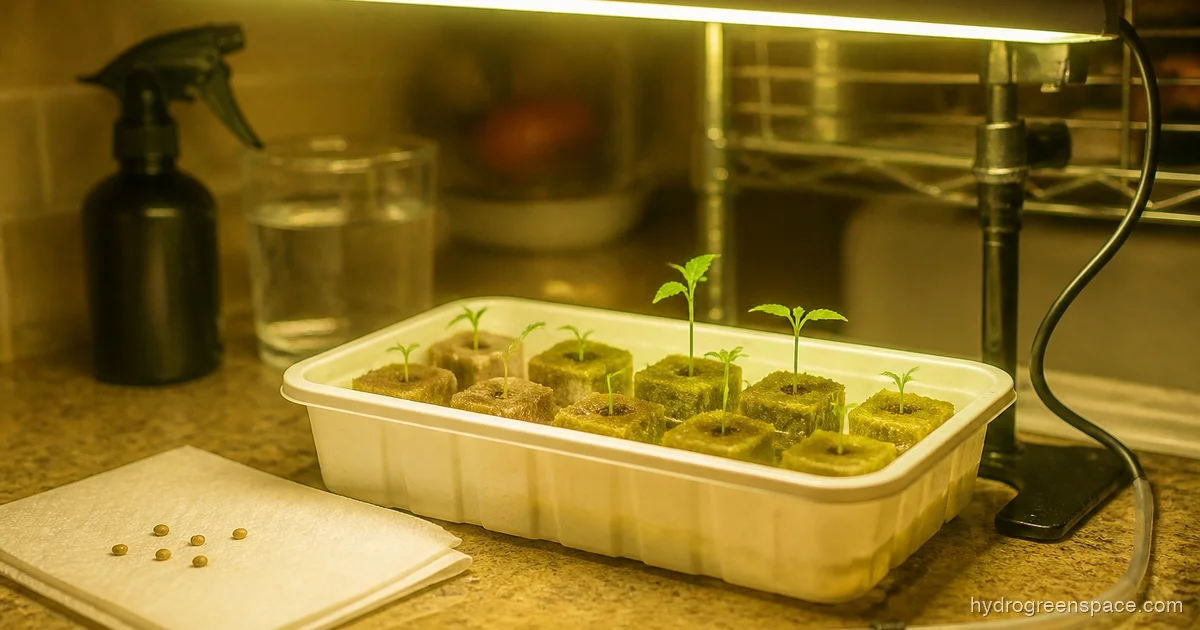
Most seeds will sprout eventually if you leave them in a damp medium and hope for the best. But “eventually” in hydroponics means you’re staring at an empty tray for two weeks, second-guessing yourself, and then starting over. If you want to germinate seeds fast for hydroponics, the answer isn’t a single magic method: it’s matching the right technique to the right conditions from day one.
Here’s what actually controls germination speed, how the common methods compare side by side, and what to do when your seeds just won’t cooperate.
How Long Germination Actually Takes
Most vegetable seeds germinate between 2 and 7 days when conditions are right. Lettuce and herbs tend to pop in 2 to 3 days. Tomatoes and peppers take 5 to 10 days, sometimes longer. Cucumbers fall in the middle at 3 to 5 days.
Those timelines assume good conditions. If you’re seeing 14-plus days with no sign of life, something in your setup is off, not the seeds. Old seeds stored poorly can add a few days, but they shouldn’t add two weeks.
One thing worth knowing: the moment a seed contacts moisture, it begins a process called imbibition, water absorption that triggers the embryo inside to wake up. Everything after that is about keeping the environment supportive enough for the seedling to emerge without interruption.
The 3 Factors That Actually Control Speed
Before comparing methods, understand what’s doing the work.
Heat is the biggest lever you have. Most seeds germinate fastest between 72°F and 80°F (22°C to 27°C). Drop below 65°F and germination slows dramatically or stalls. This is why seeds left on a cold garage shelf take forever. It’s not the medium, it’s the temperature. A seedling heat mat solves this entirely and costs very little.
Moisture needs to be present but not excessive. Seeds need humid air around them and a damp (not soaked) medium. Sitting in pooled water cuts off oxygen to the seed and triggers rot before anything sprouts. This is the most common mistake beginners make: they think wetter equals faster, and it doesn’t.
Oxygen matters more than most people expect. The seed needs oxygen during germination, and a waterlogged medium suffocates it. This is also why the paper towel method often outperforms starter cubes: the towel can hold moisture while still exposing the seed to air on both sides.
Method Comparison: Speed vs. Reliability
Paper Towel Method (Fastest)
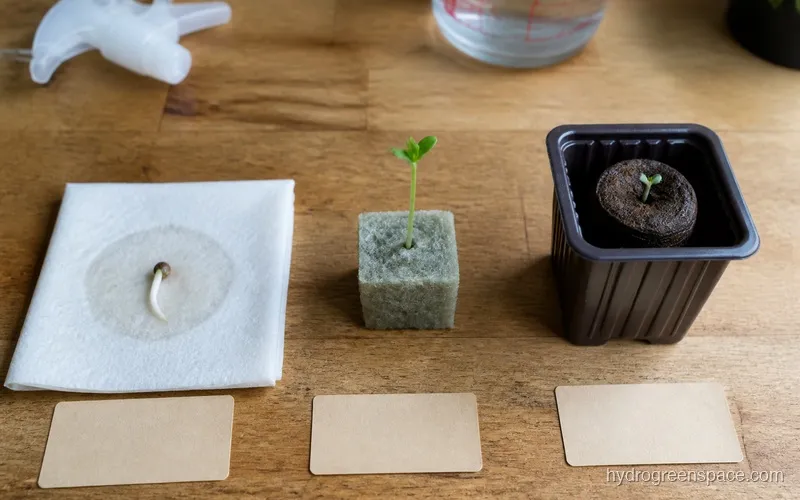
Wet a paper towel until damp but not dripping, place seeds inside, fold it over, put it in a zip-lock bag or between two plates, and set on a heat mat. Most seeds will show a radicle (the first root tip) in 24 to 48 hours.
The downside: you have to transfer the sprouted seed to your growing medium, and that handling can damage a fragile tap root if you’re not careful. Works best for seeds you’ve had for a while and want to pre-screen before committing to a tray.
What I’d do: Use the paper towel method for older seed packets you’re not sure about. Test a few first. If you get good germination, start the rest in your actual propagation medium.
Starter Cubes: Rockwool or Rapid Rooter (Most Reliable)
Starter cubes are the industry standard for a reason. You push the seed in, keep the cube moist, maintain humidity with a dome, and let it work. Germination typically takes 3 to 5 days, sometimes 2 for fast-sprouting varieties.
Rockwool needs to be pH-adjusted before use: soak it in water at pH 5.5 for an hour. Skip that step and the high pH will slow germination noticeably. Rapid Rooter plugs are easier for beginners because they’re pH-neutral and made from composted organic material, so they go straight into the tray. If you’re deciding between the two, the Rapid Rooter vs. rockwool comparison breaks down the trade-offs in detail.
The advantage here is zero transplant shock. The cube goes directly into the net pot once roots are visible at the bottom.
Coco Coir Plugs (Best Balance)
Coco coir sits between the two above in terms of speed and convenience. Germination runs 3 to 5 days, similar to rockwool, but coco is more forgiving of beginner watering mistakes because it holds moisture evenly without going anaerobic as easily. It also has a neutral pH and natural antifungal properties that help prevent damping off.
Starting seeds in coco coir takes a bit more setup than a plug tray, but if you’re planning to run a coco-based system or want a medium that transfers cleanly to hydroponics, it’s worth it.
Seed Prep: When to Soak and When to Skip It
Most seeds don’t need pre-soaking. For small seeds like lettuce, basil, or cilantro, soaking is unnecessary and can actually cause them to clump and become harder to handle.
When soaking helps: Large, hard-coated seeds like corn, squash, beans, and beets benefit from a 4 to 12 hour soak in room-temperature water before planting. The hard coat restricts water uptake, and soaking softens it so imbibition starts faster.
The H2O2 trick for old or stubborn seeds: Mix 1 teaspoon of 3% hydrogen peroxide per cup of water, soak seeds for 30 minutes, then rinse and plant immediately. The hydrogen peroxide lightly breaks down the seed coat and kills surface mold or bacteria that could prevent germination. This works particularly well for seeds stored more than a year or seeds from previous seasons that have been sitting in a drawer. Don’t exceed 30 minutes, as longer soaks can damage the embryo.
Setup: Heat Mat, Humidity Dome, and Water Quality
Heat Mat
A heat mat raises your tray temperature 10 to 20 degrees above ambient, which puts you in that ideal 72°F to 80°F range even in a cool space. Place the tray directly on the mat and use a dome to trap heat and humidity above the seeds. Remove the dome once seedlings emerge to prevent excess moisture buildup.
Humidity Dome
The dome keeps humidity above 70%, which speeds germination by reducing moisture loss from the medium surface. If you don’t have a dome, plastic wrap over the tray works fine. Just leave a small gap for air exchange, because a fully sealed environment can get too warm and promote mold.
Water Quality
Water quality is easy to overlook, but it matters. If your tap water is heavily chlorinated or has a high mineral content, it can slow germination. Chlorine is easy to deal with: let tap water sit uncovered for 24 hours and it off-gasses on its own. For high mineral content (hard water), filtered or reverse osmosis water during germination gives more consistent results.
Keep your germination water between pH 5.8 and 6.2. Outside that range, nutrient and water uptake at the seed level becomes less efficient even before any nutrients are involved.
Warning: Don’t add nutrients to germination water. Seeds have everything they need inside them to germinate. Adding nutrient solution raises EC and can draw moisture away from the seed through osmosis, which slows things down instead of speeding them up.
When to Move Seedlings Into the Hydroponic System
Once a seedling has its first set of true leaves (not the cotyledons, but the actual leaf shape of that plant), it’s ready for the system. For most plants, that’s 7 to 14 days after germination.
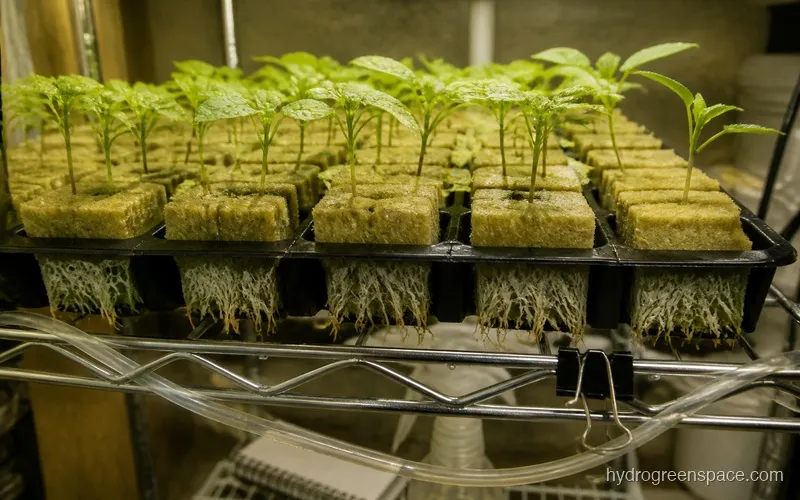
Don’t rush this step. A seedling moved too early into a full nutrient solution will often stall because its root system isn’t ready to uptake at the rate you’re feeding it. Wait until you see white roots emerging from the bottom of the cube or plug.
Transplanting seedlings into hydroponics at the right stage makes a significant difference in how fast they establish. The first week after transplant, keep nutrient concentration lower than normal (around half strength) and let the plant adjust.
For varieties you plan to start directly in net pots without a separate tray, the approach differs from plug-tray germination. Check the net pot seed starting guide for how that process works.
Why Seeds Won’t Germinate (And Why Seedlings Die After Sprouting)
Seeds not germinating at all:
- Temperature too low (most common cause)
- Medium too wet and oxygen-depleted
- Seeds are old or were stored improperly (test viability with the paper towel method first)
- pH of water too far outside the 5.8 to 6.2 range
Seeds germinate but seedlings collapse: This is almost always damping off, a fungal condition that attacks seedlings at the stem base. It’s caused by high humidity combined with poor air circulation, or a medium that stays too wet. Preventing damping off starts with not overwatering, not misting the stems directly, and introducing a small fan for air circulation once seedlings emerge.
Seeds germinate unevenly across a tray: Usually a heat distribution problem. The center of the tray is warmer than the edges on most heat mats. Rotate the tray every day or two, or invest in a mat with a built-in thermostat.
Leggy, stretched seedlings: Light is too far away or intensity is too low. Seedlings stretch toward the light when they’re not getting enough. Drop your grow light closer or increase intensity. This isn’t a germination issue. It’s a light issue the moment they emerge.
Once you’ve dialed in your germination setup, the rest of the hydroponic process gets easier because you’re starting with strong, healthy seedlings instead of struggling transplants. If you want to go deeper on growing options for those seedlings, caring for seedlings after germination covers what to do once they’re in the system and actively growing. For everything that happens from the very first seed to transplant day, the seed starting for hydroponics guide covers the complete process.