
How to Germinate Seeds for Hydroponics Without Rockwool
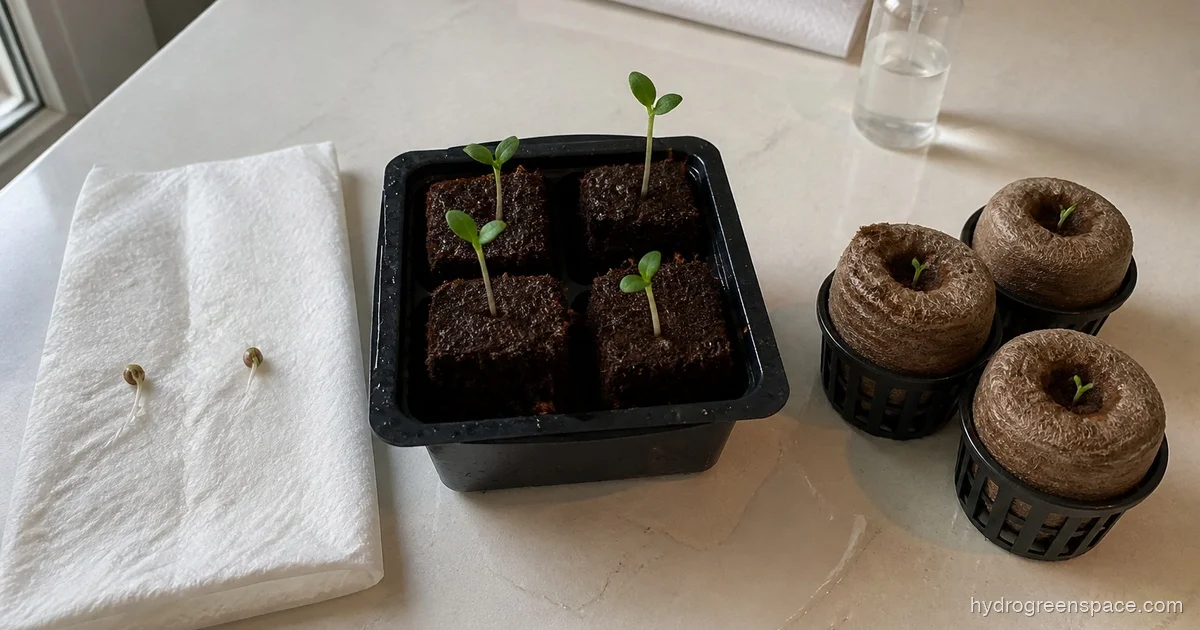
Rockwool works great, but it’s not the only way to get a seed into a hydroponic system. I’ve started seeds in paper towels on my kitchen counter, in coco plugs under a humidity dome, in peat pellets squeezed into net pots, and even directly in perlite. Every method works. The differences come down to cost, messiness, and how well the medium transitions into your specific system.
If you’ve been putting off your first grow because you don’t have rockwool on hand, or you just want to know your options, this breaks down exactly how to germinate seeds for hydroponics without rockwool, method by method.
The Cheapest Method: Paper Towel Germination
No growing medium at all, just a damp paper towel and a warm spot. This is how most home growers start, and it’s genuinely hard to beat for cost and simplicity. The only downside is the transfer step, which requires a bit of care.
How to prep it: Wet a paper towel until it’s damp but not dripping. Wring it out, fold it in half, and place your seeds inside. Slide the whole thing into a zip-lock bag or place it on a plate covered with another plate. Keep it somewhere between 70-80°F.
What to plant: One seed per spot, about an inch apart. Don’t stack them.
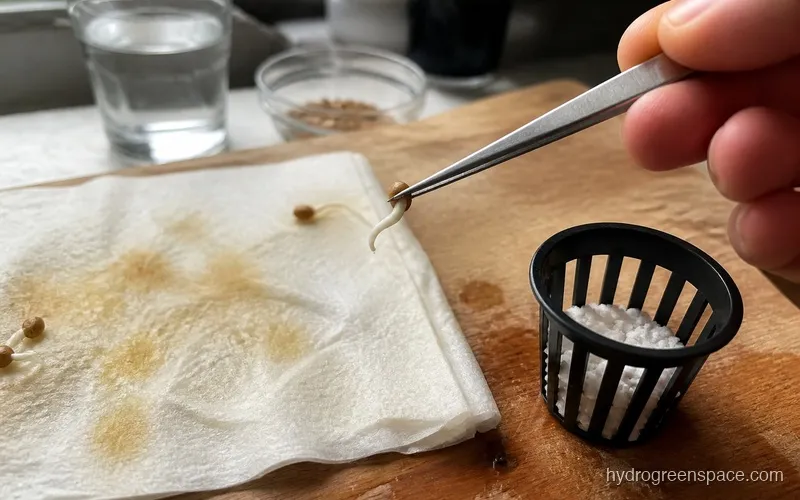
What to watch for: You’re looking for the radicle, the tiny white tap root, to emerge. Most lettuce and basil seeds show this within 24-48 hours. Tomatoes and peppers take 3-5 days. Once the radicle is 0.5-1 inch long, it’s ready to transfer.
When to transfer: As soon as that radicle hits about an inch, move it. Any longer and the root will start to branch and tangle in the paper fibers, which makes extraction painful and increases the chance of snapping the tap root.
Common mistake: Waiting until you see a full seedling before moving it. At that stage the root has wrapped itself into the paper towel and you will almost certainly damage it. Move at first radicle, not later.
To transfer, use tweezers or your fingertip and gently lift the seedling by the seed coat (never the root) and nestle it into a net pot filled with your chosen medium. Point the radicle downward. Cover loosely and keep it misted.
Coco Coir Plugs and Loose Coco
If you already use coco coir as a growing medium in your system, starting seeds in it is a natural fit. Coco coir holds moisture well, drains fast enough to avoid rot, and has essentially no nutrient content on its own, which is exactly what you want during germination (seeds carry their own food supply for the first week or two).
How to prep it: For loose coco, fill a small container or net pot about two-thirds full, wet it with pH-balanced water (target 5.5-6.0), and press a small divot in the center about 0.25 inches deep. For pre-made coco plugs, just soak them in pH-balanced water until they expand, then squeeze out the excess.
How to plant: Drop one seed per plug or divot. Cover lightly. Don’t pack it down.
What to watch for: Keep the surface damp but not wet. Coco dries out faster than rockwool, so check it at least once a day. Damping off is less of a risk in coco than in peat because coco doesn’t compact and smother roots, but it can still happen if airflow is poor and the surface stays soaked.
When to transfer: Once the seedling has its first true leaves, it’s ready to move into the system.
Peat Pellets
Peat pellets are flat discs that expand into tall cylinders when you add water. They’re cheap, widely available, and come with a mesh skin that holds everything together, which makes them easy to drop straight into a net pot. They’re one of the most beginner-friendly options for using peat pellets for hydroponics.
How to prep it: Place pellets in a tray, pour warm water over them, and let them soak for about 5 minutes. They’ll expand to 3-4x their dry height. Drain any standing water from the tray.
How to plant: Push one seed about 0.25 inches into the top center of the pellet. Pinch the opening closed. No need to cover with anything extra.
What to watch for: Peat retains moisture very well, sometimes too well. If your germination tray has a humidity dome, crack it for an hour or two each day after seedlings emerge to prevent damping off. Peat pellets run slightly acidic on their own (pH around 5.5), which actually works in your favor for hydroponics.
When to transfer: Once the roots start poking through the mesh skin of the pellet, it’s time. You can drop the whole pellet into a net pot and fill around it with hydroton or perlite.
Rapid Rooters and Oasis Cubes
These are foam-based plugs made specifically for hydroponic propagation. Rapid Rooters and Oasis Cubes are what you’ll find at most hydroponic shops. They’re not rockwool, and they behave quite differently. For a full breakdown, see the Rapid Rooter vs rockwool comparison.
Rapid Rooters in particular are nearly foolproof. They come pre-moistened, have an ideal structure for air-to-water ratio, and their root channels guide the radicle straight down. I keep a bag of these for any germination run where I need a high success rate.
How to prep it: If using Rapid Rooters, no soaking needed. Just open the bag and plant. If using Oasis Cubes, soak in pH-balanced water (5.5-6.0) for 30 minutes, then allow to drain.
How to plant: Each plug has a pre-formed hole. Drop one seed in, pinch the top lightly. That’s it.
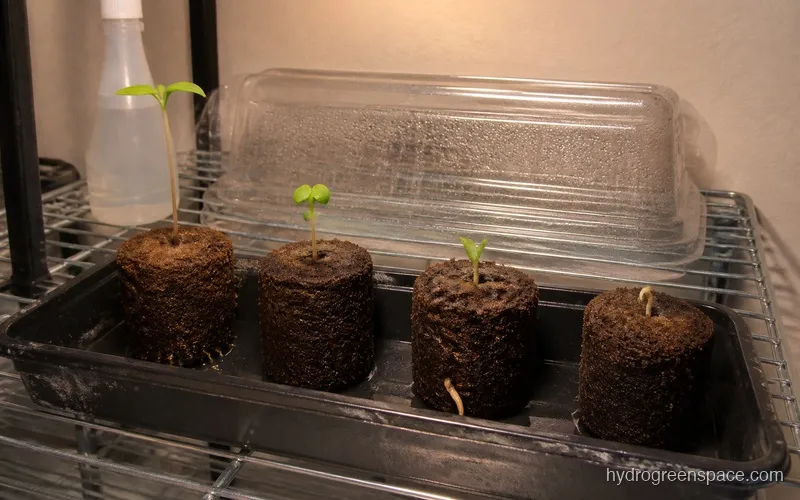
What to watch for: Keep plugs in a propagation tray with a humidity dome for the first 3-5 days. Lift the dome for 30 minutes in the morning and evening to prevent mold. The plugs should feel damp but not sitting in water.
When to transfer: When roots are visibly emerging from the bottom of the plug. Drop the whole plug into a net pot and fill in around it.
What I’d do: For any critical germination run where I can’t afford failures, I use Rapid Rooters. The consistent results justify the cost.
Perlite and Vermiculite
If you’ve already read up on perlite vs vermiculite for seed starting, you know these two minerals work differently. Perlite is all about drainage and aeration. Vermiculite holds more moisture and is better for seeds that need sustained warmth and humidity to germinate (peppers, tomatoes, herbs).
For hydroponics specifically, a 50/50 mix of perlite and vermiculite in a net pot gives you a solid germination environment that transitions directly into the system without removing the seedling from any plug.
How to prep it: Rinse perlite thoroughly before using (it’s dusty straight from the bag). Combine your mix in a net pot, wet it with pH-balanced water.
How to plant: Press the seed about 0.25-0.5 inches deep, cover gently. The mix won’t form a hard crust, so you don’t need to worry about emergence issues.
What to watch for: Perlite drains very fast, so you’ll need to water or mist more frequently. Check every 12 hours. Damping off risk is low with perlite because it doesn’t stay wet long enough to create the conditions that fungal pathogens love.
When to transfer: The net pot goes directly into your system once the seedling has true leaves and a visible root system. This is the smoothest transition of any method because there’s nothing to remove or disturb.
After the Radicle: What Comes Next
Once germination is complete, regardless of which method you used, you’re moving into the seedling phase. This is where most beginners make the leap to nutrients too fast. Wait until the seedling has its first set of true leaves before introducing any nutrient solution, and when you do start, come in at a low EC (around 0.8-1.2 for most leafy crops) and build from there.
Your propagation tray for germinating seeds plays a bigger role than it looks. A cheap tray with a loose dome lets humidity escape unevenly and creates hot spots. A well-fitting dome keeps conditions consistent until the seedling no longer needs the extra humidity.
Pay attention to preventing damping off in seedlings during this window. It’s most likely to strike in the 5-10 days after germination when stems are still thin and conditions are humid. If you see it early, you can usually recover by improving airflow and pulling back on moisture — catch it late and the seedling is a write-off.
Warning: Never place a freshly germinated seedling directly under a strong grow light. The cotyledons (seed leaves) are fragile and will bleach if hit with high-intensity light before the root system is established. Start with low intensity or keep the light further away for the first week.
If you want to know which crops give you the best return on your germination effort, check out the guide to best seeds to start hydroponically. Lettuce and spinach are the obvious starting points, fast germination, predictable growth, forgiving systems. Tomatoes and peppers take longer and need more controlled conditions, but the payoff is worth it once you’ve got the germination process dialed in.
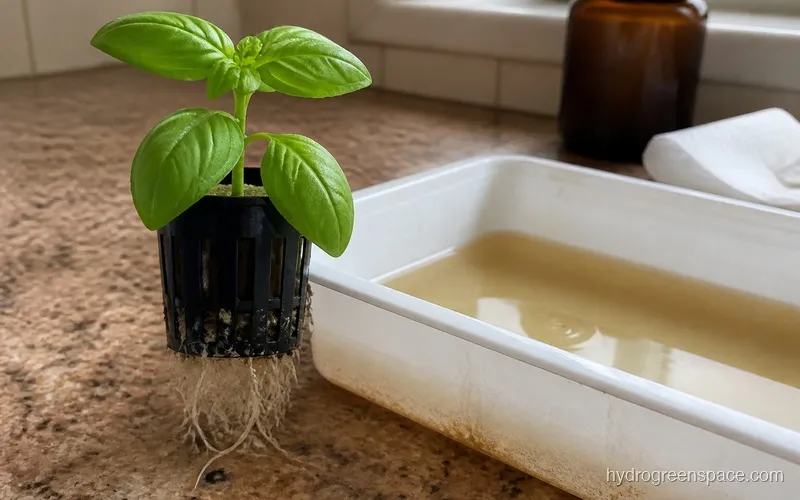
Once you’ve got healthy seedlings with a root system that’s ready to go, the next step is getting them into your system properly. Transplanting your seedlings to the system covers timing, how to handle different root lengths, and what to expect from each type of hydroponic setup during that first week after transplant. The seed starting for hydroponics guide covers the full picture across every germination method, from choosing your media to transplant day.