
Seed Starting for Hydroponics: Complete Grower's Guide
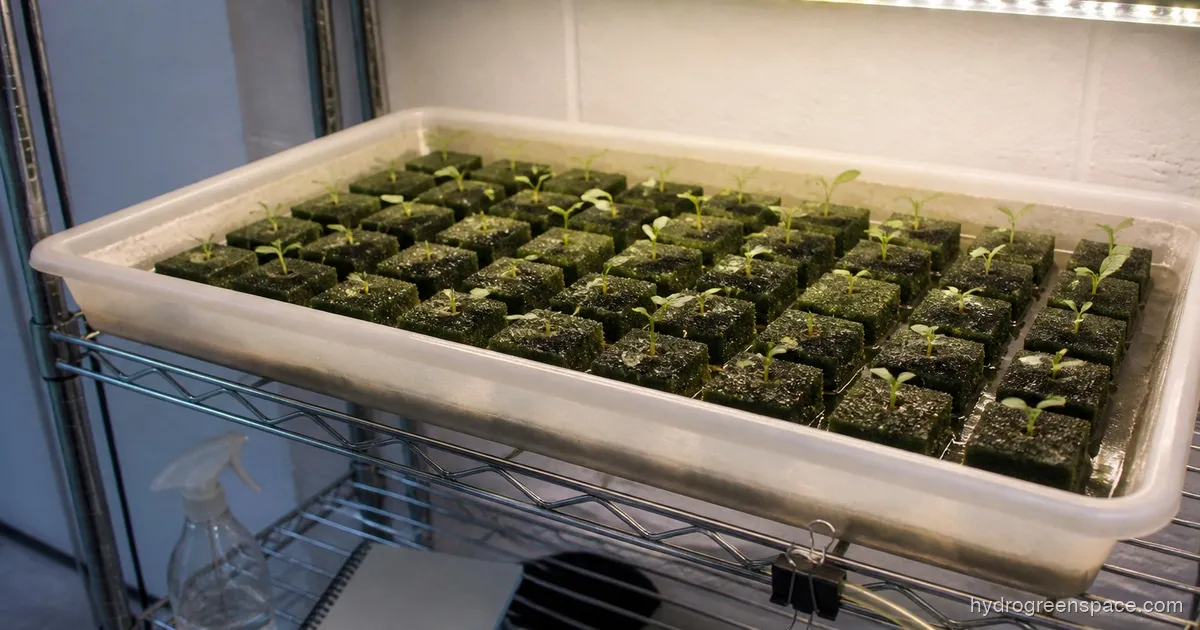
Getting seeds into a hydroponic system sounds simple until you’ve watched a full tray of lettuce sprout beautifully and then collapse overnight, or transferred a seedling to your DWC bucket only to have it stall for two weeks before giving up entirely. The issue is never the seed. It’s almost always something that happened in those first two to three weeks, before the plant ever touched nutrient solution.
This guide covers the entire seed starting hydroponics process from the moment a seed hits your germination media through transplant day and the first week in your system. Each section links to a full deep-dive on that topic, so you can skim the overview here and go as deep as you need on whatever’s giving you trouble.
The short version: seeds need warmth, moisture, and darkness to germinate. Seedlings need light, humidity, and patience. The growing medium you choose affects how smoothly the transition into your system goes. And damping off, the disease that kills seedlings overnight, is almost entirely preventable once you understand what causes it.
Starting Seeds Without Rockwool
Rockwool is the default medium most hydroponic guides recommend, and it genuinely works well. But it’s not the only option, and for a lot of home growers it’s not even the best one. Paper towels cost nothing and germinate seeds in 2 to 5 days. Coco coir plugs, peat pellets, Rapid Rooters, and perlite/vermiculite mixes all work, each with different tradeoffs in cost, messiness, and how cleanly they transition into specific system types.
The cheapest approach that actually works is the paper towel method: dampen a paper towel, wrap the seeds inside, seal it in a zip-lock bag, and put it somewhere 75 to 80 degrees Fahrenheit. Most seeds crack in 2 to 4 days. The catch is the transfer, once the radicle appears, you need to move each seedling into a starter plug without breaking that fragile root. It’s fiddly but very doable once you’ve done it a few times.
For the full guide, see How to Germinate Seeds for Hydroponics Without Rockwool.
Rapid Rooter vs Rockwool: Choosing the Right Starter Plug
If you’re choosing between Rapid Rooters and rockwool, the honest answer is that neither is universally better. Rapid Rooters are made from composted bark and foam, hold moisture naturally, and don’t need any pH prep beyond a quick water soak. They’re more forgiving for beginners. Rockwool is more consistent at scale, works extremely well for cloning, and is compatible with every system type, but it’s naturally alkaline and will cause pH problems if you don’t pre-soak it in pH 5.5 water before use.
For seeds specifically, Rapid Rooters have a slight edge because the moisture retention does a lot of the work for you. For clones, rockwool’s structure is better at holding a cutting upright while roots develop. If you’re running a DWC or Kratky setup, both work equally well. For NFT, rockwool cubes tend to seat more reliably in the channels.
For the full guide, see Rapid Rooter vs Rockwool: Which Should You Use?.
Seed Starting in Coco Coir
Coco coir is popular because it’s sustainable, pH-neutral, and available everywhere. The part that catches most growers off guard is a calcium-binding problem built into how coco works. Fresh coco coir preferentially absorbs calcium and magnesium from whatever it contacts, which means unbuffered coco will pull calcium out of your seedlings’ root zone even if your nutrient solution is perfectly dialed in. For hydroponic growers, this can wipe out an entire tray of seedlings before they ever develop true leaves.
The fix is buffering: soak your coco in a calcium-magnesium solution (about 200 ppm Cal-Mag) for 24 hours before use, then rinse. After buffering, the cation exchange sites are saturated and coco stops competing with your plants for calcium. It’s one extra step, but skipping it is the source of most “random” seedling failures people experience with coco.
For the full guide, see Seed Starting in Coco Coir: The Buffering Step That Matters.
Seed Starting in Peat Pellets
Peat pellets are probably the most beginner-friendly germination media available. You drop one in warm water, it expands in 30 seconds, you push a seed into the divot, and put it under a humidity dome. They hold moisture consistently, air circulation is good, and most seeds germinate reliably. For someone just getting started with hydroponic seed germination, peat pellets remove a lot of variables.
The complications show up at transplant time. Peat pellets come in a mesh netting that holds the pellet together. In soil, that mesh breaks down. In hydroponics, it doesn’t, and it can restrict root growth in your net pot. For most growers the solution is simple: gently tear the mesh away before placing the pellet in your net cup. Also worth knowing: peat is naturally acidic (pH around 4.0 to 4.5), which means your reservoir pH may drift after transplanting while the pellet stabilizes.
For the full guide, see Seed Starting in Peat Pellets for Hydroponics.
Transplanting Seedlings to Your Hydroponic System
Transplanting is where a lot of otherwise healthy seedlings meet an early end. Not because the seedling wasn’t ready, but because the details that matter most get skipped: what counts as “ready to transplant,” how to handle a seedling that germinated on a paper towel versus one in a plug, and what nutrient strength to start with during that first critical 48 hours.
A seedling is ready to transplant when you can see roots emerging from the bottom of the plug or pellet. That’s the real signal, not the number of leaves or how many days have passed. When you move it into your system, start with a very dilute nutrient solution and raise it gradually over the first week. Hitting a fresh transplant with full-strength nutrients is one of the most common causes of transplant shock.
For the full guide, see Transplanting Seedlings to Hydroponics: Step-by-Step.
Damping Off Prevention for Hydroponic Seedlings
Damping off is the disease that kills seedlings overnight. One day your germination tray looks fine; the next morning, stems are pinched at soil level and plants are toppled over. By the time you see it, those plants are already gone and nothing will bring them back. The good news is it’s almost entirely preventable.
In hydroponic seed trays, damping off is usually caused by three things working together: standing water around the stem base, stagnant air inside the humidity dome, and temperatures that are warm enough for fungal growth but not optimized for seedling development. The fix is airflow. Cracking the dome for an hour each day starting on day two creates enough air exchange to prevent the fungal conditions that cause collapse. Overwatering your plugs is the other culprit, and plugs should feel like a wrung-out sponge, not saturated.
For the full guide, see Damping Off Prevention for Hydroponic Seedlings.
Choosing the Best Seeds for Hydroponics
You don’t need seeds marketed as “hydroponic.” Any open-pollinated or hybrid seed will germinate the same way. What matters is variety selection: whether the plant’s mature size, root structure, and days-to-harvest are a good fit for your system. Leafy greens and herbs are the best starting point for most home growers because they’re fast, compact, and forgiving. Fruiting crops like tomatoes and peppers take longer, need more space, and require additional support, but they’re absolutely doable once you have seedling management dialed in.
Some plants are practical to germinate hydroponically but poor fits for an indoor hydroponic system long-term: carrots, beets, large brassicas, corn, and climbing beans are all examples. They’ll germinate fine; they just don’t work well in compact systems.
For the full guide, see Best Seeds for Hydroponics: Varieties That Thrive.
How to Germinate Seeds Fast for Hydroponics
If your seeds are taking longer than expected, the answer almost always comes down to temperature. Seeds at 65 degrees Fahrenheit can take two to three times as long to germinate as seeds at 78 degrees. A heat mat under your propagation tray is the single most impactful investment for faster, more consistent germination. Beyond temperature, moisture consistency and seed age (older seeds have lower viability) are the next two factors.
For certain crops, a pre-soak in plain water for 4 to 12 hours can soften the seed coat and speed up germination. This works well for larger seeds like squash, cucumbers, and beans. For small seeds like lettuce and basil, soaking isn’t necessary and can cause them to clump together and become difficult to handle.
For the full guide, see How to Germinate Seeds Fast for Hydroponics.
Using Net Pots for Seed Starting
Net pots are the standard container for hydroponic systems, and you can start seeds directly in them rather than using a separate tray. The advantage is that you skip transplanting entirely: once roots develop, the seedling is already seated in the pot it will grow in. The complication is moisture management. Net pots drain quickly, and bare seeds will dry out before they germinate unless you’re using a starter plug that holds moisture consistently.
The most reliable approach is to seat a Rapid Rooter plug or rockwool cube in the net pot, plant the seed in the plug, and keep the plug moist while the seed germinates. A 2-inch net pot fits a standard 1-inch rockwool cube; a 3-inch net pot gives you more stability and room for larger plugs.
For the full guide, see Net Pot Seed Starting Guide for Hydroponics.
Week-by-Week Hydroponic Seedling Care
The window between germination and a transplant-ready seedling is where crops actually succeed or fail. Week one is mostly hands-off: keep the dome on, maintain moisture, don’t add nutrients. Week two is when light becomes critical and the dome starts coming off gradually to harden the seedlings. Week three brings first true leaves and the beginning of nutrient introduction at very low concentrations. By week four, most crops should be showing visible root development and ready for their system.
EC progression matters here. Starting seedlings at full nutrient strength is one of the most reliable ways to stunt growth. A good starting point is around 0.5 to 0.8 EC for the first week of nutrient introduction, increasing slowly to 1.2 to 1.5 by transplant time for most leafy crops.
For the full guide, see Hydroponics Seedling Care Guide: Week-by-Week.
Picking the Right Propagation Tray
The propagation tray holding your plugs matters more than most people expect. A tray designed for rockwool cubes has a different cell geometry than one designed for peat pellets, and using the wrong tray with your media leads to plugs that shift around, dry out unevenly, or don’t seat correctly when it’s time to transfer. The humidity dome that fits the tray also affects how much airflow you can manage during the critical hardening phase.
If you’re using Rapid Rooters, a standard 50-cell or 72-cell insert with a dome works well. For rockwool cubes, a flat tray without inserts is cleaner. Peat pellets do best in shallow cell trays that support the expanded pellet shape without compressing it.
For the full guide, see Best Propagation Trays for Hydroponics: 2025 Guide.
If you’re new to starting seeds for hydroponics, the best place to begin is choosing your germination media and reading that full guide before you buy anything. Most problems in the seedling stage trace back to that first decision: what the seed is sitting in, how much moisture it’s holding, and whether that media will transition cleanly into your specific system. Get that right, and everything downstream is much easier to manage.