
DIY Air Stone Hydroponics: Build, Place & Clean It
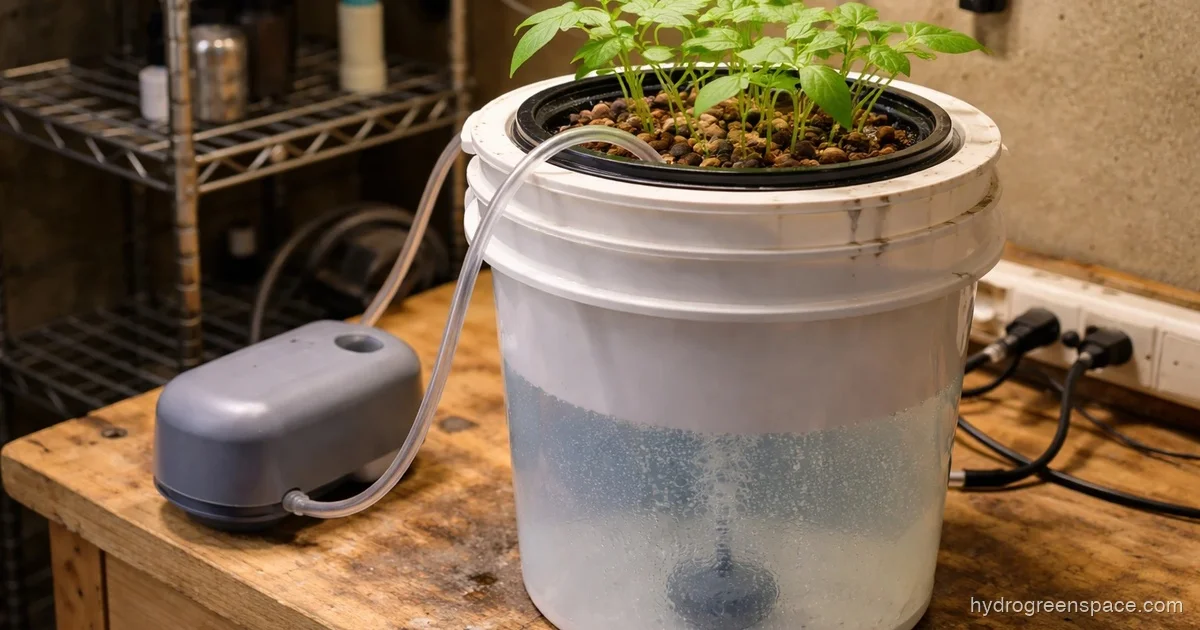
Air stones are one of the most overlooked parts of a hydroponic setup, until roots start turning brown and plants stop growing. The good news is that you don’t need an expensive diffuser to get solid dissolved oxygen levels in your reservoir. A basic DIY air stone setup costs a few dollars and takes about 15 minutes to put together.
Here’s what you need to know about building one, placing it correctly, and keeping it clean enough to actually do its job.
What an Air Stone Actually Does in Your Reservoir
Plants in a hydroponic system get their nutrients from water, but those roots still need oxygen. Without enough dissolved oxygen in the nutrient solution, roots can’t uptake nutrients efficiently and you create perfect conditions for pythium (root rot). An air stone solves this by pushing air bubbles through the water, increasing the surface agitation and oxygen exchange.
In a DWC (deep water culture) system, where roots hang directly in the water, this is non-negotiable. The roots are submerged, the reservoir is sealed, and without constant aeration, that water goes stagnant fast.
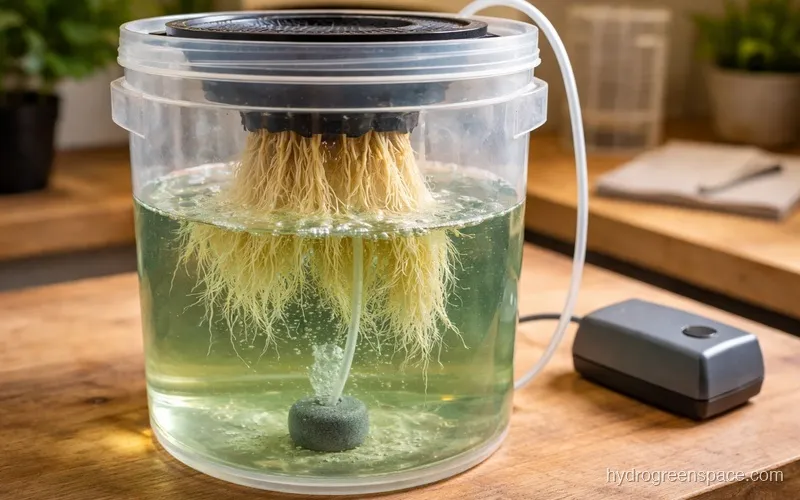
The air stone itself doesn’t add oxygen by dissolving air directly. What it does is break the airflow into small bubbles, maximizing contact between air and water. Smaller bubbles mean more surface area and better oxygen transfer. A single large bubble rising to the surface does almost nothing compared to a cloud of micro-bubbles from a quality porous diffuser.
Two DIY Air Stone Methods That Actually Work
Method 1: Porous Lava Rock or Ceramic Diffuser
This is the most common homemade air stone approach and the closest to a commercial unit. You’ll need:
- A piece of porous lava rock (the kind sold for landscaping or aquarium use) or an unglazed ceramic piece
- Aquarium airline tubing (3/16-inch standard)
- A small barbed fitting or airline connector
- Aquarium-safe silicone sealant
- An air pump rated for your reservoir size
Cut your lava rock to a manageable size (roughly a golf ball is enough for a 5-gallon reservoir). Drill or carve a small channel into one side, push the airline tubing in firmly, and seal around the joint with silicone. Let it cure for 24 hours before submerging. The porous rock breaks airflow into tiny bubbles far better than open-ended tubing alone.
Tip: Test it in a bucket of plain water before putting it in your system. You want to see an even cloud of bubbles rising from the surface of the stone, not a few large ones pushing out from a single point. If you see the latter, the silicone is forcing air through one channel only.
Method 2: Repurposed Aquarium Diffuser Material
Cheap commercial air stones from pet stores often fail quickly in hydroponic use because the mineral content in nutrient solution clogs them faster than plain aquarium water. But the material itself (compressed silica or ceramic) is worth using if you can get it for next to nothing.
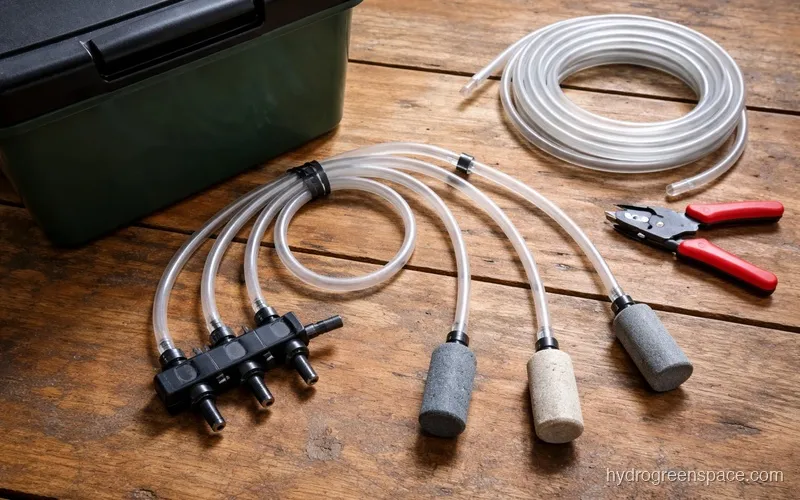
The better DIY approach: buy a pack of cheap aquarium air stones (usually a few dollars for 10), then run them in parallel on a gang valve splitter. Instead of relying on one stone to aerate your entire reservoir, you distribute the airflow across three or four smaller stones placed at different points. This gives you better coverage and means one clogged stone doesn’t tank your whole system.
For a homemade air stone hydroponics setup on a budget, this parallel approach is hard to beat.
Sizing Your Aeration for the Reservoir
Air stone placement in hydroponics matters less than people think if your pump output is wrong to begin with. Get the sizing right first.
A general rule: you want at least 1 watt of air pump output per gallon of reservoir volume. For a standard 5-gallon bucket hydroponic system, a single-outlet pump rated at 5-8 watts is enough. For a larger tote-based system, you’ll need more output and likely multiple stones.
| Reservoir Size | Minimum Pump Output | Stones Recommended |
|---|---|---|
| 5 gallons | 5-8W | 1 medium |
| 10-15 gallons | 10-15W | 2 medium |
| 20-30 gallons | 20W+ | 3-4 small or 2 large |
| 50+ gallons | 40W+ | 4-6 distributed |
Undersizing is the most common cheap air stone hydroponic mistake. A weak pump struggling through a clogged stone delivers almost no dissolved oxygen, while the grower thinks they’re covered.
Where to Place the Air Stone in Your System
Put the air stone at the lowest point of your reservoir, toward the center if possible. Here’s why: bubbles rise vertically, so central placement means oxygenated water circulates outward as bubbles reach the surface. Corner placement creates a dead zone on the opposite side of the reservoir.
For a DIY DWC hydroponic system, the stone should sit on the bottom of the bucket, directly below the net pot. Roots will eventually grow down toward it. Don’t panic when they do. The air stone placement in that spot means the root tips are constantly in the most oxygenated zone of the water.
For larger systems like a hydroponic tote with multiple plant sites, one central stone isn’t enough. Run airline tubing along the bottom with multiple stones every 12-18 inches, or use a ring diffuser that wraps the perimeter.
What I’d do: In any system over 10 gallons, I weight the airline tubing down with a clean stainless steel nut threaded onto the tube near each stone. Otherwise the tubing floats up and the stone ends up near the surface instead of the bottom, which defeats the whole point.
Cleaning Schedule and How to Clear a Clogged Air Stone
Clogging is inevitable. Mineral deposits from your nutrient solution coat the pores in the stone over time, and a clogged stone puts back-pressure on your pump, reducing output and shortening pump life.
A basic cleaning schedule:
- Weekly: Pull the stone, rinse under running water while the pump is still pushing air through it. This clears loose debris without disassembling anything.
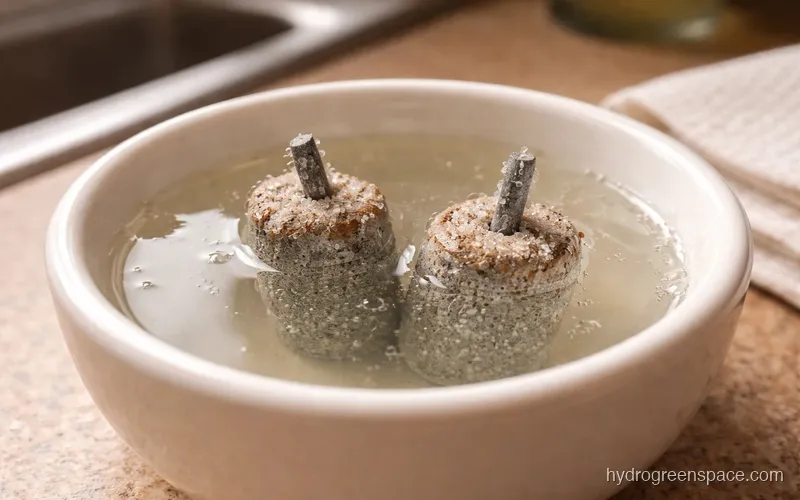
- Monthly: Soak the stone in a solution of 1 part white vinegar to 3 parts water for 30-60 minutes. The acid dissolves mineral buildup without damaging the stone. Rinse thoroughly and let dry before resubmerging.
- Every 3-6 months: Replace cheap commercial stones entirely. DIY lava rock diffusers last longer but benefit from a deeper vinegar soak every few months.
To tell if your air stone is clogged: pull it out and hold it up to light. You should see the pores throughout the material. Then hold it submerged in plain water while connected to the pump. If you see only a few large bubbles coming from one or two spots instead of a uniform cloud, it’s clogged.
Warning: Never boil your air stone to clean it if it’s been used in a hydroponic system. Boiling can drive mineral deposits deeper into the pores rather than removing them, and it can crack cheaper ceramic material.
When to Skip the Air Stone Entirely
Not every hydroponic method needs one. The Kratky method is the clearest example: plants are suspended above the water with a deliberate air gap between the water surface and the net pot. As plants drink and the water level drops, that gap grows and roots access oxygen directly from the air. An air stone in a Kratky setup isn’t just unnecessary, it can actually cause problems by raising the water level back up and drowning the air roots.
Nutrient film technique (NFT) systems also don’t use air stones in most configurations. The thin film of nutrient solution flowing across roots leaves the bulk of the root mass in open air, which provides more than enough oxygen. If you’re building an NFT channel and wondering whether to add aeration to the reservoir, a small air stone in the res won’t hurt, but it’s not the priority it is in DWC.
Where aeration matters most: any system where roots are fully submerged in standing water. DWC buckets, deep res systems, and flood-and-drain setups with long flood cycles all benefit significantly from good air stone hydroponic system setup.
What Happens When Aeration Alone Isn’t Enough
Sometimes you do everything right with the air stone setup and still see oxygen-related problems. Root zone temperature is usually the culprit. Water holds less dissolved oxygen as it gets warmer. At 72°F, a well-aerated reservoir holds plenty of oxygen. At 80°F, you can run the same setup and still see root rot because warm water simply can’t carry enough O2.
If your reservoir temperature is above 72°F consistently, no amount of aeration fully compensates. You need to address the heat directly. This connects directly to a DIY water chiller for hydroponics if you’re in a warm environment.
Beneficial bacteria in hydroponics also play a role here. A healthy microbial culture competes with pathogenic organisms like pythium for root surface area, adding a layer of protection on top of your physical aeration. Once your air stone setup is dialed in, inoculating with beneficial bacteria is the natural next step.
The full picture of root zone health comes down to three things working together: dissolved oxygen from aeration, cool water temperatures, and a healthy microbial environment. Start with the air stone. Get it built, sized correctly, and placed at the bottom of the reservoir. The rest builds from there. An air stone is a core component of almost every active DIY hydroponic system, so it’s worth understanding before you scale up.