
DIY Water Chiller for Hydroponics: 4 Methods That Work
Warm reservoir water is one of the fastest ways to lose a hydroponic crop. Nutrients become less available, roots start drowning in oxygen-depleted solution, and the whole system tips toward rot and algae almost overnight. A commercial water chiller solves it cleanly, but at $400 to $600 for a unit sized for a home setup, most growers start looking for alternatives. The good news: there are four DIY methods that genuinely work, and the right one depends on your system size and how much heat you’re dealing with.
This guide covers all four, from the no-build options you can try tonight to a repurposed compressor build for larger RDWC systems. Each method gets a realistic cost estimate, an honest look at its limits, and a verdict on which systems it actually suits.
Why Reservoir Temperature Is Worth Obsessing Over
Water temperature controls more than you might think. The sweet spot for most hydroponic crops is 65-72°F (18-22°C). Push above 75°F and you start losing dissolved oxygen rapidly. Above 80°F, you’re in trouble: root rot that follows warm water moves fast, and by the time you see brown slime on your roots, the damage is already significant.
The science is straightforward. Warm water holds less dissolved oxygen, and roots need oxygen to drive nutrient uptake. As the root zone temperature climbs, the plant’s ability to absorb nutrients drops even if your nutrient solution is perfectly balanced. That’s why plants in a summer grow room or a garage setup can look like they’re starving even on a correct feeding schedule.
Warm water also triggers a different kind of problem: algae. Algae that takes hold when water warms up competes for oxygen and nutrients, coats root surfaces, and is genuinely difficult to eliminate once established. Keeping your reservoir below 70°F is the single biggest thing you can do to prevent it.
Method 1: Frozen Water Bottles (Free, Works Immediately)
This is where every grower starts, and it’s not as ineffective as it sounds for small systems.
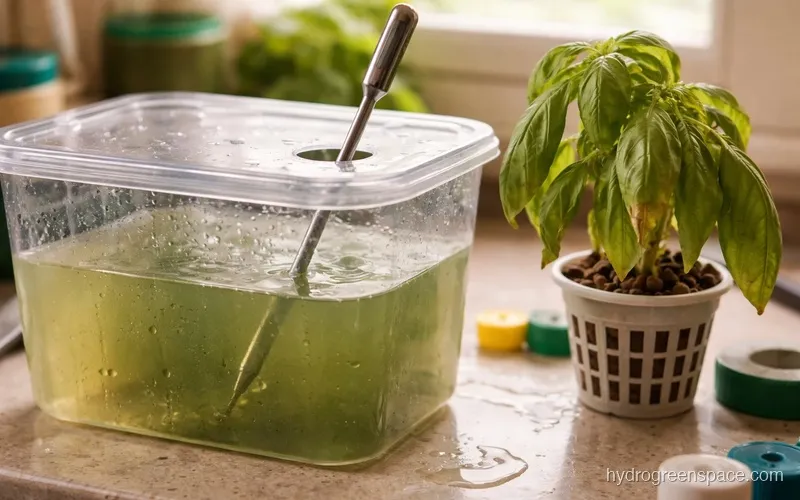
Fill two or three plastic bottles with water and freeze them. Drop them directly into your reservoir. A single 1-liter bottle can drop a 5-gallon bucket system by 5-8°F for 2-3 hours depending on ambient temperature and how well your reservoir is insulated.
What it handles: Systems up to about 10 gallons with two or three bottles rotating. Works well for a 5-gallon bucket system or a small DWC reservoir that runs warm during the day.
Estimated cost: $0 (you already own bottles and a freezer).
The honest limit: This is a maintenance task, not a solution. In a hot room above 85°F ambient, you’ll be rotating bottles every two hours. It doesn’t scale to multi-bucket RDWC builds without serious freezer space. Use it to bridge a heat wave or while you build something more permanent.
Tip: Freeze water inside the bottles, not directly on the outside surface. Bottles of ice last significantly longer than ones that start melting the moment they hit room air.
Method 2: Fan Circulation Plus Reservoir Insulation
Before you build anything, make sure you’ve done everything possible to prevent heat gain in the first place. A lot of growers reach for ice when their real problem is a black plastic reservoir sitting under grow lights with no airflow.
Two changes make a measurable difference:
- Wrap your reservoir in 1/2-inch foam insulation board (the silver-faced kind from a hardware store). Tape the seams. This alone can hold temperature 5-8°F lower than an uninsulated bucket in the same room.
- Add a small desk fan aimed across the top of your nutrient solution (if it’s accessible) or across the outside of the reservoir. Evaporative cooling from the water surface is real and surprisingly effective in lower-humidity rooms.
What it handles: Prevents passive heat gain in systems up to 20-30 gallons. Works better as a complement to another method than as a standalone solution in genuinely hot environments.
Estimated cost: $10-20 for insulation board and foam tape, plus whatever a fan costs if you don’t already have one.
The honest limit: This method slows heat gain; it doesn’t actively cool. On its own, it won’t keep a reservoir at 68°F in a garage that hits 90°F in August.
Method 3: Ice Chest Coil Loop (Best DIY-to-Performance Ratio)
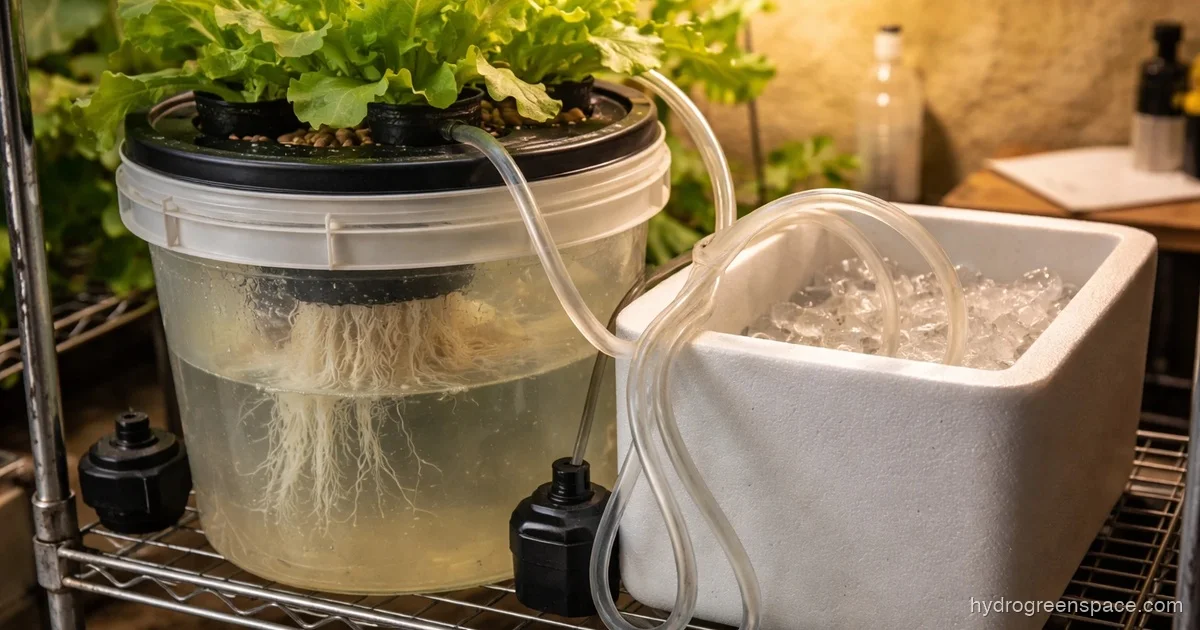
This is the method that consistently gets recommended on grower forums, and it earns it. The concept: coil flexible tubing through an ice-filled cooler, pump your nutrient solution through the coil, and the cold contact chills the solution before it returns to your reservoir.
What you need:
- A 20-48 quart cooler (larger = longer ice life)
- 15-20 feet of 1/2-inch ID food-safe vinyl tubing
- A small submersible or inline pump
- Zip ties or foam to hold the coil in place inside the cooler
- Ice or frozen water jugs (you can reuse jugs here too)
Coil the tubing inside the cooler so it makes as many passes as possible through the ice bed. Connect one end to the outlet side of your pump and the other back to the reservoir. The solution flows through the coil, drops temperature, and returns chilled.
What it handles: Systems up to 20-30 gallons reliably. A 48-quart cooler packed with ice jugs can hold temperature for 8-12 hours before needing a recharge.
Estimated cost: $30-60 for cooler and tubing if you don’t own them already. Pump: $15-25.
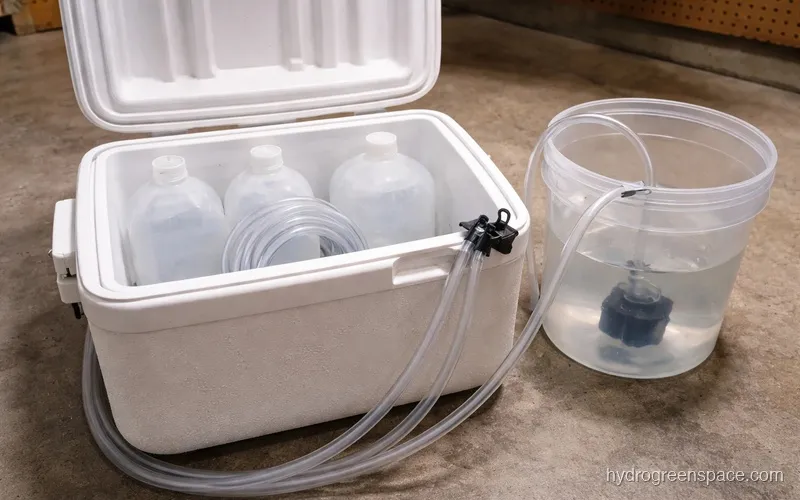
What I’d do: Use refrozen water jugs instead of bagged ice. They last twice as long, create no water mess when they melt, and you can freeze them right back for the next cycle. A 48-quart cooler with six 1-liter jugs will run 10-12 hours between cycles in a 75-80°F room.
The one real downside: the pump adds a small amount of heat back into the solution, and moving the nutrient solution out of the reservoir and through an external loop means you need to account for the volume in transit when mixing your nutrients. For most setups, this is negligible, but it’s worth knowing.
Method 4: Repurposed Water Cooler Compressor Hack (For RDWC and Large Systems)
This is the most involved option and the closest thing to a real chiller you can build without buying one. Countertop water coolers (the kind that sit next to a bottle of drinking water) use a small refrigeration compressor to chill their internal water tank. That compressor can be adapted to chill a hydroponic reservoir directly.
The core idea: remove the cooler’s tap and faucet assembly, plumb your reservoir water through the cooler’s internal coil (or replace it with food-safe tubing), and run it as a continuous loop. The compressor does the refrigeration work; your reservoir stays cool.
What you need:
- A used countertop water cooler with a working compressor ($15-40 at a thrift store or marketplace)
- Food-safe tubing to match the existing fittings
- A small circulation pump
- Basic plumbing fittings to connect the loop
What it handles: 30-80 gallon systems depending on the cooler’s compressor size and ambient temperature. This is the method to reach for on a DIY RDWC chiller build where frozen bottles won’t cut it and you can’t justify a commercial unit.
Estimated cost: $60-120 depending on what you find. Compare that to $400+ for a commercial aquarium chiller rated for the same volume.
The honest limit: This takes real tinkering. You’ll need to understand the cooler’s internal plumbing before you start cutting anything. If the compressor has any refrigerant issues (a common thrift-store problem), the whole build fails. Test the cooler thoroughly before modifying it. There’s a learning curve, and you may kill one unit before you get it right.
Warning: Never use tubing that isn’t rated as food-safe for a build that circulates nutrient solution. Standard aquarium tubing is fine. Hardware store irrigation tubing typically is not. When in doubt, use NSF-certified food-grade vinyl tubing.
Which Method Is Right for Your System?
Here’s a quick decision framework:
| System size | Ambient temp | Recommended method |
|---|---|---|
| Under 10 gallons | Under 80°F | Insulation + fan + frozen bottles |
| Under 10 gallons | 80-90°F | Ice chest coil loop |
| 10-30 gallons | Under 85°F | Ice chest coil loop |
| 30+ gallons / RDWC | Any | Water cooler compressor hack or commercial chiller |
| Any size | Over 90°F | Consider a commercial water chiller comparison |
For most growers running a single DWC bucket or a small recirculating system, the ice chest coil loop hits the right balance. It’s cheap, genuinely effective, and doesn’t require any permanent modifications to your setup. You can boost dissolved oxygen with an air stone alongside any of these methods to help compensate on hot days when your chilling system is working hard.
For anyone running an RDWC build with 40+ gallons of nutrient solution in circulation, the compressor hack or a purpose-built chiller is worth the time and money. Beneficial bacteria that thrive in cooler water become much easier to maintain when your root zone temperature is stable, and that stability pays dividends across the entire grow cycle.
When summer hits and your ambient temperature climbs above 85-90°F consistently, no DIY method will outperform the environment on its own. At that point, you’re looking at room-level cooling combined with reservoir management. The full summer heat management guide covers that situation in detail.
Start with what you can build tonight and upgrade from there. Your roots will tell you if it’s enough. Reservoir cooling is one of the most important factors in any DIY hydroponic system, and building it in from the start is easier than retrofitting it later.