
Gutter Hydroponics: Build an NFT System for $60
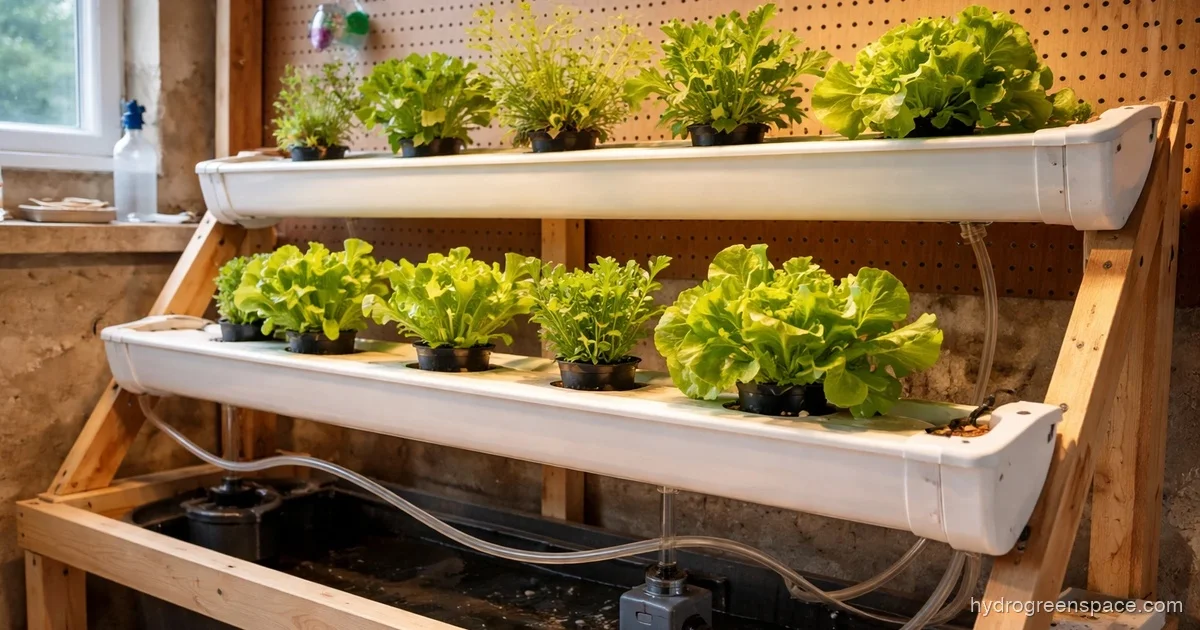
Rain gutters are sitting in the lumber aisle of every hardware store, and most people walk right past them. If you’ve been eyeing a Nutrient Film Technique setup but don’t want to pay $300 for a prefab kit or wrestle with custom-cut PVC pipe, a gutter hydroponic system is worth a serious look. The materials cost under $60, the build takes an afternoon, and it runs on the same principles as commercial NFT farms.
Here’s how to set one up correctly, and where most first-timers get it wrong.
Choosing the Right Gutters
Not all gutters are equal for hydroponics. You have three main options you’ll see referenced online: standard vinyl rain gutters, solid PVC channel stock, and downspout sections used as growing tubes.
Vinyl K-style rain gutters are the most practical starting point. They’re sold in 10-foot lengths at Home Depot and Lowe’s for around $5–8 each, they’re food-safe, and the flat bottom gives you a wide channel for nutrient solution to flow across root zones. Go with white or light gray if you can, because darker colors absorb heat and will raise your root-zone temperature on warm days.
PVC channel stock (the flat-bottom U-channel sold at some hardware and plumbing stores) works slightly better in that it comes in consistent widths, but sourcing it locally can be hit or miss. For a first build, standard rain gutters will do everything you need.
Downspout sections are a different animal. They’re closed on top, which controls light and algae, but you’re limited to 2–3 inch openings, which restricts plant size. There’s a whole approach built around those, and if you want to go down that route, building a downspout hydroponic system covers it in detail. For this guide, we’re using open K-style gutters.
Tip: Pick up the gutter end caps at the same time. You’ll need them to seal both ends of each channel, and they’re easy to forget.
The One Rule You Cannot Skip: Slope
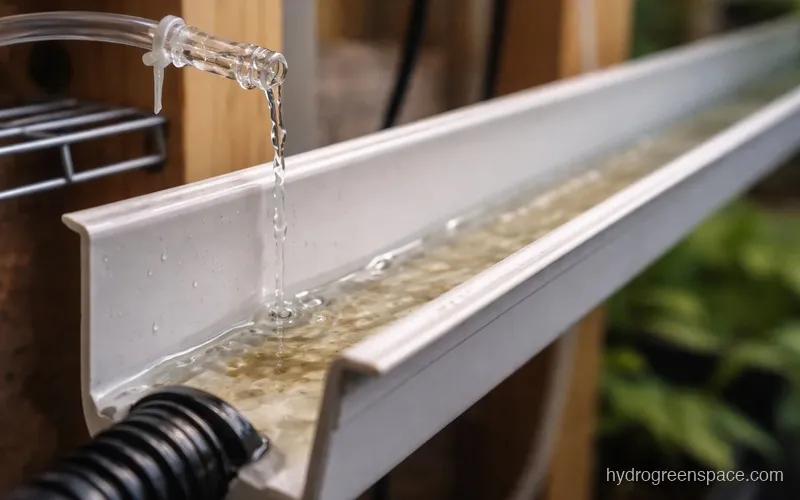
A gutter NFT system lives or dies by its slope. Too flat and the nutrient solution pools, oxygen can’t reach the roots, and you’ll get anaerobic rot. Too steep and the solution rushes past too fast for roots to absorb nutrients properly.
The target is a 1–2% grade. In practical terms, that means for every 10 feet of gutter, one end should sit 1.2 to 2.4 inches higher than the other. You can use a basic level and a tape measure or just estimate it with a few wooden shims under the high end.
The high end is where your solution enters (from the pump line), and the low end drains back to the reservoir. If you’re running multiple gutter channels in parallel, each one needs its own individual slope check, because stacking them on a frame that’s even slightly off level will cause the outer channels to run dry while the center ones flood.
Building the System: What You Actually Need
You don’t need a parts list a mile long. Here’s the core setup for a two-channel gutter system growing 12–16 plants:
Gutters and frame
- 2x 10-foot vinyl K-style gutters
- 4x gutter end caps (2 per channel)
- PVC primer and cement (or waterproof silicone) to seal the caps
- A simple wooden frame or repurposed shelving to hold the gutters at the correct slope
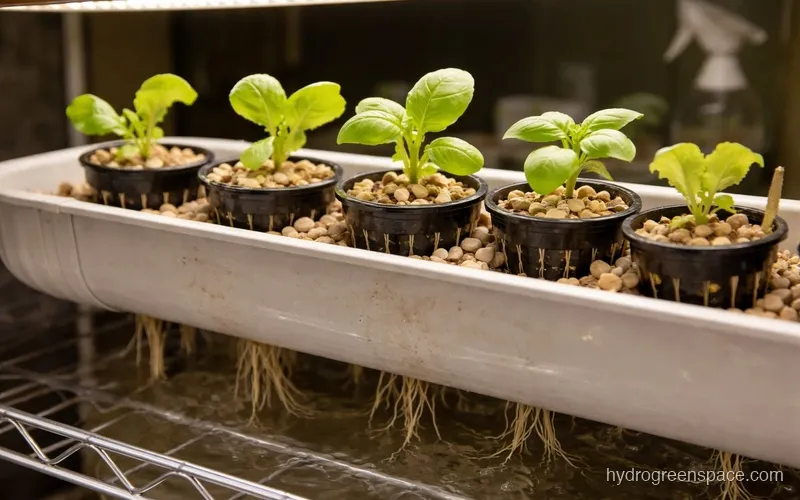
Net pots and growing medium
- 2-inch net cups (one per plant site)
- Perlite, clay pebbles (hydroton), or a 50/50 mix of both for each cup
Net pot spacing depends on what you’re growing. Lettuce can go as close as 6 inches apart. Herbs like basil and mint do well at 8 inches. Strawberries need 10–12 inches of space.
To create the holes for your net cups, use a hole saw bit that matches your cup diameter exactly. 2-inch net cups need a 2-inch hole, not 2.25, or the cup will sit loose and tip. Drill through the flat bottom of the gutter, not the sides.
Pump and reservoir
- A plastic storage tote (10–20 gallons for a two-channel system) as your reservoir
- A small submersible pump (100–200 GPH is plenty for two 10-foot gutters)
- Half-inch tubing to run from the pump to each gutter’s high end
- A simple timer (optional, but useful if you want to run the pump in intervals rather than continuously)
For NFT, continuous flow is standard. The thin film of nutrient solution running over the roots keeps them moist while the exposed roots above the film get oxygen. For a small gutter system at home, running the pump continuously on a timer set to 15 minutes on / 15 minutes off is a reasonable starting point. You can dial it in from there based on your plants’ response.
For a deeper look at how to calculate flow rate for your specific setup, understanding NFT flow rate breaks down the math.
What to Grow (and What to Skip)
Gutter NFT systems excel with fast-growing, shallow-rooted plants. The channel depth limits you to roughly 3–4 inches of usable space above the gutter floor.
Best performers:
- Lettuce is the gold standard for NFT. Fast turnover, light root system, handles the thin film perfectly. You can go from transplant to harvest in 4–6 weeks.
- Herbs like basil, cilantro, parsley, mint (keep mint separate, it spreads), and chives. All do well with the consistent moisture.
- Strawberries love NFT. A vertical gutter setup with strawberries is genuinely one of the most productive uses of limited space.
- Spinach, arugula, kale have shorter harvest windows and the same root profile as lettuce.
Skip for gutters:
- Tomatoes, peppers, cucumbers (root systems too large and the plants too heavy)
- Anything that needs deep root support or forms a taproot
If you want to grow fruiting crops in a DIY system, a DWC bucket setup or a single-bucket system gives roots the depth and volume they need.
Going Vertical
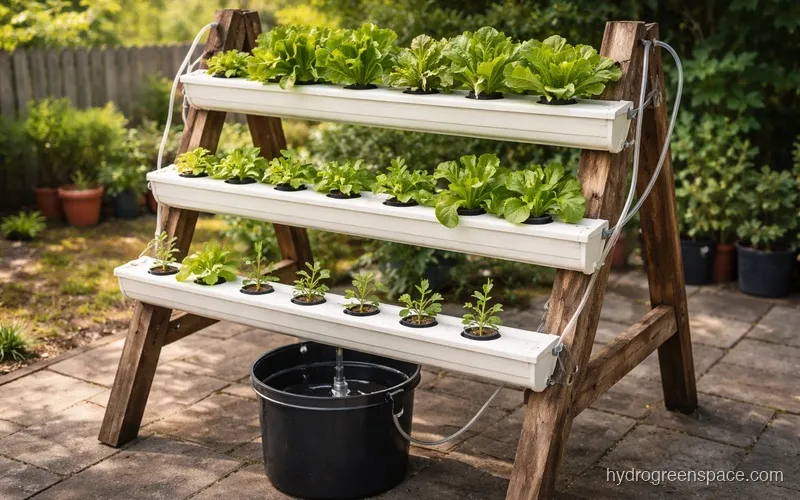
One of the best arguments for gutter hydroponics is how easily it stacks. Mount two or three channels on a tiered frame or a wall-mounted rail system and you can triple your growing area without using any more floor space.
The key constraint is lighting. If you’re indoors, each tier needs its own light source or you’ll get serious shading on lower channels. Outdoors, stacking works well as long as the structure faces south (in the northern hemisphere) and the tiers are spaced far enough apart that the upper gutters aren’t blocking sun from the lower ones.
What I’d do: For a first vertical build, I’d run two channels stacked 18 inches apart on a simple 2x4 frame, growing strawberries on top and lettuce below. The strawberries handle more light intensity, the lettuce is fine in partial shade, and you get two crops cycling at different rates.
If you want to see a related approach using vertical PVC tubes, vertical PVC hydroponic systems cover that structure in detail.
Troubleshooting: Algae and Uneven Flow
Two problems show up in nearly every open-gutter system eventually.
Algae in Open Gutters
Vinyl K-style gutters are open at the top. Light hits the nutrient solution directly, and algae will grow. It’s not a matter of if, but when.
The practical fix is to cover the gutters. Reflective aluminum tape or strips of black pond liner cut to width and laid loosely over the channel work well. You want to block light from reaching the solution while still allowing airflow around the net cup stems. A snug-fitting cover that also insulates the root zone from temperature swings is worth the extra effort.
If you’re already seeing green slime, flush the system with plain water, scrub the gutter walls with a soft brush, then run a diluted hydrogen peroxide solution (3% H2O2 at roughly 1–2 ml per liter of water) through the system before returning to nutrient solution. For more on managing algae in hydroponic systems, that’s a deeper issue worth understanding before it takes over a crop.
Uneven Flow Across Channels
If you’re running multiple gutters from one pump and notice one channel is running heavy while another barely trickles, the cause is almost always elevation inconsistency or unequal tubing runs. The pump sends solution down the path of least resistance.
Fix it by adding a simple inline valve or flow restrictor on each feed line so you can balance the flow manually. Ball valves at the entry point of each gutter give you fine control and cost about $2 each at any hardware store. Set the pump to full power and throttle down whichever channels are running too heavy until all channels have a consistent thin film across the full length.
If you’re interested in more NFT hydroponic system design, that covers professional-grade approaches to flow balancing that scale past a two-gutter home setup.
Starting Your First Run
Fill your reservoir, set your pH to 5.8–6.2, and mix your nutrient solution to a starting EC of around 1.2–1.5 mS/cm for seedlings and young transplants. Run the pump for 30 minutes and walk each gutter from high end to low end, looking for an even, thin film across the entire floor of the channel with no standing pools and no dry spots.
If the film is there and the plants are in, you’re ready. The first two weeks are mostly about watching and adjusting pH daily. After that, gutter hydroponics is genuinely low-maintenance: top off the reservoir every few days, do a full nutrient change every 1–2 weeks, and harvest as plants mature.
The crop you pull from 20 feet of gutter space will change how you think about what’s possible in a small yard or garage. For a side-by-side look at how a gutter NFT setup compares to other channel-based DIY hydroponic systems, the complete guide covers every approach worth considering.