
Hydroponic Peppers: Complete Growing Guide
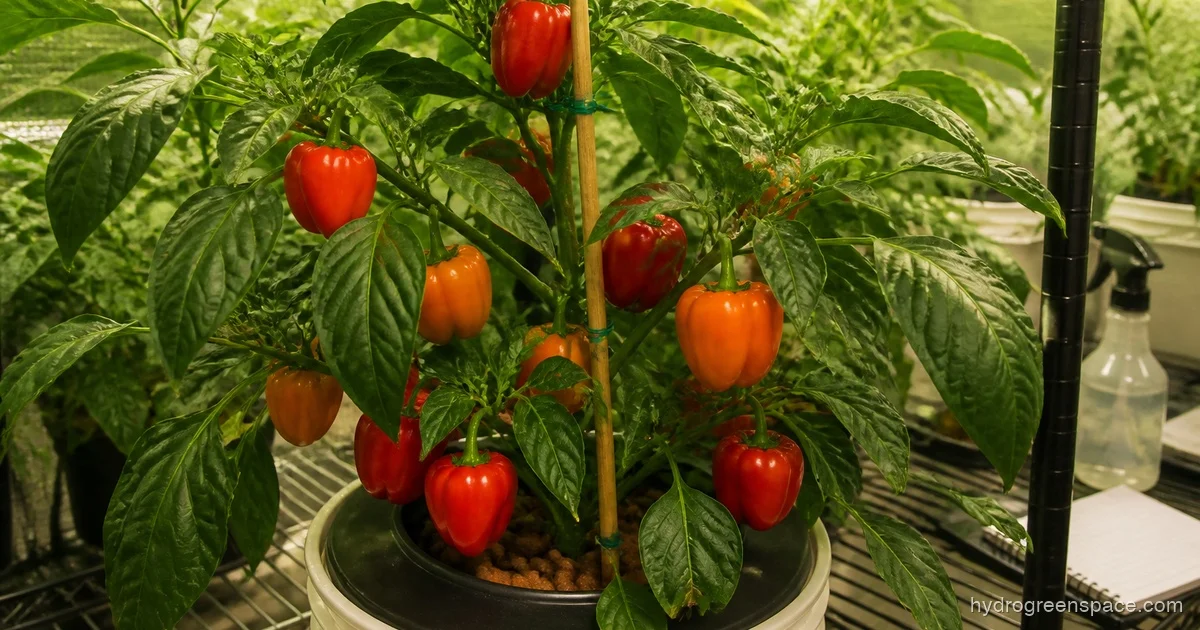
Peppers are one of the most rewarding crops you can grow hydroponically, and one of the most humbling. They take patience, they need light, and they will not set fruit if you skip pollination indoors. But when you dial everything in, a single pepper plant in a DWC bucket will outproduce a garden bed plant by a wide margin. I’ve pulled over 40 bell peppers off one plant in a single grow season. That number didn’t happen by accident.
The difference between a pepper plant that thrives and one that stalls at two feet with no fruit usually comes down to three things: the right EC at the right stage, enough light, and getting pollen moving. Get those three right and the rest is detail.
Why Peppers Are a Slightly Advanced Hydroponic Crop
Peppers aren’t the crop I’d recommend to someone picking up hydroponics for the first time. Unlike fast-maturing crops like lettuce, peppers take months from seed to first harvest and need precise nutrient management that shifts as the plant moves through growth stages. That said, “slightly advanced” is not the same as “difficult.” If you’ve run a basic system before and understand nutrient management, you’re ready.
The payoff is real: peppers grow faster hydroponically than in soil, they fruit more reliably in a controlled environment, and you can grow varieties that would struggle outdoors in your climate. Growing chili peppers hydroponically is especially rewarding because you control the exact stress conditions that influence heat level.
You can find peppers on the full list of vegetables you can grow hydroponically alongside other fruiting crops that make excellent hydro candidates.
The Best Hydroponic System for Peppers
Short answer: Deep Water Culture (DWC) is the best starting point for most home growers.
Pepper plants get large and heavy when fruiting. They need a root zone that can support aggressive growth and handle the water and oxygen demand of a plant carrying a dozen fruits. DWC delivers both. The roots are always submerged in oxygenated nutrient solution, and the system is simple enough that you can troubleshoot problems easily.
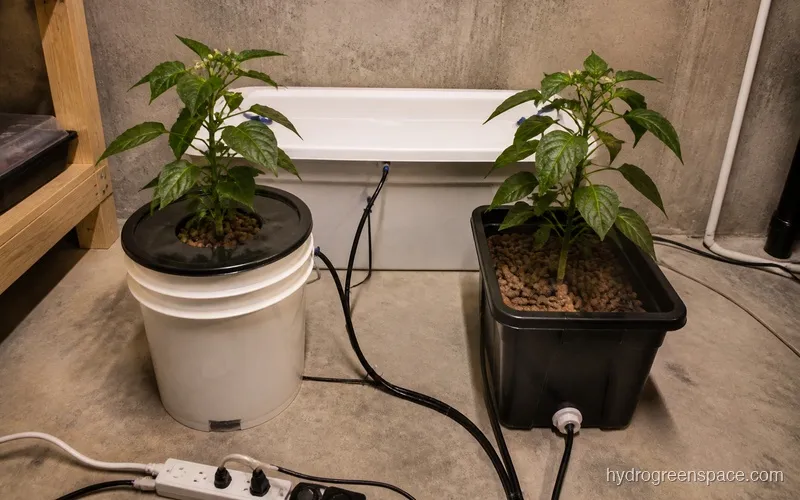
If you want to build a DWC system yourself, it’s one of the cheaper builds you can do. A 5-gallon bucket setup works well for a single plant and is a great format for peppers specifically because you can dedicate a full bucket to one large plant without competing root zones.
Dutch Bucket systems are the professional choice for larger setups. They scale well if you want to run 4-8 plants and let each plant have its own media-filled bucket while sharing a reservoir. For home growers running more than 2-3 plants, Dutch Bucket beats DWC on manageability.
Ebb and Flow (flood and drain) works fine too, though the intermittent flooding means you need to be more careful with media choice and drainage timing for larger pepper root systems.
What I’d avoid for peppers: NFT (Nutrient Film Technique). The channels are designed for smaller, leafy crops. Pepper plants are too heavy, and the thin film of solution won’t keep up with the water demand of a plant in heavy fruit. Save NFT for lettuce.
What I’d do: Start with one DWC bucket per plant. Once you’ve run a full cycle and understand how the plant behaves, scale to Dutch Bucket if you want to grow more plants at once.
Variety Selection: Bell Peppers vs. Hot Peppers
Bell peppers and hot peppers are not the same grow. They have different EC targets, different timelines, and slightly different temperaments.
Bell peppers (California Wonder, Yolo Wonder, King of the North): These take 60-80 days from transplant to first harvest. They’re heavier fruiting than hot peppers, which means they need stronger structural support and consistent calcium supply. EC sweet spot: 2.0-2.5 in fruiting stage. They’re more sensitive to heat stress and nutrient fluctuations than hot varieties.
Mini sweet peppers (Lunchbox varieties): Faster than full-size bells, usually 55-65 days to harvest, and more forgiving of minor EC swings. These are my recommendation for growers who want the bell pepper experience without the anxiety.
Jalapeños and serranos: Solid mid-tier choice. They fruit heavily, tolerate slightly higher EC (up to 2.8), and finish around 65-75 days from transplant. Jalapeños are probably the most forgiving hot pepper for hydroponics.
Ghost peppers, habaneros, Carolina Reapers: These are long-cycle grows. Expect 90-120 days from transplant to first harvest for superhots. The upside is they tolerate higher EC (up to 3.0-3.5) and actually benefit from mild drought stress toward the end of the fruiting cycle to push heat. Plan ahead for choosing the right pepper variety before you start your seeds.
Tip: For your first hydroponic pepper grow, pick a jalapeño or a mini sweet over a full-size bell pepper. Bells are rewarding but they’re also the most demanding to get right. Jalapeños are more forgiving and you’ll get faster feedback on what’s working.
Germination and Transplanting
Start seeds in rockwool cubes. Soak the cubes in pH-adjusted water (5.5-6.0) for an hour before planting, then place seeds about 6mm deep. Keep them at 80-85°F and in total darkness until they sprout, which usually takes 7-14 days. Pepper seeds are slow germinators compared to tomatoes, so don’t panic if nothing happens for 10 days.
Once seedlings have their first true leaves and roots are visibly emerging from the bottom of the rockwool cube, they’re ready to move into your system. Starting seeds in rockwool is the most reliable method for clean transfers without disturbing young roots.
Some growers use coco coir as a growing medium for Dutch Bucket setups, which works well for peppers because coco holds moisture between feedings while still draining freely.
Start transplants in a dilute nutrient solution (EC 0.8-1.2) and ramp up over the first two weeks as the plant establishes. Don’t push full EC immediately. Young pepper roots are sensitive and you can stunt them before they’re even growing properly.
Nutrient Management: The Vegetative-to-Fruiting Shift
This is where growing peppers hydroponically gets interesting and where a lot of growers stall out.
Peppers need two different nutrient profiles depending on where they are in their life cycle.
Vegetative stage (weeks 1-6 from transplant): Run higher nitrogen. Something in the range of 7-3-6 NPK works well, with EC at 1.8-2.2. The plant is building its canopy and root system. This is not the time to push potassium.
Flowering and fruiting stage (once first flowers appear): Shift to a lower nitrogen, higher potassium formula. A 4-4-8 or 5-5-10 NPK is closer to what the plant wants now. EC for bell peppers moves to 2.0-2.5; for hot peppers and superhots, 2.5-3.5. Potassium is critical for fruit development and brix (sugar content), and insufficient K is one of the main causes of poor fruit set.
Calcium and magnesium are the other major consideration. Peppers are heavy calcium users, and blossom end rot (soft, sunken spots on the bottom of the fruit) is almost always a calcium deficiency, even when the nutrient solution contains calcium. Cal-mag for peppers is not optional; it’s standard practice. I run cal-mag as a supplemental addition throughout the entire grow, not just when I see symptoms.
Keep pH at 5.8-6.2. Letting pH drift above 6.5 locks out calcium and iron, and you’ll be chasing problems. I aim for 6.0 as my target and correct when I see it creep above 6.3.
For the principles behind nutrient timing and ratios, how to feed your hydroponic plants covers the fundamentals that apply across all crops.
Common mistake: Running high nitrogen into the fruiting stage. This causes lush, dark green leaves and almost no flowers. If your pepper plant looks beautiful at week 8 and has barely any blooms, nitrogen is usually the culprit. Scale it back and push potassium.
Light, Temperature, and Environment
Peppers need more light than most growers expect. Target 14-16 hours per day for indoor growing, using a full-spectrum LED. They are long-day plants and will not fruit well with less than 12 hours.
Check your grow light distance from plants carefully with peppers. Too close and you’ll see bleaching and heat stress on the top leaves. Too far and growth is slow and leggy. With most quality LEDs, 18-24 inches above the canopy is the right range, but follow your specific light’s PPFD chart if it includes one.
Temperature is a bigger factor than most growers expect when they’re first setting up. Peppers like it warm:
- Daytime: 73-78°F
- Night: at least 65°F (drop below 60°F and flower drop becomes a real issue)
Humidity target: 50-70% during vegetative, dropping to 40-60% during flowering. Lower humidity during flowering helps with pollen viability and reduces disease pressure.
Pollination Indoors
No bees, no fruit.
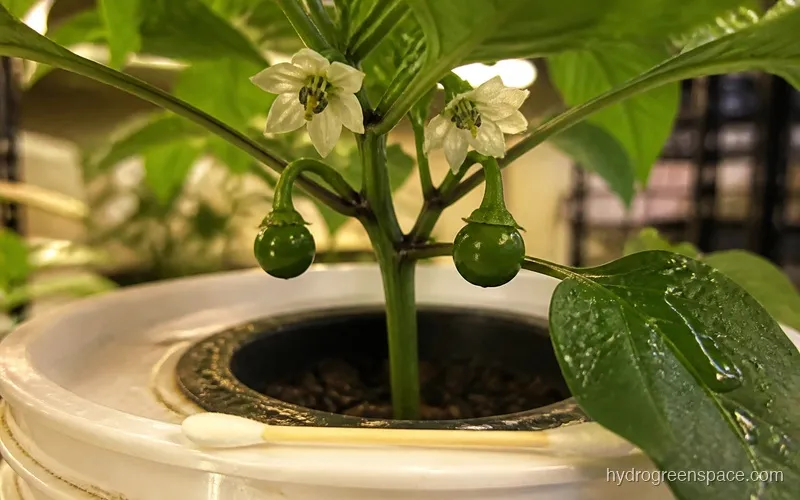
Outdoors, peppers are pollinated by wind and insects. Indoors, you are the bee. If you don’t move pollen manually, you’ll get flowers that open and drop without setting fruit, and you’ll spend weeks wondering what’s wrong with your nutrients.
Two methods work well:
Hand-shake method: Once flowers are fully open, give the main stem a gentle shake each day. This mimics wind and dislodges pollen from the anthers onto the stigma. Simple, fast, effective for small plants.
Cotton swab or soft brush method: Swirl a dry cotton swab or small paintbrush inside each open flower to transfer pollen. This is more thorough for larger plants where shaking doesn’t reach every flower. This is similar to hand-pollinating strawberries, and the same technique translates directly.
Pollinate daily during flowering, ideally in the early afternoon when humidity is at its lowest. A small oscillating fan running during lights-on hours also helps move air around flowers passively.
Staking and Plant Support
Don’t underestimate this. A pepper plant loaded with fruit in a DWC system is top-heavy and will lean, tip, or snap branches if you don’t stake it properly.
Start staking early, before the plant needs it. Run a bamboo stake or metal rod vertically through the net pot into the bucket, and loosely tie the main stem at two or three points as the plant grows. For Dutch Bucket setups, run a string from the ceiling down to the base of the plant and spiral-train the main stem around it the way greenhouse growers handle tomatoes.
Check ties weekly as stems thicken. A tie that was loose at week 4 can girdle a stem by week 8 if you forget about it.
Harvest Timing and Encouraging Continued Fruiting
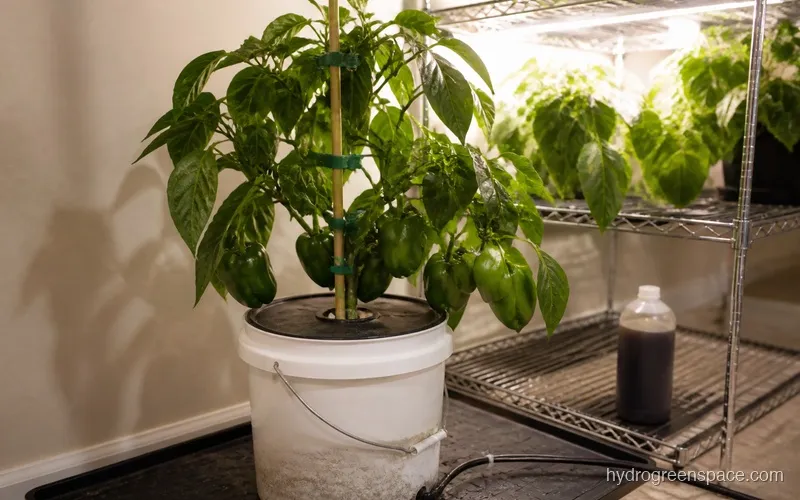
Bell peppers can be harvested green (when full-sized, firm, and fully formed) or left to ripen to red, yellow, or orange. Ripe peppers have higher sugar and vitamin C content. The tradeoff is time: going from green to full red takes another 2-3 weeks and the plant carries that fruit load the whole time instead of redirecting energy to new fruits.
For maximum yield, harvest bell peppers green or at the first hint of color change. The plant will redirect energy quickly and set the next round.
For hot peppers, harvest at the color stage recommended for your variety. Green jalapeños are milder; red jalapeños are hotter. Ghost peppers should be fully red before picking.
Always cut with clean scissors rather than twisting or pulling. Twisting can damage the stem junction and open the plant to disease.
Keep the nutrient solution fresh and maintain EC in the fruiting range throughout the harvest cycle. A plant that’s actively fruiting is pulling nutrients hard, and letting EC drop below 1.8 at this stage will slow the next fruit set.
If you want to use a similar approach for growing other fruiting crops like tomatoes hydroponically, most of the principles here carry over directly (nutrient staging, pollination, and support structures all translate).
Common Problems and Quick Diagnosis
Blossom drop: Temperature, humidity, or pollination failure. Check night temps first.
Blossom end rot: Calcium deficiency or calcium lockout from pH drift. Test pH before adding more cal-mag.
Slow growth or pale leaves in vegetative stage: EC too low or nitrogen insufficient. Target 1.8-2.0 and check your nutrient formula.
Flowers but no fruit: Pollination failure. Start hand-pollinating immediately.
Leaf curl or bleaching at the top: Light too close or too intense. Raise the fixture.
Aphids: Common on peppers indoors. Spray with diluted neem oil (avoid spraying open flowers) or introduce predatory insects if your setup allows.
If you’re unsure whether you’re looking at a nutrient deficiency or a pH problem, the nutrient deficiency chart will help you identify any nutrient deficiency by visual symptoms before you start adjusting.
The Grow Is Longer Than You Think, and Worth It
The biggest mindset shift with hydroponic peppers is accepting the timeline. You won’t harvest in four weeks. You might not harvest in eight. A bell pepper from seed to first fruit is realistically 100-120 days. A superhot can be 150 days.
But the plant you’re building during that time is a powerhouse. A healthy pepper plant in a DWC system, properly fed and well-lit, will fruit continuously for months. Some growers overwinter pepper plants and get a second full season from the same root system.
The growers who succeed with peppers are the ones who stop measuring success by the calendar and start measuring it by the plant. Get the nutrients right. Keep the light consistent. Pollinate every day. The peppers will come.