
How to Use Rockwool in Hydroponics (Step-by-Step)
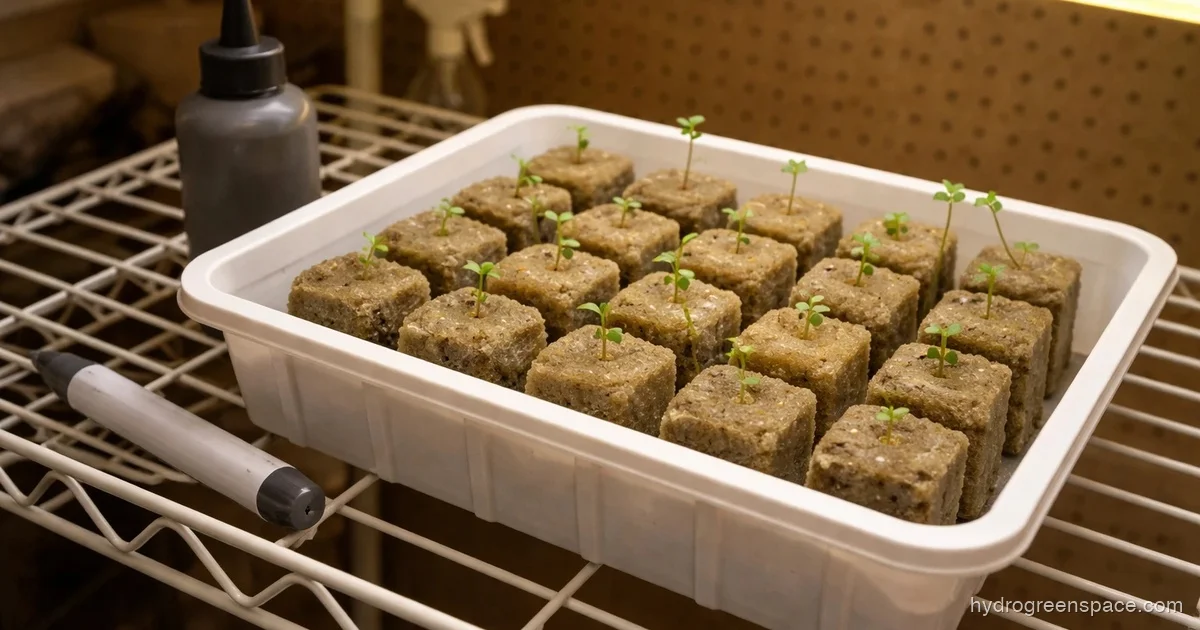
The first time I used rockwool, I soaked the cubes in plain tap water, dropped my seeds in, and wondered why germination was spotty and my seedlings looked pale after transplant. Turns out I’d skipped the one step that makes or breaks rockwool: pH correction. Rockwool is manufactured at extremely high temperatures and comes out of that process with a naturally high pH, often above 7.5. Without pre-soaking in properly adjusted water, you’re setting your seeds up in a medium that locks out the nutrients they need from day one.
That’s the most common rockwool mistake, but it’s not the only one. This guide covers the full lifecycle: how to prepare rockwool correctly, how to use it for seeds and clones, what overwatering looks like in rockwool (it’s subtle), when to transplant, and what to do with the cubes when you’re done.
Why Rockwool Works So Well in Hydroponics
Rockwool is spun volcanic rock and limestone fiber, which makes it completely inert. It has no nutrient content of its own and won’t affect your nutrient solution chemistry the way some organic media can. That inert substrate quality is exactly why it’s been the commercial hydroponics standard for decades. You control everything that goes into it.
The fiber structure gives rockwool an ideal balance of water retention and aeration. A properly conditioned cube holds moisture close to roots while keeping enough air pockets that roots don’t suffocate. That ratio is hard to replicate cheaply with other materials, which is why rockwool remains popular even as alternative growing media have improved.
One thing worth knowing: rockwool doesn’t degrade. It sits in a landfill for centuries. That’s not a dealbreaker, but it’s part of the full picture, especially if you’re thinking about reuse or disposal at the end of a cycle.
How to Prepare Rockwool Before Planting
Here’s exactly what to do.
Step 1: Mix Your Pre-Soak Solution
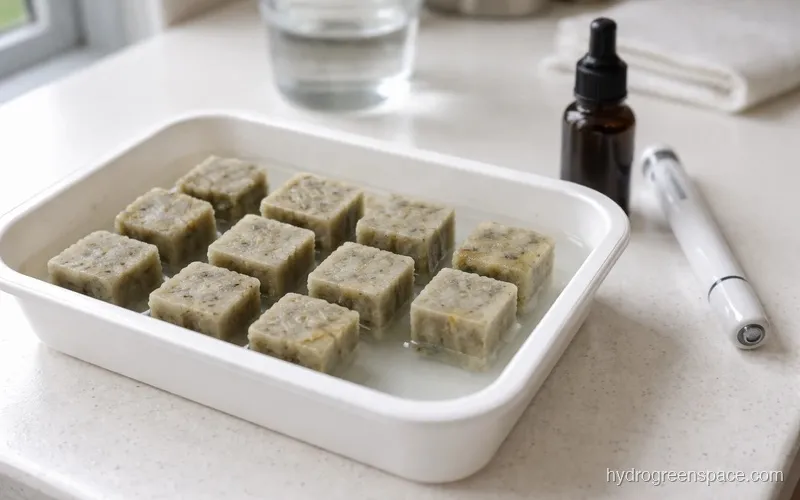
Fill a clean container with water. Adjust pH down to 5.5. Use a pH meter, not strips. Strips are imprecise enough that you could easily land at 5.8 or 6.2 and not know it.
Don’t add nutrients to the pre-soak. Rockwool fibers can absorb mineral salts and concentrate them in ways that burn young roots. Plain pH-adjusted water is all you need here.
Step 2: Soak the Cubes
Submerge the rockwool cubes completely in the pH 5.5 solution. Let them soak for 60 to 90 minutes. If you’re working with larger slabs or blocks, give them a full two hours.
One critical rule: do not squeeze the cubes after soaking. This destroys the fiber structure and collapses the air pockets. Rockwool’s water retention and aeration balance exists because of that internal structure. Squeeze it out once and the cube holds water like a sponge for the rest of the grow, which leads directly to overwatering and root rot.
After soaking, lift the cubes out and let gravity drain the excess water. That’s it.
Step 3: Check pH Drift
After soaking, re-check the water the cubes were sitting in. If the pH rose significantly (above 6.0), your tap water is probably alkaline or your cubes needed more buffer time. Some batches of rockwool are more alkaline than others. If the soak water drifted up, do a second soak in fresh pH 5.5 water for another 30 minutes.
Rockwool for Seed Starting
Once your cubes are prepped, seed starting is straightforward. Each cube has a pre-formed hole on top. Place one seed per hole, about 6mm deep. A toothpick helps with small seeds.
Don’t cover the holes with extra rockwool. The seed needs humidity, not burial. Instead, place the tray under a humidity dome.
Keep the environment between 72–78°F. Light is optional for germination (most seeds don’t need it), but once sprouts emerge, move them under light immediately. Seeds in rockwool starter cubes typically sprout in 3 to 7 days depending on the variety.
For moisture maintenance during germination: add a small amount of pH 5.5 to 5.8 water to the bottom of the tray, about 1/4 inch deep. The cubes wick moisture from below. Top-watering at this stage tends to oversaturate the top of the cube, which promotes damping off. Bottom-watering gives you more control.
Tip: Once seedlings emerge, remove the humidity dome gradually over two to three days rather than all at once. Abrupt humidity drops stress young seedlings.
Using Rockwool for Clones
For clones, the process is identical on the preparation side: pH 5.5 pre-soak, no nutrients, no squeezing.
The key difference from seeds is that clones are trying to generate roots from a cut stem, so the rooting environment matters more. Use 1.5-inch propagation cubes rather than the 1-inch starter size. The larger cube holds more moisture and gives the cutting more support.
After taking your cutting, dip it in cloning gel, insert it about an inch deep into the cube, and apply gentle pressure around the stem to close up the hole. The goal is good contact between the stem and the rockwool fibers, not an airtight seal.
Maintain humidity above 80% using a dome, and keep the cubes moist but not sitting in standing water. Roots typically emerge in 7 to 14 days. Don’t pull the cutting to check; instead, look for roots emerging from the bottom or sides of the cube.
How to Know When to Transplant
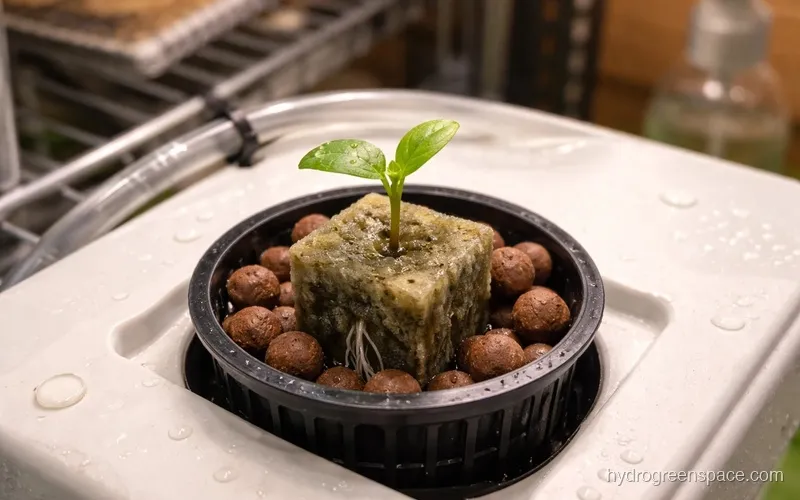
The right transplant window is when roots are visibly emerging from the bottom of the cube and the seedling has two to three sets of true leaves. At this point the root system is established enough to handle the move, but not so developed that it’s become rootbound inside the cube.
Don’t transplant by calendar. A healthy seedling under good light can reach transplant-ready in 10 days. One under weak light might take three weeks. Watch the roots, not the clock.
When you’re ready, the whole rockwool cube goes into the hydroponic system. You don’t remove the seedling from the cube. The roots will grow through the rockwool and out into the nutrient solution. This is one of rockwool’s real advantages: no root disturbance during transplant.
For net pot systems like DWC or Kratky, drop the cube into the net pot and fill around it with hydroton or another inert media to stabilize it. For drip systems, place the cube on a rockwool slab or directly into the system. For NFT, the cube sits in the channel and roots cascade down into the film.
Why Is My Rockwool Staying Too Wet?
If your rockwool cubes stay wet for more than 24 hours after watering, one of these is happening:
- You squeezed the cube after soaking. Collapsed fibers hold water without releasing it. There’s no fix for this; start with a fresh cube.
- Watering frequency is too high. In an active system, the cube should partially dry between cycles. Aim for 30–40% dry-down before the next watering.
- Poor drainage in the tray. If cubes are sitting in pooled water, they never drain properly. Use a tray with drainage holes or raise the cubes on a mesh.
- Cube is too large for the seedling. A small seedling can’t pull moisture fast enough from a 4-inch block. Match cube size to plant size.
Chronically wet rockwool leads to anaerobic conditions at the root zone, which is a fast path to root rot. If you’re seeing brown, slimy roots, the wet rockwool is usually part of the cause. Review how to prevent root rot in hydroponics before it becomes a full crop loss.
Rockwool Safety: What You Actually Need to Know
Rockwool fibers can irritate skin, eyes, and lungs. This isn’t a rare reaction, it’s a property of the material. The fibers are thin enough to become airborne when you’re handling dry cubes or breaking apart used slabs.
The practical precautions are simple:
- Wear gloves when handling dry rockwool
- Work in a ventilated area, or wear a dust mask if you’re working with large quantities
- Don’t rub your eyes after handling
Once rockwool is wet, fiber release is minimal. Most growers handle wet cubes barehanded without issues. The risk window is primarily when cubes are dry, either fresh out of the bag or at disposal.
Can You Reuse Rockwool?
Technically yes. Practically, it depends on what you grew.
If you ran a short, clean crop (lettuce, herbs, no disease issues), rockwool can be sterilized and reused. Soak used cubes in a 1% hydrogen peroxide solution for two to four hours, rinse thoroughly with clean water, adjust back to pH 5.5, and let them dry. Inspect roots carefully before reuse. Any brown or mushy root material should be removed.
If you had root rot, fungus gnats, or any significant disease pressure: don’t reuse. The cost savings aren’t worth the risk of carrying pathogens into a new cycle.
For disposal, check with your local municipality. Rockwool isn’t hazardous waste, but it doesn’t break down in compost. Some areas have recycling programs for horticultural rockwool. Most growers end up bagging it and putting it in the trash.
Can You Use Insulation Rockwool for Hydroponics?
No. Building insulation is made from similar base materials but is treated with binders, oils, and fire-retardant chemicals that are toxic to plants and not something you want in your nutrient solution. Horticultural rockwool is manufactured specifically to be free of those treatments.
The cost difference isn’t large enough to justify the risk, and a bag of horticultural starter cubes goes a long way. Don’t cut corners here.
Putting It All Together
Rockwool works reliably when you respect the preparation process. The pH soak is not optional. The no-squeezing rule is not optional. Everything else, cube size, soak time, moisture management, follows from those two fundamentals.
Once you have the prep dialed in, rockwool makes the rest of the grow easier. Transplanting is clean, root development is predictable, and you’re not fighting a medium that’s adding its own variables to your nutrient solution. If you want to compare how it stacks up against other options before committing to a full setup, rapid rooter vs rockwool breaks down the differences for seeds and clones specifically.
Your first few cubes will teach you more than any guide can. Set up a small germination tray, run the prep steps correctly, and see for yourself why this medium has been the commercial standard for decades. For context on how rockwool fits alongside coco, clay pebbles, and other substrates, the growing media for hydroponics guide is a useful reference if you’re still weighing your options.