
Coco Coir for Hydroponics: Setup, Buffering & Nutrients
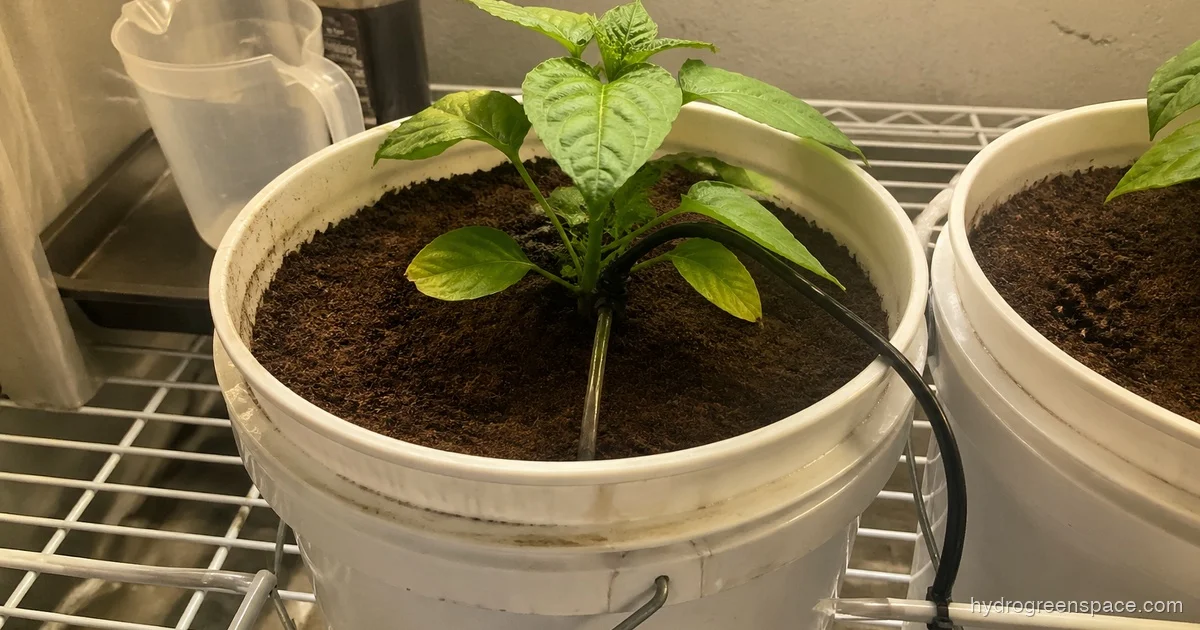
Coco coir has become the go-to growing medium for a lot of serious hydroponic growers, and for good reason. It holds moisture without becoming waterlogged, supports exceptional root development, and pairs naturally with drip systems and Dutch buckets in a way that few other media do. But there’s a catch that catches a lot of beginners off guard: skip the buffering step, and coco coir will rob your plants of calcium and magnesium from the first day you water them.
This guide covers everything you need to set up coco coir for hydroponics correctly, from understanding the three different formats to the buffering process, Cal-Mag requirements, and which systems coco actually suits.
The Three Types of Coco Coir (and Why It Matters Which One You Buy)
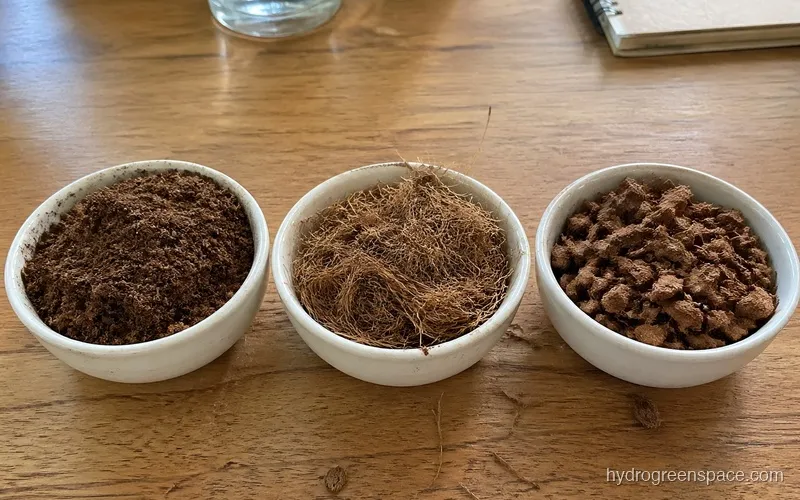
Most growers treat coco coir like a single product. It’s not. There are three distinct forms of coco, each with different drainage characteristics, and mixing up which one to use can work against you depending on your setup.
Coco Pith (Coco Peat)
Coco pith is the fine, soil-like material that makes up most retail bags of coco coir. It’s made from the dusty inner fibers of the coconut husk and has a high water retention capacity. This is both its strength and its weakness: it stays moist for a long time, which is great in a drip system with long intervals between watering, but can lead to low oxygen at the root zone if you’re watering too frequently or if drainage is poor.
Straight coco pith compacts over time, especially under the weight of a heavy plant canopy. If you’re running a single-medium setup, you’ll want to mix perlite in to keep it from turning dense.
Coco Fiber
Coco fiber is made from the long, coarse strands of the coconut husk. These fibers don’t compact and create natural air channels through the growing medium. Bags marketed as “chunky coco” or “premium loose coco” usually contain a higher fiber content. Root zone aeration is noticeably better in high-fiber coco, which is why it’s preferred by growers who water on shorter intervals or run automated drip systems.
Coco Chips
Coco chips are larger pieces of the coconut husk, cut into roughly 6-12mm cubes. They behave more like clay pebbles than fine coco pith: excellent drainage, lots of air space, and less moisture retention. Coco chips are sometimes blended with coco pith to get a balance of water-holding capacity and drainage. They’re also useful as a top layer in a media bed to reduce evaporation.
Why Buffering Coco Coir Is Non-Negotiable
This is the step that separates growers who get great results from coco and growers who wonder why their plants keep showing yellowing leaves despite proper feeding.
Coco coir comes from coconut husks that have been soaked in seawater or stored for extended periods. The result is a medium naturally high in sodium and potassium ions. These ions sit on the cation exchange sites within the coco fiber, and here’s the problem: coco has a strong preference for calcium and magnesium over sodium and potassium. When your calcium and magnesium-containing nutrient solution hits unbuffered coco, the medium strips the Cal-Mag out of solution and replaces it with sodium and potassium.
Your plant gets a dose of sodium-heavy water instead of a balanced nutrient solution. Calcium and magnesium deficiency sets in fast, usually showing up as yellowing between the veins on newer leaves, tip burn, or brown spots on older growth.
How to Buffer Coco Coir Before First Use
Buffering is straightforward but takes some lead time.
Step 1: Rehydrate. If you’re using compressed coco bricks, rehydrate them in plain water first. A standard 650g brick will expand to around 8-10 liters of usable medium. Loose coco is ready to work with immediately.
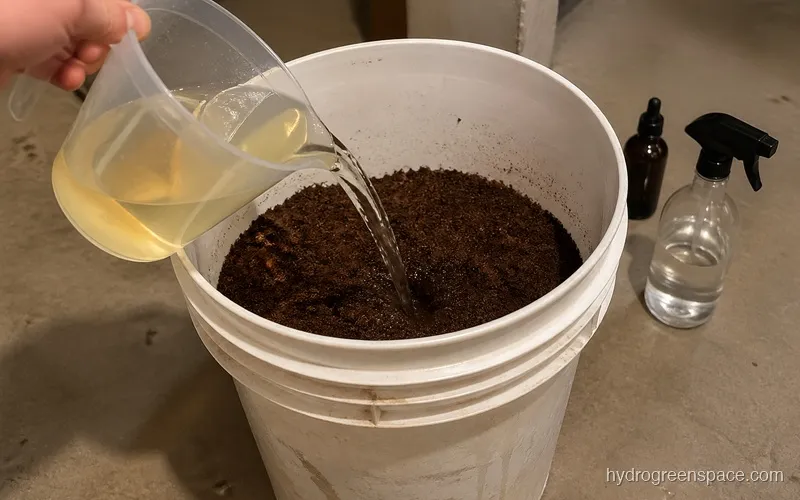
Step 2: Make a buffering solution. Mix a Cal-Mag supplement into pH-adjusted water at around 5.8-6.2 pH. Use roughly 5ml per liter of your Cal-Mag product, or follow the manufacturer’s recommendation for buffering. You want enough calcium and magnesium in solution to fully saturate the coco’s cation exchange sites.
Step 3: Soak. Submerge the coco in the buffering solution and let it sit for 8-24 hours. The coco will absorb the Cal-Mag and release sodium and potassium in return.
Step 4: Drain and rinse. After soaking, drain the solution and give the coco a rinse with plain pH-adjusted water. Check the runoff EC. If it’s very high, rinse again. Your target is runoff EC under 1.0 before you plant anything.
Warning: Even coco products sold as “pre-buffered” or “pH stabilized” benefit from a verification rinse and EC check before use. Manufacturing quality varies. Spend 20 minutes checking it now rather than diagnosing Cal-Mag deficiency for two weeks.
Nutrients for Coco Coir Hydroponics
Coco coir’s cation exchange capacity (CEC) means the medium actively interacts with your nutrient solution rather than just holding it passively. Understanding this changes how you feed.
Cal-Mag Is a Permanent Addition
You will need to add a Cal-Mag supplement to every single feeding in coco, from week one through flush. This is not optional. Even after buffering, coco continues to hold calcium and magnesium ions throughout the grow as it naturally exchanges them with other cations in solution. If you drop Cal-Mag from your schedule, deficiency symptoms will appear within a week.
Typical dosing is 3-5ml per liter of Cal-Mag alongside your base nutrient solution. If you’re running a coco-specific nutrient line (brands like Canna Coco or General Hydroponics MaxiCoco are formulated for this), the Cal-Mag is often partially built in, but supplemental Cal-Mag is still commonly needed at higher feeding levels.
Use a Coco-Specific or Hydroponic Nutrient Line
Standard potting mix nutrients designed for soil are not appropriate for coco. Soil nutrients assume slow microbial release cycles that don’t apply in a clean coco setup. Use a hydroponic formula or a coco-specific product. The ratios of phosphorus and potassium are different between soil and hydro formulas, and using the wrong one will cause lockout issues.
For a broader look at how feeding works across different media, feeding your hydroponic plants covers how nutrient delivery timing changes by system type.
Run-to-Waste vs. Recirculating
Coco is almost always run in a run-to-waste (RtW) configuration, especially for fruiting crops. This means your nutrient solution runs through the medium once and drains out rather than being recirculated back to the reservoir. RtW with coco prevents salt accumulation, keeps EC predictable, and reduces the risk of pathogens building up in recycled solution. If you want to recirculate with coco, you need to monitor EC drift very carefully and flush more frequently.
Coco Coir vs Rockwool: When to Choose Each
These two media dominate commercial hydroponic production, and the choice often comes down to how you run your system and how hands-on you want to be.
Coco coir is more forgiving on watering frequency. It holds moisture longer, which means plants can handle a pump failure or missed irrigation cycle without immediate wilting. Coco is also renewable and compostable at end of life, which matters if sustainability is a priority for you.
Rockwool has a more uniform structure that makes it predictable in high-frequency drip systems. It’s also sterile out of the box and ideal for propagation, since small rockwool cubes hold moisture very evenly and support consistent germination rates. When you look at using rockwool as an alternative medium, the propagation advantage is real. Many growers start seeds in rockwool and transplant into coco for the main grow.
The practical answer: rockwool for propagation and precision drip, coco for most other applications including Dutch buckets, hand-watered setups, and drip systems with moderate frequency. Neither is definitively better. It depends on what your system actually demands.
Which Hydroponic Systems Pair Well with Coco Coir
Coco isn’t compatible with every system format. Getting the pairing right matters.
Drip Systems
This is where coco performs best. In a drip system, nutrient solution is delivered directly to the root zone on a timer, and coco’s moisture retention bridges the gap between irrigation cycles. For a deeper dive into this pairing, drip systems that work well with coco coir walks through the setup in detail.
Dutch Bucket
Dutch bucket systems with coco are one of the most common setups for tomatoes, peppers, and cucumbers in home and commercial grows. The individual bucket format lets you customize plant spacing and the run-to-waste drain handles runoff naturally. Most Dutch bucket growers run coco with 20-30% perlite mixed in for drainage.
Ebb and Flow
Coco works in ebb and flow, but with some caveats. The flood-drain cycle needs to be tuned carefully because coco holds moisture longer than clay pebbles or rockwool, which means you can easily overwater if flood cycles are too frequent. Keep drain intervals longer than you would with inert media.
Hand-Watered Media Beds
Coco is commonly used in passive or hand-watered setups for smaller grows. You water to runoff, allow the medium to partially dry before the next watering, and repeat. This approach works well for beginners because it doesn’t require pump timers or automation. The moisture retention of coco gives you more flexibility on watering intervals than you’d have with a dry inert medium like clay pebbles.
Not Ideal for: DWC and NFT
Coco doesn’t belong in deep water culture or NFT systems. DWC suspends roots directly in oxygenated solution, so there’s no need for a moisture-retentive medium. NFT relies on a thin nutrient film flowing over bare roots, and introducing a coco bed into that channel disrupts flow and creates anaerobic pockets. For these systems, look at how clay pebbles compare as a growing medium or how the growing medium for your hydroponic system choice affects system design.
Mixing Coco Coir with Perlite
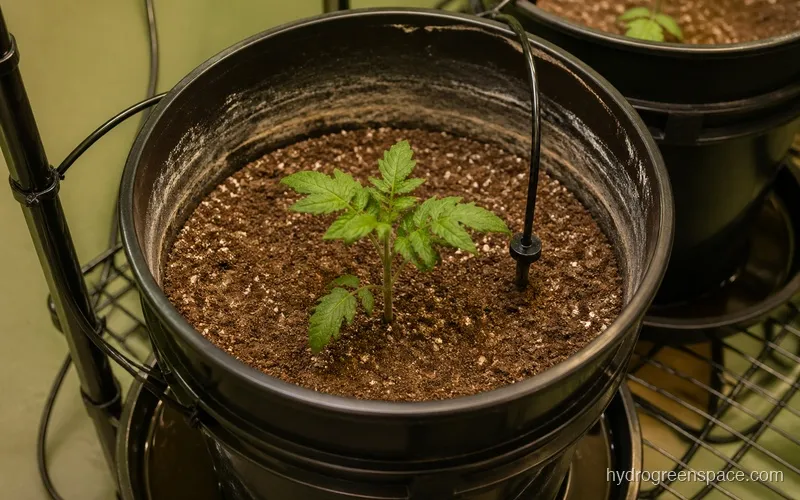
The coco-perlite mix is so common it might as well be a standard formula in the hobby. Straight coco, especially fine coco pith, holds too much moisture and compacts over a long grow. Adding perlite for better drainage solves both problems.
A 70/30 coco-to-perlite ratio is a reliable starting point for most drip systems and Dutch buckets. If you’re hand-watering on less frequent intervals, you might go 80/20. If you’re running high-frequency automated drip with multiple feeds per day, a 60/40 or even 50/50 ratio keeps root-zone oxygen where it needs to be.
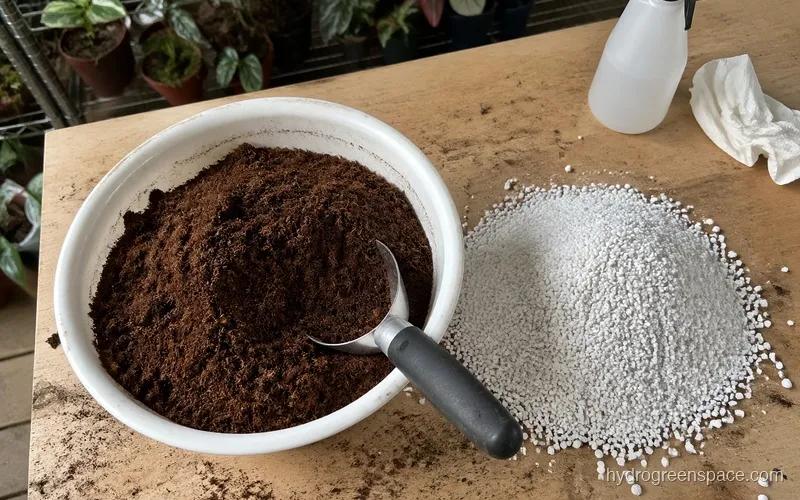
Avoid adding vermiculite to a coco mix. Vermiculite retains even more moisture than coco and will push your root zone toward waterlogged conditions in a medium-based setup. Perlite is the correct pairing.
Reusing Coco Coir
Coco is not as reusable as clay pebbles or rockwool, but it can be used for two or three grow cycles with proper treatment between runs.
At the end of each grow, flush the medium thoroughly with a dilute hydrogen peroxide solution (1-2%) to clear pathogen residue, then flush again with plain pH-adjusted water. Let it dry partially before storing. Re-buffer with a Cal-Mag solution before the next use, and check the EC of the runoff before planting.
After two to three cycles, coco pith starts to break down structurally. It compacts, stops holding its original texture, and drainage suffers. At that point, compost it and start fresh. The cost of coco is low enough that trying to stretch degraded medium past its useful life costs more in plant performance than you save on media.
For healthy root zones throughout the grow, adding beneficial bacteria to your coco setup helps maintain a clean rhizosphere and supports nutrient uptake, particularly in run-to-waste systems where you’re not recirculating an established microbial community.
Root Rot in Coco vs Soil
One of the questions new coco growers ask is why root rot seems less common in coco than in soil. The answer comes down to oxygen.
Soil compacts over time and traps water in pockets with no gas exchange. When those pockets stay wet, the anaerobic conditions allow pathogens like pythium to establish rapidly. Coco, even when fully saturated, maintains air channels between the fibers. The root zone stays oxygenated even during the wet phase after irrigation, which is the critical difference.
That said, coco is not immune to root rot. Overwatering, poor drainage, high temperatures, or a contaminated medium will still produce the conditions pythium needs. If you see slimy brown roots in your coco setup, preventing root rot in your system covers the diagnosis and treatment steps in detail.
Also keep in mind that the clay pebbles vs LECA as a substrate comparison is worth reading if you want to see how an inert, fully draining medium handles the same moisture management challenge differently.
If you’re still figuring out which medium makes the most sense for your specific setup, the full growing media comparison covers coco, clay, rockwool, perlite, and everything else side by side with system-specific recommendations. Pick your medium based on your system, your watering schedule, and how much hands-on management you want. Buffer your coco before it ever sees a plant root.