
How to Make a Kratky Hydroponic System (No Pump)
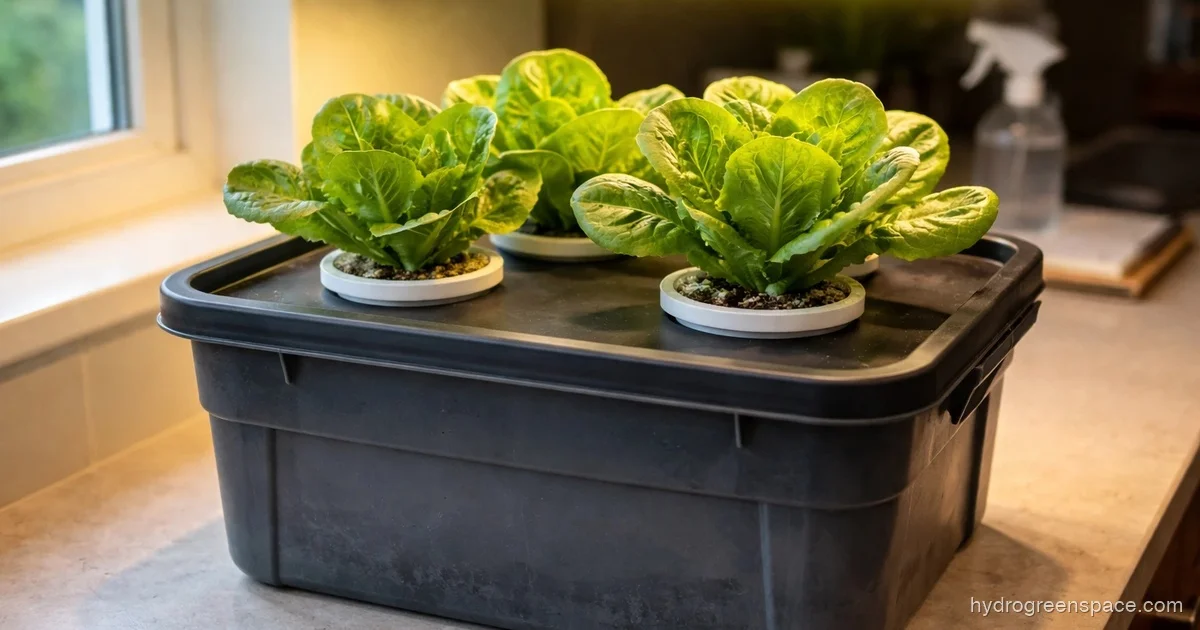
The Kratky method is the one hydroponic technique that genuinely requires no pump, no air stone, no electricity, and no timers. You fill a container with nutrient solution, suspend a plant above it, and let physics do the rest. For anyone who has looked at a recirculating DWC setup and thought “that’s a lot of equipment,” this is the alternative.
The catch is that simple does not mean foolproof. Most Kratky failures come down to one mistake made on day one: the water level. Get that right, and the system almost runs itself.
This guide covers how to build a Kratky hydroponic system in three different container sizes, because the right container depends entirely on what you are growing. A mason jar is perfect for a single herb plant. A storage tote handles a row of lettuce. A 5-gallon bucket gives larger plants like peppers or small tomatoes enough reservoir volume to finish a full grow.
How the Kratky Method Actually Works
Most passive hydroponic systems are just poorly designed active ones. The Kratky method is different because the air gap is intentional and essential.
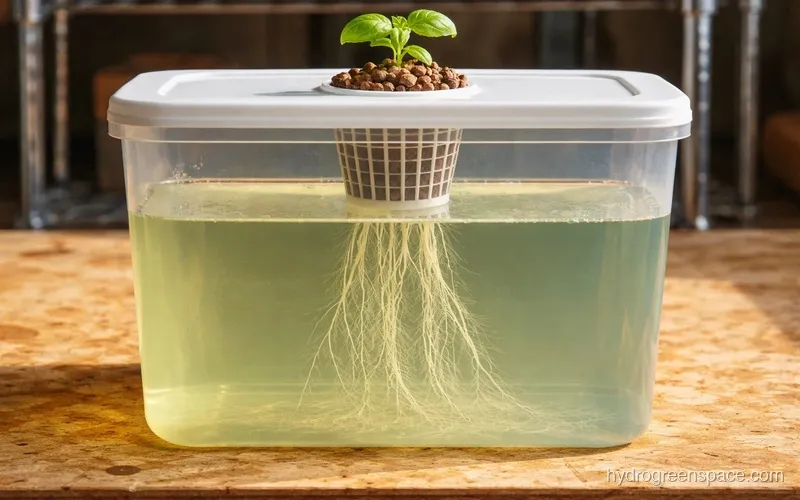
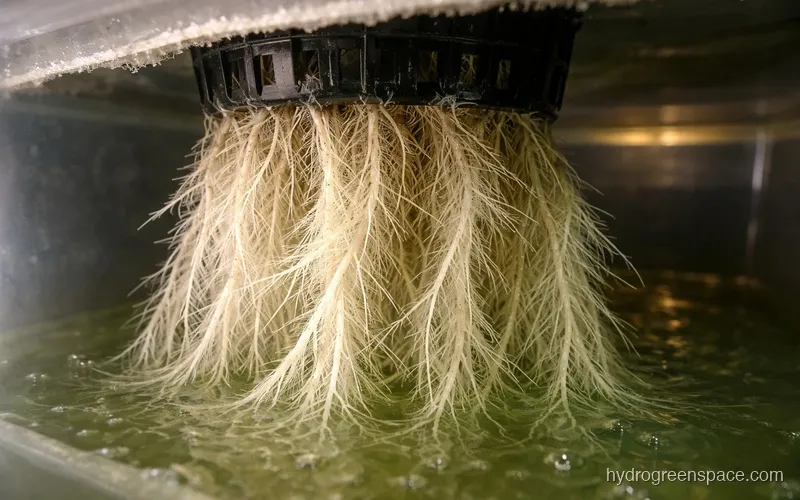
When you first fill the reservoir, the roots sit just at or slightly below the surface of the nutrient solution. As the plant drinks, the water level drops. That dropping water level creates an air gap between the surface of the solution and the lid or net pot. The roots that are now exposed to that humid air gap develop into thick, oxygen-hungry aerial roots. The roots still submerged in solution continue pulling up water and nutrients.
This separation between the wet lower root zone and the oxygenated upper root zone is what allows non-circulating hydroponics to work without an air pump. The plant is essentially creating its own root zone oxygenation as it grows.
If you want a broader picture of how this fits into the hydroponic landscape, the different types of hydroponic systems article covers how Kratky compares to NFT, DWC, and ebb-and-flow in a single breakdown.
What You Need (All Three Builds)
Before choosing a container size, gather the core materials. They are identical across all three builds.
Universal supplies:
- Net pots (2-inch for mason jars, 2- or 3-inch for totes, 3.75-inch for buckets)
- Growing medium (hydroton clay pebbles, rockwool cubes, or perlite)
- Hydroponic nutrient solution (a two-part or three-part formula with a complete NPK + micronutrient profile)
- pH meter or test kit
- pH up/pH down solution
- Seeds or seedlings
Target your nutrient solution pH at 5.5 to 6.2. Outside that range, plants lock out nutrients even when the solution is correctly formulated. If you are mixing your own nutrients from scratch, the DIY hydroponic nutrients from compost guide is worth reading before your first mix.
Per-container additions:
- Mason jar build: 1-quart or half-gallon wide-mouth mason jar, 2-inch net pot lid or a DIY lid with hole
- Storage tote build: 10 to 18-gallon opaque storage tote, drill with 2- or 3-inch hole saw
- 5-gallon bucket build: standard 5-gallon bucket with lid, 3.75-inch hole saw
Note: Never use clear containers without covering them. Algae grows fast in any reservoir exposed to light, and once it takes hold it competes with your plants for nutrients and oxygen. Paint clear containers on the outside, wrap them in foil, or use tape. Anything that blocks light works.
Build 1: Mason Jar Kratky for Herbs
This is the most forgiving starting point. A single basil plant, one green onion, or a small cilantro in a wide-mouth mason jar is a weekend project with visible results inside a week.
Steps:
- Cut or purchase a 2-inch net pot lid sized for your mason jar opening.
- Fill the net pot with rinsed clay pebbles or a pre-wetted rockwool cube.
- Place your seedling (or seed) in the growing medium.
- Mix your nutrient solution at half-strength for seedlings (check your nutrient label for the seedling rate).
- Fill the jar so the bottom of the net pot is touching the nutrient solution, approximately 0.5 inches of immersion on the net pot itself.
- Cover the jar exterior with tape or paint to block light. The lid area around the net pot can stay open.
- Place under a grow light or in a south-facing window with strong indirect light.
The jar holds roughly 32 oz of solution for a quart jar. A basil plant will drink through that in 2 to 4 weeks depending on temperature and light intensity. When the level drops low, you have a decision to make (more on that in the topping-up section below).
Tip: Start with basil or green onions for a first Kratky build. Both show results fast, tolerate a slightly imperfect pH, and give you a clear sense of how quickly the water level drops so you can calibrate your expectations before moving to a larger build.
Build 2: Storage Tote Kratky for Lettuce
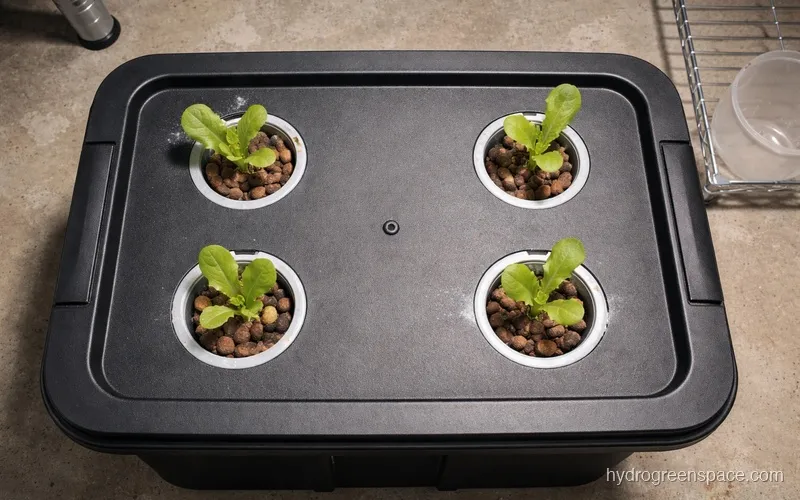
A 10 to 18-gallon opaque storage tote is the classic Kratky method lettuce setup. You can fit 6 to 12 plants in a single tote depending on hole spacing, and the larger reservoir volume means you check in far less often than with a jar.
Steps:
- Mark hole positions on the tote lid. Space 2-inch holes at least 6 inches apart for loose-leaf lettuce, 8 inches for butterhead varieties.
- Drill holes with the hole saw. Deburr with sandpaper so net pots sit flush.
- Mix your nutrient solution at full strength (around 800 to 1,200 ppm for lettuce, depending on growth stage). Fill the tote.
- The correct starting water level: the base of each net pot should touch the surface of the solution, with no more than 0.25 to 0.5 inches of the pot submerged. This is critical. More on why below.
- Add seedlings to net pots. Transplant seedlings that already have a small root mass if possible. Seeds can be germinated directly in the pots in rockwool cubes.
- Seal the lid. Tuck any gaps between the lid and tote with foam weatherstrip tape to block light entry at the seams.
A fully planted 18-gallon tote will grow a head of lettuce to harvest in 30 to 45 days under decent LED lighting. If you are running this in a basement or interior room, the basement hydroponics setup guide covers lighting and humidity management in detail.
Build 3: 5-Gallon Bucket Kratky for Larger Plants
A 5-gallon bucket hydroponic system gives you enough reservoir volume for plants with higher nutrient demands: peppers, small tomatoes, cucumbers, or large herbs like dill or large-leaf basil.
Steps:
- Mark a single hole in the center of the bucket lid sized for a 3.75-inch net pot.
- Drill the hole, deburr the edge.
- Mix nutrient solution at full strength. For fruiting crops like peppers, start around 1,200 to 1,500 ppm and increase to 1,600 to 2,000 ppm once flowering begins.
- Fill the bucket so the base of the net pot just barely contacts the solution surface, 0.25 to 0.5 inches of immersion maximum.
- Place the seedling in the net pot with clay pebbles packed firmly around the stem.
- Cover any light entry points. Black buckets work well, but still tape over the lid seams.
Tip: For tall plants like indeterminate tomatoes, Kratky works for the first 8 to 10 weeks but will start to struggle as the plant outgrows the reservoir volume. You can transition mid-grow to a recirculating DWC setup if needed. The DIY deep water culture system guide shows that transition.
The Water Level Mistake That Kills Most Kratky Grows
The correct starting water level is not “fill it up.” Starting too high is one of the most common Kratky failures.
If the net pot is deeply submerged in the nutrient solution at the start, the root zone never gets enough oxygen. The roots stay wet continuously, oxygen-starved roots rot, and the plant collapses within 7 to 10 days. It looks like overwatering, because it effectively is.
The rule: on day one, the net pot base should just barely touch the solution. A light dip of 0.25 to 0.5 inches is fine. An inch of submersion is too much for most plants.
As the plant grows and the water level drops naturally, the upper roots will dry out and develop into the aerial root zone. That is the air gap doing its job. Do not panic when you see dry, white, fuzzy roots hanging above the water line. Those are healthy roots.
Can You Top Up a Kratky Reservoir?
Yes, but with a constraint. When you top up, never refill to the original starting level. Top up to approximately the halfway mark of the current root zone depth. You want to keep the aerial root portion of the roots exposed.
If you flood the reservoir back to the lid level, you submerge all the aerial roots and restart the oxygen deficit problem from scratch. The plant will recover, but it wastes a week of growth.
For a hydroponic garden without a pump, topping up correctly is the single most important maintenance skill.
Preventing Root Rot Without an Air Pump
Root rot in Kratky comes from three sources: light contamination, starting water level too high, and stagnant warm nutrient solution. A fourth source is using tap water with high chloramine content in a non-aerated system where the chloramine has no opportunity to off-gas.
Preventing it:
- Keep reservoir temps below 72°F (22°C). Warm water holds less dissolved oxygen.
- Block all light from the reservoir. Even small pinhole leaks through lid gaps are enough for algae to establish.
- Use beneficial bacteria products (like Hydroguard or similar) as a preventative, not a cure. Add them at the first fill.
- If you suspect root rot (brown, slimy roots with a sulfur smell), remove the plant, rinse the roots gently with plain pH-adjusted water, trim dead roots, and add a beneficial bacteria product before returning to a freshly mixed reservoir.
What Grows Best in a Kratky System
Leafy greens and herbs are the natural fit: lettuce, spinach, arugula, kale, basil, mint, cilantro, and green onions. These plants finish a growth cycle before the reservoir runs out, which is exactly how Kratky is designed to work.
Fruiting crops (tomatoes, peppers, cucumbers) are possible in a 5-gallon or larger build, but they demand more nutrient solution volume and more attentive top-up management. Compared to growing vegetables in soil, they will mature faster but need more monitoring than lettuce does.
Plants that do not work well: anything with very deep or woody root systems (larger trees, perennials), aquatic plants, and root vegetables like carrots or radishes.
Scaling Up Your Kratky Setup
Once you have one successful build, the natural next step is stacking or multiplying containers. A row of five storage totes under a 4-foot LED bar is a functional small-scale lettuce farm producing harvests every 5 to 6 weeks on a staggered planting schedule.
The best hydroponic systems for vegetables article covers how Kratky fits into a broader indoor growing setup if you are thinking beyond single containers.
If cost is a constraint, the Kratky method is one of the cheapest ways to start. Most builds cost under $15 per container using storage totes and basic two-part nutrients, and the equipment is reusable indefinitely. The hydroponic systems you can build for under $50 piece shows exactly what that budget can cover.
Kratky is the entry point that makes hydroponics feel possible rather than intimidating. It is one of the simplest systems in the complete DIY hydroponic guide, which maps out every build from passive Kratky jars to full recirculating systems. Once you have harvested your first tote of lettuce and seen how little maintenance it actually required, the next build will take you 20 minutes instead of an afternoon.