
DIY PVC Hydroponic Tower Garden: Build Guide
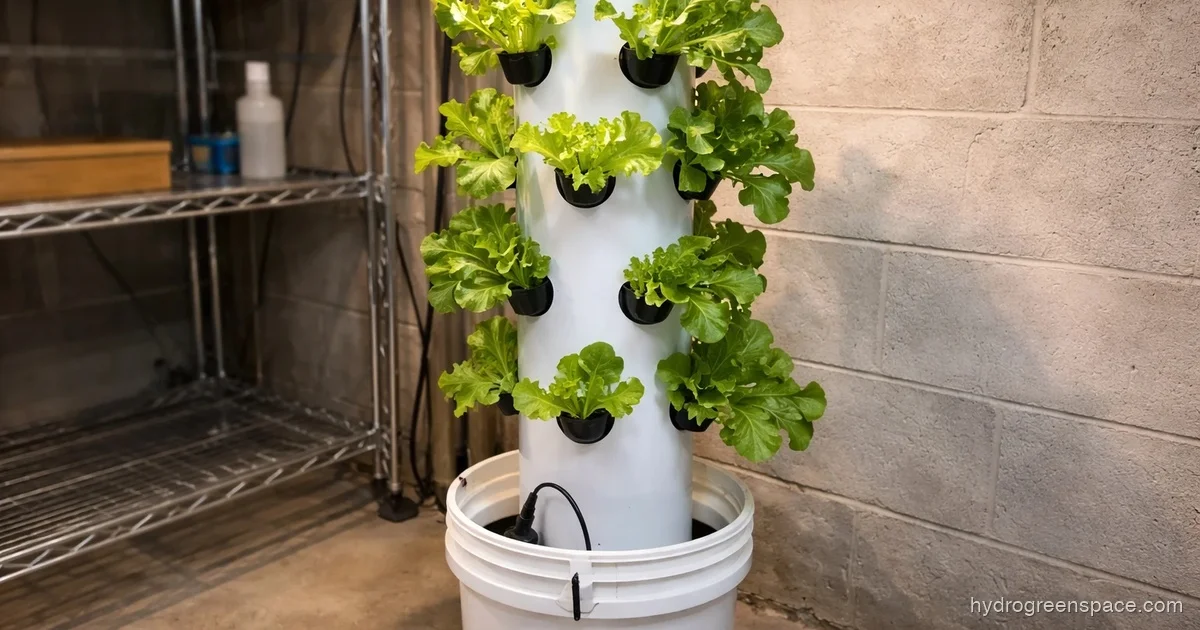
PVC towers are one of the most satisfying builds in home hydroponics. You get a functional, vertical growing system for $50–$80 in materials, and if you do it right, you can run 20+ plants in the footprint of a single pot. The catch is that there are a few decisions early in the build that can make your tower thrive or turn it into an algae-filled mess. This guide walks through all of them.
If you want to understand the mechanics before you build, read through how a hydroponic tower works first. This article focuses on the actual build.
Is PVC Safe for Hydroponics?
This is the question that trips up a lot of first-time builders, so let’s settle it before anything else.
Standard Schedule 40 PVC is safe for hydroponics. It’s the same material used in residential plumbing, and studies on PVC pipe leeching show that the risk to food crops is negligible at normal growing temperatures. The concern most people read about online is plasticizers in flexible PVC (like garden hose material or vinyl tubing), not rigid Schedule 40 pipe.
You do not need to hunt down “food-grade PVC.” Regular white Schedule 40 from any hardware store is what you want. It’s rigid, widely available, cheap, and has been used in commercial hydroponic towers for decades.
One actual concern: UV degradation. If you’re building an outdoor tower, paint it white or wrap it to reflect sunlight. This does two things: it slows the degradation of the pipe over time, and it blocks light from hitting your nutrient solution, which is the main cause of algae in tower systems.
Warning: Do not use grey electrical conduit (EMT/PVC conduit) in place of plumbing PVC. It looks identical but uses different stabilizers and is not the same material. Stick to white Schedule 40 plumbing pipe.
Choosing Your Pipe Size: 4-Inch vs 6-Inch
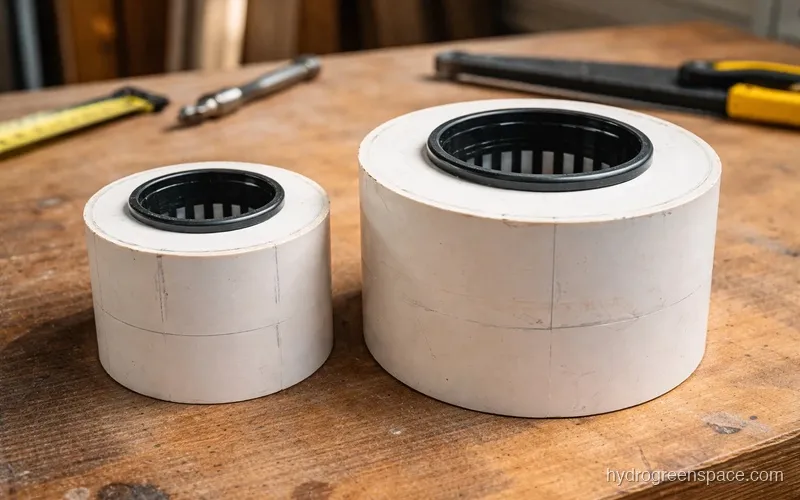
Four-inch pipe is the standard recommendation for a first tower, and it’s what most DIY builds use. You can fit 2-inch net cups comfortably, and the pipe is light enough to handle when fully planted. A 5-foot section of 4-inch Schedule 40 PVC runs about $12–$15 at a hardware store.
Six-inch pipe opens up your plant options significantly. You can run larger net cups (3-inch), which means more root mass and better airflow around each plant. Tomatoes, peppers, and larger herbs do better with the extra space. The trade-off is weight and cost. A 5-foot section of 6-inch PVC is roughly twice the price and considerably heavier once the growing medium is in.
For a first build growing leafy greens and herbs, go with 4-inch. If you’re planning to grow strawberries or want to eventually try fruiting plants, start with 6-inch.
How Tall Should Your Tower Be?
A practical first tower sits between 4 and 6 feet tall. This gives you 8–12 planting sites on a 4-inch pipe and keeps your reservoir and pump requirements manageable.
Going taller runs into two problems. First, pump head pressure: every foot of vertical height your pump has to push water requires more GPH capacity. A 6-foot tower with a reservoir sitting on the floor means about 7–8 feet of total head height once you account for tubing length. Second, a tall tower gets heavy and unstable. If you’re indoors, you’ll want a ceiling anchor or frame.
For most home growers, a 5-foot tower is the sweet spot.
Spacing the Holes
For 2-inch net cups in 4-inch pipe, space holes 6 inches apart vertically. This gives each plant enough room to grow without leaves from adjacent plants blocking light or airflow.
Stagger your holes in a spiral pattern around the pipe instead of cutting them all in a straight line down one side. A true spiral (rotating about 45–90 degrees between each hole) means each plant gets unobstructed light from at least one direction and the structural integrity of the pipe stays higher.
A simple hole saw at the right diameter makes clean cuts. For 2-inch net cups, use a 2-inch hole saw. The net cup should fit snugly without gaps where light can enter. Any light leak into the pipe is a future algae problem.
Pump Sizing: Getting This Right Matters
Too small a pump and your upper plants dry out. Too large and you’re wasting electricity and creating turbulence that strips oxygen from your solution.
A rough rule: you want to deliver about 1–2 gallons per minute to the top of the tower. For a 5-foot tower with a reservoir on the floor, your total head height (vertical lift + friction loss in tubing) is around 6–7 feet.
Look at pump specs for “flow rate at head height,” not the maximum GPH rating printed on the box. A pump rated at 400 GPH free-flow might only push 80–100 GPH at 6 feet of head. That’s still plenty for a single tower, but if you’re daisy-chaining two or three towers, you need to scale up.
For a single tower, a 200–400 GPH submersible pump is the right range. Something like a 264 GPH pump (commonly found for $15–$20) runs well for a standard 5-foot single tower with a 5-gallon reservoir.
If you want to compare pump options in detail before buying, this breakdown of the best hydroponic water pumps covers what to look for by system type.
Building the Reservoir and Circulation
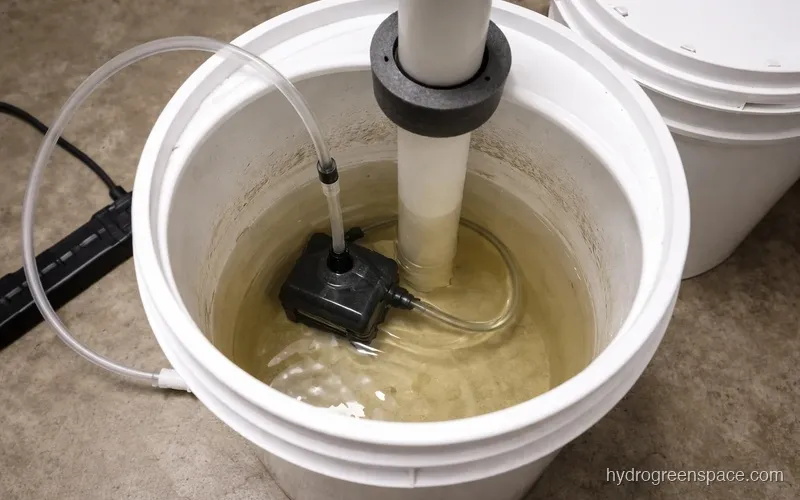
The reservoir sits at the base. A 5-gallon bucket or a 10-gallon tote both work, depending on how many plants you’re running.
For a single 5-foot tower with 10 planting sites, a 5-gallon bucket reservoir is functional but you’ll be topping off every 2–3 days in summer. A 10-gallon tote is more forgiving and gives you more buffer for pH and EC stability. If you’ve built a DWC system before, repurposing the same type of tote works perfectly here.
The pump sits submerged in the reservoir and pushes nutrient solution up through a central tube to the top of the tower. The solution flows through each planting site from top to bottom, then drains back into the reservoir. This is essentially a small NFT-style recirculating system.
Make sure your drain hole at the base of the tower is large enough to keep up with your pump output. A mismatch between inflow rate at the top and drain capacity at the bottom causes pooling inside the pipe, which drowns roots.
Growing Medium and Net Cups
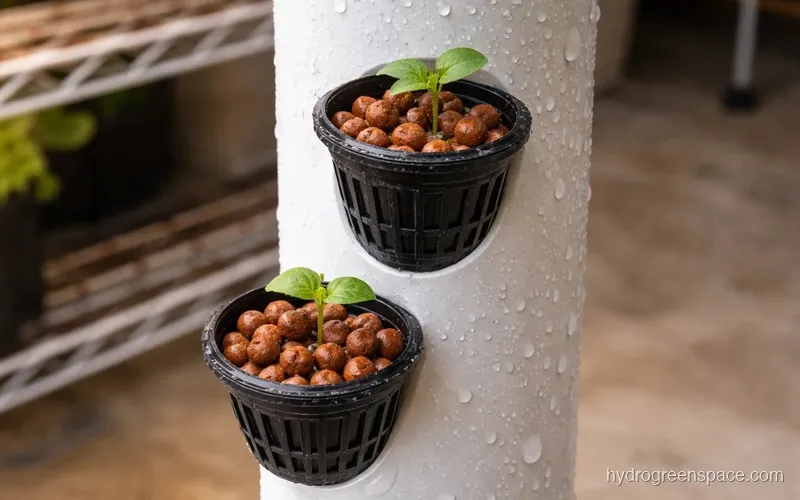
Clay pebbles (hydroton) are the go-to for tower builds. They drain fast, don’t compact, and are reusable after a thorough cleaning between cycles. Fill each net cup about halfway, place your seedling or clone, then fill around it to the lip of the cup.
Rockwool cubes also work well if you’re starting from seed. Start seeds in rockwool, let them establish, then transplant the cube directly into the net cup and backfill with clay pebbles. The roots will grow through the rockwool and into the pipe chamber quickly.
If you want a detailed look at how different growing media compare, rocks for hydroponics covers the full range of options beyond just clay pebbles.
What Plants Grow Best in a PVC Tower?
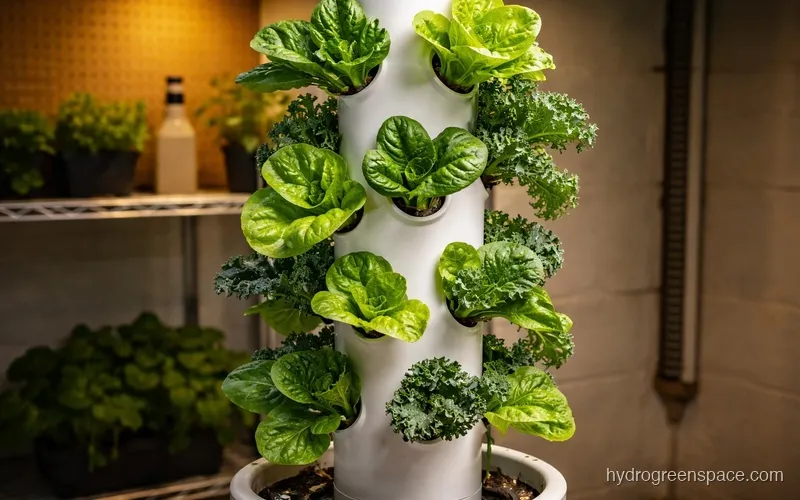
Leafy greens are the clear winners. Lettuce, spinach, kale, and arugula grow fast, have shallow root systems, and produce continuously if you harvest outer leaves rather than cutting the whole plant.
Herbs are a close second. Basil, parsley, cilantro, and chives all thrive in a tower. Mint works but spreads aggressively, so keep it in its own section or in a separate system.
Strawberries are the surprise star of tower gardening. They grow well in 4-inch pipe, the vertical position actually helps the berries hang clear of the plants, and the fruit-to-space ratio is excellent. They need slightly different nutrient management than leafy greens (lower nitrogen once flowering), but the yield is worth it.
Tomatoes and peppers are technically possible in a 6-inch tower, but the support structure required for the weight of fruiting plants makes the build significantly more complex. For your first tower, stick to greens and herbs. Check the full list of hydroponic vegetables when you’re ready to expand what you’re growing.
What Actually Goes Wrong (and How to Prevent It)
Algae. This is the number one issue with PVC towers. Every light gap, every translucent section of tubing, every uncovered reservoir opening becomes an algae breeding ground. Paint or wrap your pipe, use black tubing for your feed line, and keep your reservoir lid light-tight.
Uneven flow. If your top plants look wet and your middle ones look dry, your inner delivery tube is clogged or your pump is undersized for the head height. Clean the tube and check the pump spec against your actual head height.
Net cup gaps. Light-blocking tape around any loose net cups before you plant. Fixing algae in an established tower is miserable.
Nutrient drift. In a small reservoir, evaporation concentrates your nutrient solution faster than you’d expect. Top off with plain water (not fresh nutrient solution) when the level drops, and do a full reservoir swap every 7–10 days. For mixing guidance, how to feed hydroponic plants has a solid primer on maintaining EC and pH in recirculating systems.
Putting It Together
Cut your pipe, drill your holes in a spiral pattern, insert a central delivery tube, mount the assembly over your reservoir, wire in your pump, and you have a working vertical hydroponic system. The total build time for a first tower is usually 3–4 hours including drying time for any sealant.
Once you’ve run one tower successfully, the second one goes together in half the time. Most growers start with a single tower, get comfortable with the nutrient schedule and maintenance rhythm, then add a second or third unit. That’s also when it makes sense to look at a vertical PVC hydroponic system setup with multiple towers on a shared reservoir, which cuts your maintenance time considerably.
Start simple, get one tower producing well, and build from there. A PVC tower is one of the most space-efficient builds in the DIY hydroponic systems toolkit, and the skills you pick up on a single tower apply directly to every vertical build that follows.