
DIY Hydroponic Systems Under $50 That Actually Work
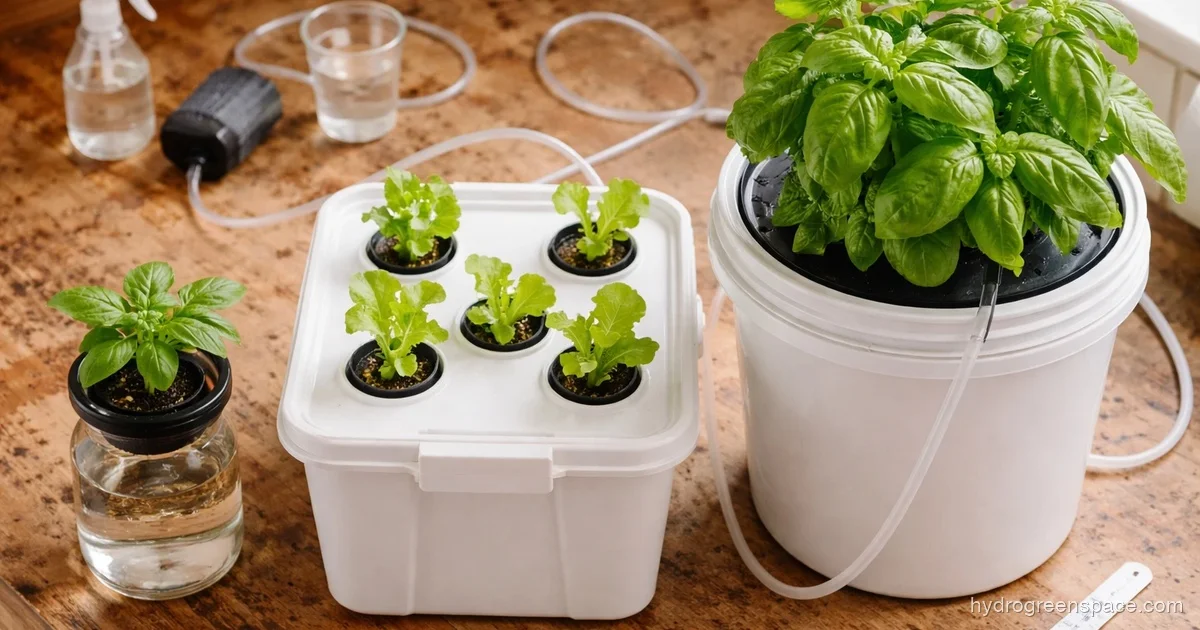
You have about $50 and a free afternoon. That’s enough to build a working hydroponic system that will grow real food. I’ve built all three of the setups below, and each one taught me something different about how hydroponics actually works at its core.
Pick the build that matches your budget and what you want to grow. Then go buy the parts.
The $10-15 Build: Kratky Mason Jar
This is the one I recommend to anyone who’s never touched hydroponics. No pump. No electricity. No timer. Just a jar, some nutrients, and a plant.
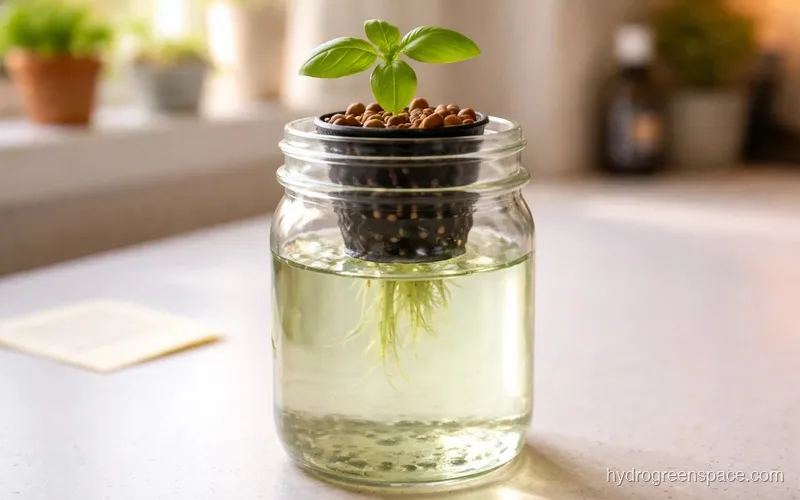
The Kratky method works by leaving an air gap between the water surface and the net pot. As the plant drinks, the roots that were submerged grow longer into the solution, and the roots exposed to air become your oxygen source. It’s passive deep water culture that runs itself.
Parts List
| Item | Where to buy | Cost |
|---|---|---|
| Quart mason jar (wide mouth) | Walmart / dollar store | $1-2 |
| 2” net pot | Amazon (pack of 10) | $3-4 |
| Small bag clay pebbles | Amazon | $5-7 |
| Hydroponic nutrients (starter size) | Amazon / garden center | $8-12 |
Total: roughly $10-15 depending on where you source nutrients.
If you already have mason jars at home, the build drops below $10.
How to Build It
- Set the 2” net pot in the jar opening. If it doesn’t sit snugly, wrap the rim with a strip of foil tape to close the gap.
- Fill the jar with water mixed to 1/4 strength nutrients. For beginners, General Hydroponics Flora Series or MaxiGro both work at this scale.
- Fill the net pot with rinsed clay pebbles. Set your seedling or rooted cutting inside.
- The water level should just touch the bottom of the net pot to start. As the plant grows, don’t refill to that level again. Let it drop naturally and keep the air gap growing.
That’s it. No timers to set, no pumps to prime.
What to Grow
Herbs only at this scale. Basil, cilantro, mint, and parsley all do well. Lettuce will work in a single jar but the root mass gets crowded fast. Avoid anything fruiting or tall-stemmed.
Tip: Wrap the outside of the jar with black electrical tape or foil. Light hitting the nutrient solution grows algae, and algae competes with your plant for nutrients and oxygen.
The $25-35 Build: Rubbermaid Tote DWC (4-6 Plants)
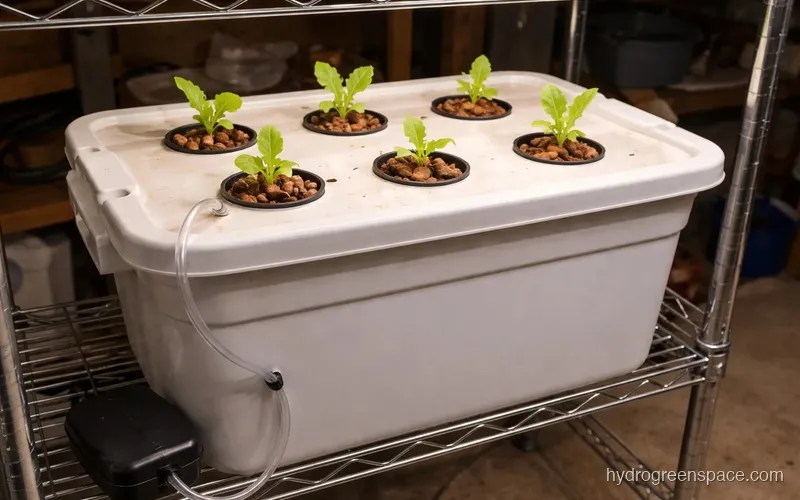
This is where most people find their groove. A standard 18-gallon Rubbermaid tote gives you enough root space and reservoir volume to grow 4-6 heads of lettuce or a cluster of herbs at once. Unlike the mason jar, this build uses an air pump to oxygenate the water, so your roots stay healthy as the root mass gets larger.
You can find everything at Walmart and a quick Amazon order. For a deeper breakdown of how tote systems are built and sized, check out building a hydroponic tote system.
Parts List
| Item | Where to buy | Cost |
|---|---|---|
| 18-gallon Rubbermaid tote | Walmart | $8-10 |
| Aquarium air pump (small, 1-2 outlets) | Walmart / Amazon | $7-10 |
| Air tubing (3 feet) | Walmart aquarium section | $2-3 |
| Air stone | Walmart aquarium section | $2-3 |
| 3” net pots (6-pack) | Amazon | $4-5 |
| Clay pebbles (small bag) | Amazon | $5-7 |
| Nutrients | Amazon / garden center | $8-12 |
Total: $36-50 depending on nutrients. You can hit $25-35 if you already have an air pump or find one secondhand.
How to Build It
- Mark 6 evenly spaced holes in the lid using your 3” net pot as a template. Cut with a utility knife or hole saw.
- Connect the air pump to the air stone with tubing. Drop the air stone to the bottom of the tote. Run the tubing over the rim and plug the pump in.
- Mix your nutrient solution at 1/2 strength for seedlings, full strength for established plants. Fill the tote to within 2 inches of the lid.
- Set net pots in the holes. Fill with clay pebbles. Place seedlings.
- The air stone creates constant circulation, so you don’t need a separate water pump.
If you want to eliminate the pump entirely and run a passive version of this setup, pool noodle hydroponics is a clever approach that uses foam instead of net pots.
What to Grow
Lettuce is the obvious answer and it’s right. Butterhead, romaine, and loose-leaf varieties grow fast and fill out nicely at this scale. You can also run basil, spinach, or kale. A full tote of lettuce can be ready to harvest in 4-5 weeks from transplant.
What I’d do: Start with 3 plants your first run, not 6. You’ll learn faster with fewer variables, and if something goes wrong (pH crash, pump failure), you lose half a crop instead of the whole thing.
The $40-50 Build: 5-Gallon Bucket DWC (Single Large Plant)
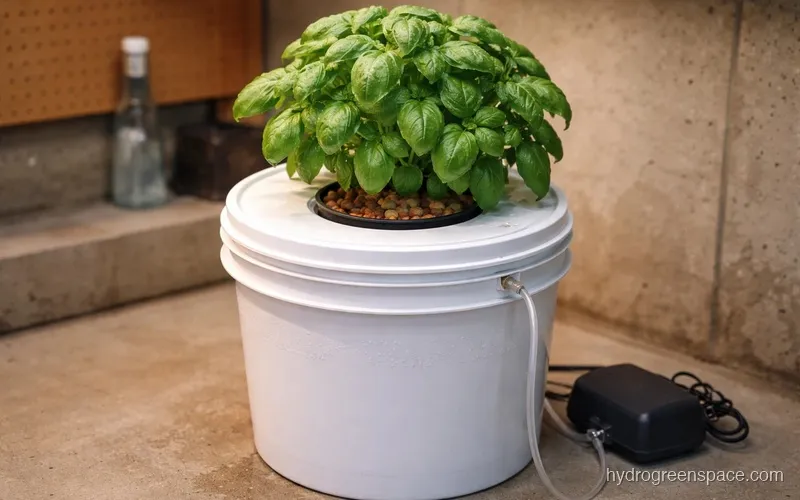
If you want to grow one big plant well, a 5-gallon bucket DWC setup is the right format. The deeper reservoir handles root systems that would crowd out a tote in 3 weeks. This build works well for full-size basil, large-head lettuce, or eventually peppers and small tomatoes once you add lighting.
Parts List
| Item | Where to buy | Cost |
|---|---|---|
| 5-gallon food-grade bucket with lid | Home Depot / Walmart | $5-7 |
| Aquarium air pump (adjustable) | Amazon | $10-14 |
| Air stone + tubing | Amazon or Walmart | $3-5 |
| 6” net pot | Amazon | $2-3 |
| Clay pebbles | Amazon | $6-8 |
| Nutrients | Amazon | $8-12 |
Total: $34-49. Buy the adjustable air pump if you plan to scale later, since you can run multiple buckets off one pump with a splitter.
How to Build It
- Cut a single 6” hole in the center of the lid. A 6” hole saw makes this clean; a utility knife works but takes patience.
- Drill a small hole near the rim for the air tubing to pass through cleanly.
- Drop the air stone in the bottom. Connect and route the tubing through the rim hole, plug in the pump.
- Mix nutrient solution at 1/2 strength for your first week, then move to full strength. Fill to 1 inch below the net pot.
- Set the net pot in the lid hole, fill with clay pebbles, and plant.
For a full walkthrough with measurements and common pitfalls, this single-bucket hydroponic system guide covers the build in more detail.
What to Grow
Large basil, full-head lettuce, and Swiss chard are ideal. If you’re growing under natural light or a window, stick to greens. If you have a cheap LED panel, you can try a small pepper plant, but expect a slower grow at this budget.
What You Can Skip at This Budget
You don’t need a pH meter, a TDS meter, or a full grow light setup to start.
pH meter: You can start without one. Tap water in most US cities falls between 6.5 and 7.5, which is workable for a first grow, especially for herbs and lettuce. If your plants look yellow and sluggish after week 2, that’s when to buy a meter and check. The $15 Blue Lab or Apera entry meters are worth it at that point.
TDS meter: Same story. Mix nutrients to label instructions at 1/2 strength and you’re in the ballpark. A TDS meter matters more once you’re scaling or troubleshooting. Learning how much it actually costs to start hydroponics can help you decide what’s worth adding to your budget and what isn’t.
Grow lights: If you have a south-facing window, you can skip lights for the first grow. Herbs and leafy greens need 6+ hours of direct sun. If you’re in a low-light apartment, a $20-30 grow strip light on Amazon will do the job for greens. Fruiting crops need real lighting, and that’s a different budget category.
The goal for your first build is to grow something and learn how your water behaves, how fast your plants drink, and what healthy roots look like. You’ll naturally know what gear to add after one harvest.
The Biggest Mistakes at This Budget
Most first-run failures come down to one of three things: algae from light leaking into the reservoir, nutrient solution that’s too strong for seedlings, or not checking water levels for too long. None of those are equipment problems. They’re habits. Reading through common beginner mistakes in hydroponics before your first grow will save you a failed crop.
Once you’ve run one of these builds to harvest, you’ll have a clear opinion about what you want to grow next and what system you’d actually use to do it. That’s the real point of starting cheap. When you’re ready to see what comes next, the complete guide to DIY hydroponic systems maps out every build from sub-$20 Kratky setups to full recirculating systems.