
DIY Hydroponic Drip System: Build One for Under $50
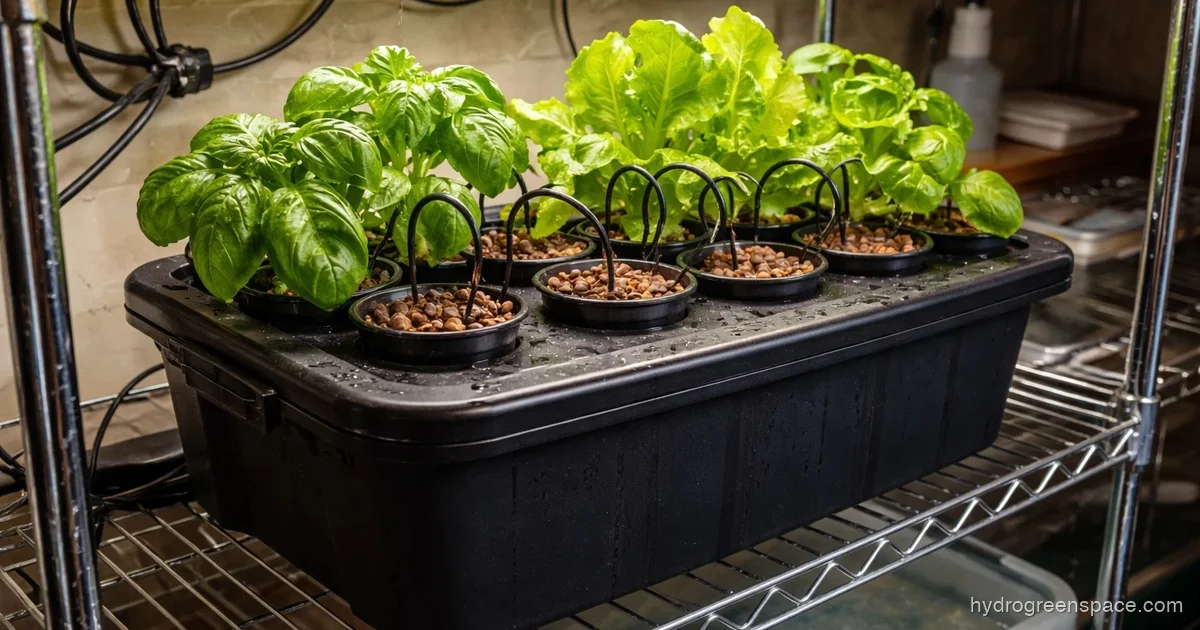
A drip system is probably the most forgiving hydroponic setup you can build at home. You can run 2 to 4 plants, spend under $50, and have the whole thing running in an afternoon.
If you’ve been reading about different types of hydroponic systems and kept landing on drip systems as your starting point, you’re in the right place. They’re not the simplest system on paper, but in practice they’re very forgiving, easy to expand, and the parts are available at any hardware store.
Recovery vs Non-Recovery: Pick This First
Before you buy anything, you need to decide which type of drip system you’re building. This isn’t a small detail; it changes how you manage nutrients and how often you intervene.
Recirculating (recovery) drip systems collect runoff from the growing containers and return it to the reservoir. The pump runs on a timer, nutrients cycle back, and you top off the reservoir every few days. This is the better choice for most beginners because it’s water-efficient and you use less nutrient solution overall.
Non-recovery drip systems let the runoff drain to waste. Each feeding delivers fresh solution, and nothing goes back to the reservoir. This eliminates the pH drift that builds up in recirculating systems, but you’ll go through more nutrient solution and need a drain setup.
For this build, we’re going with a recirculating drip system. It’s cheaper to run, the parts list is simpler, and it’s the right call for a 2-to-4 plant setup where solution volume is small. If you scale up or move to large commercial-style plants later, non-recovery becomes worth considering.
What You’ll Need (Parts List Under $50)
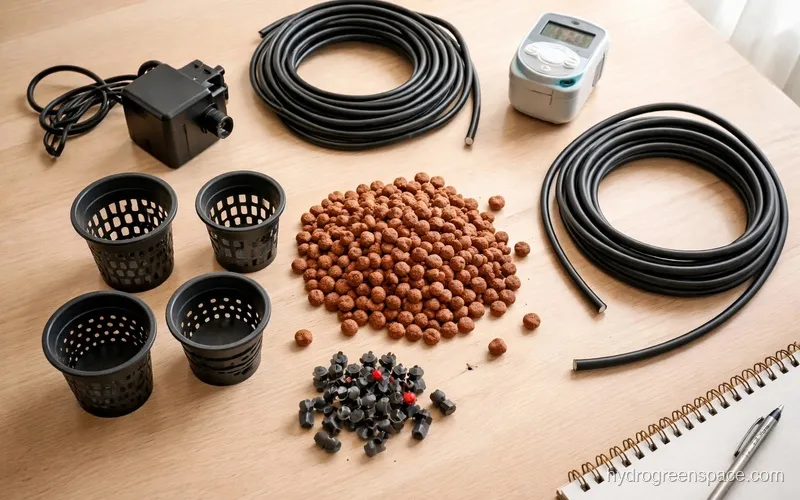
Here’s what a simple 4-plant recirculating drip system requires. Prices vary by region, but this should land between $35 and $50 for a first build.
- 5-gallon bucket or storage tote (reservoir): $5 to $8
- Submersible pump (100–250 GPH): $10 to $15
- Vinyl tubing, 1/2 inch main line: $4 to $6
- Spaghetti tubing (1/4 inch drip lines): $4 to $6
- Drip emitters (adjustable, 1 per plant): $5 to $8
- Net pots or nursery containers: $3 to $5
- Growing medium (clay pebbles or coco coir): $5 to $10
- Outlet timer: $8 to $12
Total: $34 to $70 depending on what you already own. If you have a spare bucket and a timer, you can build this for closer to $25.
Tip: Get adjustable drip emitters, not fixed-rate ones. Being able to dial back flow per plant matters more than you’d think, especially if you’re running different plant sizes at the same time.
You can get a sense of what similar gear costs when you look at a complete hydroponic equipment checklist before ordering. Some items overlap with other builds you might start later.
How to Build It: Step-by-Step
Step 1: Set Up Your Reservoir
Use a 5-gallon bucket or a plastic storage tote. Darker containers work better because they block light, which slows algae growth. If your container is clear or light-colored, wrap it with black tape or paint the outside.
Cut or drill a hole in the lid for your pump cord and main tubing. Submersible pumps sit inside the reservoir in the nutrient solution, so no need for an external connection.
Step 2: Connect the Main Line
Run a piece of 1/2-inch vinyl tubing from the pump outlet, out through the reservoir lid. This is your main supply line. Keep it short and direct. If you’re running 4 plants in a row, one central line with T-connectors works fine.
Step 3: Install the Spaghetti Lines and Emitters
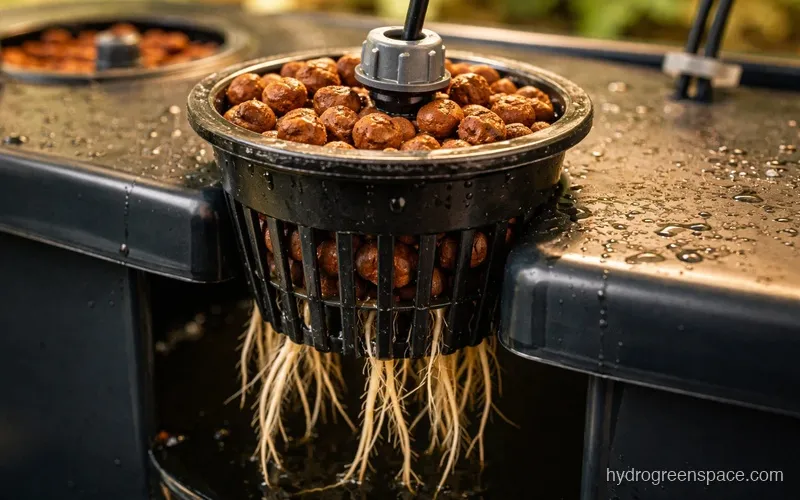
Punch 1/4-inch holes in your main line using a punch tool or a small drill bit. Push in barbed connectors, then attach a length of spaghetti tubing to each one. The other end of each spaghetti tube connects to an adjustable drip emitter, which sits directly in your growing container next to the plant stem.
One emitter per plant. Position it so the drip hits the growing medium near the root zone, not the stem.
Step 4: Fill Containers with Growing Medium
Clay pebbles are the most popular choice for drip systems, and for good reason. They don’t compact, they drain fast, and they’re reusable. Coco coir is a good alternative if you want more moisture retention, especially for plants like basil that don’t like to dry out completely between cycles.
Rinse clay pebbles thoroughly before using them. The dust that comes off fresh pebbles will absolutely clog your emitters within a day or two.
Step 5: Place Your Plants
If you’re starting from seedlings, transplant directly into net pots or nursery containers filled with your growing medium. Roots should be able to reach the bottom of the container, where runoff sits briefly before returning to the reservoir.
For a 4-plant setup, a 3-to-5 gallon container per plant gives the root zone enough room to grow without crowding.
Step 6: Fill the Reservoir and Test
Fill your reservoir with pH-adjusted water (target 5.5 to 6.5 for most crops) and add nutrients. Plug in the pump and check that each emitter is dripping, not gushing or blocked. Adjust flow at each emitter so every plant gets roughly the same volume per cycle.
Check the return drainage to make sure runoff is actually making it back to the reservoir and not pooling in the containers.
Timer Settings: This Is Where Most Beginners Go Wrong
Running the pump 24/7 is a common first-time mistake. Roots need air as much as they need water. Continuous flooding pushes out the oxygen in your growing medium and you end up with root rot that looks like overwatering.
For clay pebbles: 15 to 30 minutes on, 30 to 60 minutes off, repeated throughout the day and night. Start with 15 minutes on, 45 minutes off and adjust based on how your plants respond.
For coco coir: Coco holds more moisture, so you can run shorter cycles with longer gaps. Start at 10 minutes on, 2 hours off during lights-on, and skip or reduce cycles during lights-off.
A cheap mechanical outlet timer with 15-minute increments handles this fine. If you want more control, a digital timer lets you set 6 to 8 individual cycles per day. The goal is to keep the medium damp but not saturated.
Growing Medium and Plant Choices
Clay pebbles handle drip systems well because they have no structural breakdown, drain between cycles, and support air pockets around the roots. Coco coir works well too but benefits from slightly more frequent watering cycles and buffering before first use.
Avoid peat moss and rockwool in a drip setup. Peat compacts over time and blocks drainage. Rockwool works, but it needs careful pH management and doesn’t pair as intuitively with adjustable drip emitters.
As for plants, drip systems favor medium to large crops. Tomatoes, peppers, cucumbers, and herbs like basil and mint all do well. Leafy greens like lettuce grow fine but are frankly better suited to a DIY DWC hydroponic system or even a Kratky method setup, where you don’t need a pump at all.
Troubleshooting: Clogs, Algae, and pH Drift
Clogged Emitters
This is the most common drip system headache. It’s usually caused by mineral buildup (especially in hard water areas), algae, or debris from unwashed growing medium.
To clear a clogged emitter, remove it, soak it in white vinegar for 10 to 15 minutes, and rinse with clean water. If clogs happen repeatedly, flush your system with plain pH-adjusted water weekly and add a pre-filter to your pump intake.
What I’d do: Run a 5-minute plain-water flush every week before adding fresh nutrients. It keeps mineral deposits from hardening inside the lines and gives you a consistent baseline for nutrient mixing.
Algae Growth
Algae grows wherever light reaches nutrient-rich water. Keep your reservoir covered, wrap any clear tubing, and make sure containers don’t have gaps around stems where light can enter.
If algae is already established, drain and clean the reservoir with a diluted hydrogen peroxide solution (3% concentration, about 1 ml per liter of water), rinse everything thoroughly, and block the light source before refilling.
pH Drift in Recirculating Systems
In a recirculating system, the reservoir pH will drift over time as plants uptake different nutrients at different rates. Check pH every 1 to 2 days and adjust as needed. You can use a hydroponic pH adjustment calculator to figure out how much adjuster to add without overshooting.
If you’re seeing daily pH swings larger than 0.5 units, your reservoir is probably too small relative to your plant count. Increasing reservoir volume reduces the speed of drift significantly.
This is also covered well in the context of how to feed hydroponic plants, which walks through nutrient schedules and EC management alongside pH.
Expanding the System Later
One advantage of a drip setup is how easily it scales. Once you’ve dialed in a 4-plant build, adding more containers is straightforward: extend the main line, punch in more barbed connectors, and add emitters. The pump may need an upgrade if you’re pushing past 8 to 10 plants, but the core system stays the same.
If cost is a concern as you plan ahead, the breakdown in how much it costs to start hydroponics gives a realistic picture of what different system sizes actually run. And if you want to see how a drip build stacks up against an ebb-and-flow or NFT setup before committing, ebb and flow systems take a different approach to timed flooding that’s worth understanding.
Get your first 4-plant system running well before adding complexity. Once you’ve watched a full grow cycle, timed your watering intervals, and solved your first clog, you’ll know exactly where to take it next. For a broader look at how a drip system compares to other builds, the DIY hydroponic systems guide covers every approach at every budget.