
Apartment Hydroponics: Systems, Costs & Landlord Tips
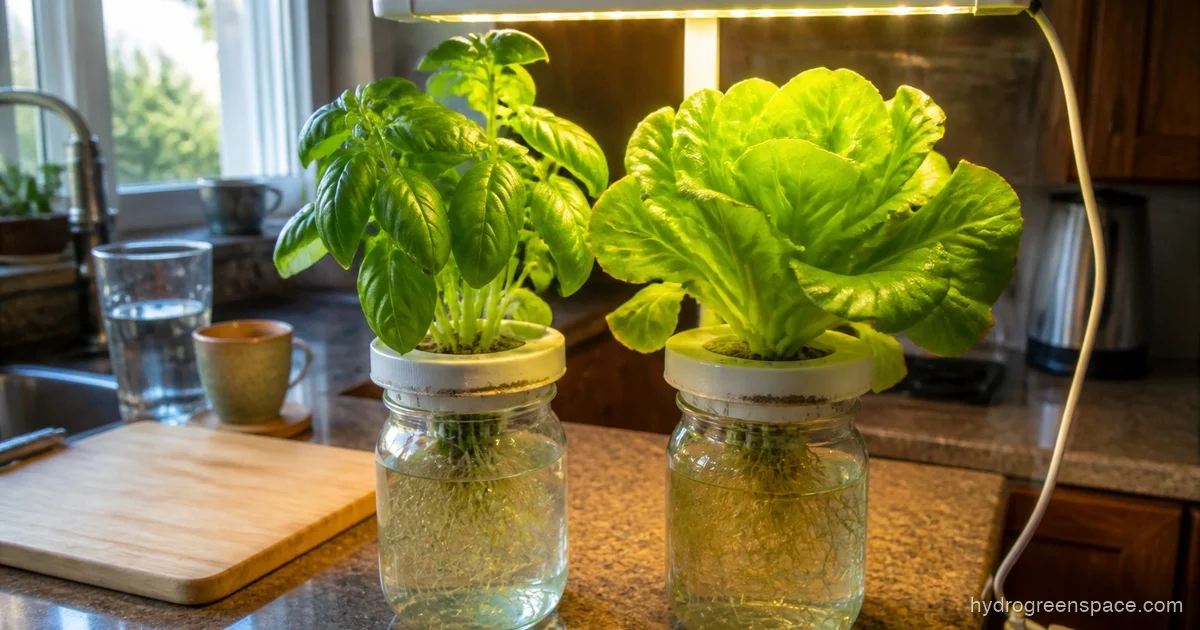
Growing food in an apartment sounds like the kind of thing that requires a spare room, a landlord who doesn’t care what you do, and somehow a green thumb that works without soil or sunlight. None of that is true. I’ve grown basil, lettuce, and cherry tomatoes in a 650-square-foot apartment using a couple of Kratky jars and a basic grow light, and the setup took up less counter space than a coffee maker.
The real question isn’t whether you can do a hydroponic apartment garden (you absolutely can). The question is how to do it in a way that doesn’t stress your lease, annoy your landlord, or flood your floors. That’s what this guide actually covers.
The Right System Makes All the Difference in a Small Space
Not every hydroponic system belongs in an apartment. Some are loud, some require pumps running 24/7, some need reservoirs the size of a cooler. Before you buy anything, it’s worth understanding which systems actually fit apartment life.
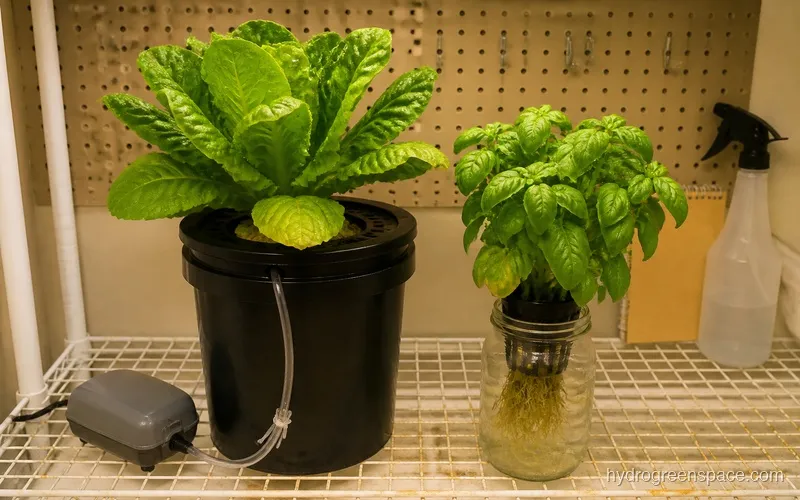
Kratky (passive DWC) is the best starting point for most apartment growers. There’s no pump, no electricity beyond a grow light, and no dripping water. You fill a reservoir, suspend the plant over it in a net pot, and the roots drop down into the nutrient solution as the water level drops. It’s genuinely hard to make a mess with Kratky. The only real limitation is plant size: it works best for leafy greens, herbs, and compact fruiting plants. If you want to grow larger plants, you’ll outgrow Kratky quickly.
Small DWC buckets are the next step up. You get an air pump (quiet ones exist), an air stone, and a single bucket per plant. The noise is usually just a soft hum, quieter than a fish tank aerator. DWC handles faster growth and larger root systems than Kratky, which makes it viable for basil, peppers, and small tomato varieties. If you’re unsure which direction to take, comparing the full range of hydroponic systems gives you a clearer picture of what each is actually good for before you commit.
Countertop all-in-one units (like a Lettuce Grow Farmstand or an AeroGarden) handle everything in one package: reservoir, pump, lights, timer. They’re the most landlord-friendly option because they look like an appliance, not a science project. They’re also expensive per square inch of growing space and locked into specific pod sizes. For pure ease of setup, nothing beats them, but if you want to grow more than a handful of herbs, you’ll hit their limits fast.
NFT (nutrient film technique) and flood-and-drain systems are worth skipping entirely for apartments. NFT requires a constant pump cycle and even a short power interruption can kill roots. Flood-and-drain involves flooding trays, which means more water movement and more risk near carpets or wood floors.
What I’d do: Start with a 3-5 site Kratky setup in mason jars or a simple storage container. Grow lettuce or herbs for a few cycles to get your nutrient ratios and light distance dialed in before upgrading to DWC. You’ll save money and actually understand what your plants need before scaling up.
Choosing a Room (and Why Your Choice Matters More Than You Think)
The spot you pick for your grow determines almost everything else: your light requirements, your humidity management, and whether your landlord ever notices.
Kitchen and dining areas are the most natural fit for small setups. Spills are less catastrophic on tile or sealed hardwood than on carpet. Ventilation is usually better. And a compact countertop garden in a kitchen looks intentional, not suspicious. The downside is that kitchens get humid when cooking, so if you’re also running a grow light for 14-16 hours, watch your ambient humidity.
Spare rooms or office corners give you more space and more control. You can use a grow tent to contain the smell, light, and humidity to one defined area, which also makes everything cleaner and more efficient. Grow tents are one of the most underrated tools for apartment growers because they keep your grow self-contained and give you something you can actually manage.
Bedrooms are viable but come with trade-offs. The hum of an air pump and the glow of a grow light are real at 2am. If you’re a light sleeper, you’ll want a timer that shuts lights off before you go to bed, and a pump on a vibration-dampening pad. There’s a full breakdown of what actually works in bedroom hydroponics.
Avoid carpeted areas entirely if you can. Nutrient solution is slightly acidic and stains. A drip or a spill during water changes can stain carpets in ways tile simply doesn’t hold against you. If carpet is unavoidable, lay a waterproof rubber mat under the entire setup.
Do You Need Natural Light?
No. Not even a little.
This is the part that surprises people who are used to soil gardening. Hydroponic plants don’t know the difference between sunlight and a well-specced grow light, because photosynthesis responds to spectrum and intensity, not source. You can run a completely light-independent hydroponic apartment setup in a north-facing room with no windows at all.
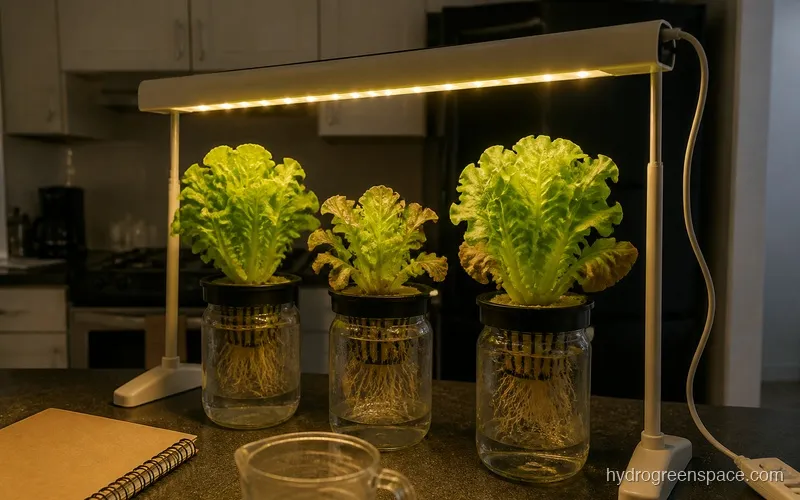
What you do need is a grow light that covers the right spectrum (full-spectrum LED or a 6500K blue-leaning spectrum works well for leafy greens and herbs), placed at the right distance (usually 6-18 inches depending on the light’s intensity), and run on a timer for 14-16 hours per day.
The indoor hydroponic system with lights guide covers exactly how to choose a light for your space without overspending. The short version: for a small apartment grow under 4 square feet, a 45-100W LED panel is plenty. You don’t need a $300 light to grow basil.
The Landlord Question: How to Think About It
Most leases don’t mention hydroponics specifically because landlords didn’t anticipate it. What they do care about is water damage, electrical load, mold, and alterations to the property.
Here’s the honest breakdown:
Water damage is the real concern, and it’s a legitimate one. A leaky reservoir, an overflowing bucket during a water change, or a cracked fitting can damage floors, ceilings (for the tenant below you), and walls. This is manageable with basic precautions: a waterproof tray under every reservoir, a wet/dry vacuum on hand for changes, and never leaving a fill unattended. The actual risk from a properly maintained small DWC or Kratky system is lower than the risk from a potted plant that gets overwatered.
Mold is a concern if you’re running a large grow in a poorly ventilated space. A small Kratky or DWC setup doesn’t generate enough humidity to matter in a normally ventilated room. If you’re using a grow tent, a small inline fan exhausting into the room is usually enough.
Electrical load from a single grow light and a small air pump is trivial, under 150W for most apartment setups. That’s less than a laptop plus a monitor. No landlord is going to notice that on the building’s electrical system.
Can your landlord legally stop you? If your lease has a clause about modifications to the property or commercial growing operations, they might have standing. But a handful of plants in a Kratky setup isn’t a modification; it’s a houseplant. Growing herbs and lettuce for personal use is no different legally than keeping a ficus. If you’re worried, the safest move is to ask your landlord casually: “I’m thinking of growing some herbs indoors, any restrictions I should know about?” Most landlords say go ahead.
Warning: If you’re planning to use a grow tent, mount any lights or equipment without drilling into walls. Free-standing tent frames don’t require any alterations and won’t trigger lease clauses about modifications.
What Can You Actually Grow?
In a typical apartment setup with a 2-4 site system and one grow light, you can realistically grow:
- Leafy greens (lettuce, spinach, arugula, kale): 3-5 weeks to harvest, very forgiving
- Herbs (basil, cilantro, parsley, mint, chives): continuous harvest with regular trimming
- Compact fruiting plants (cherry tomatoes, small peppers, dwarf cucumber varieties): possible in DWC, need more height clearance and a trellis
What doesn’t work well in apartments: full-size tomato plants, any vining crop that needs more than 3 feet of vertical space, and anything that needs pollination help (though a soft shake of the flowers daily handles most of that).
What It Actually Costs to Get Started
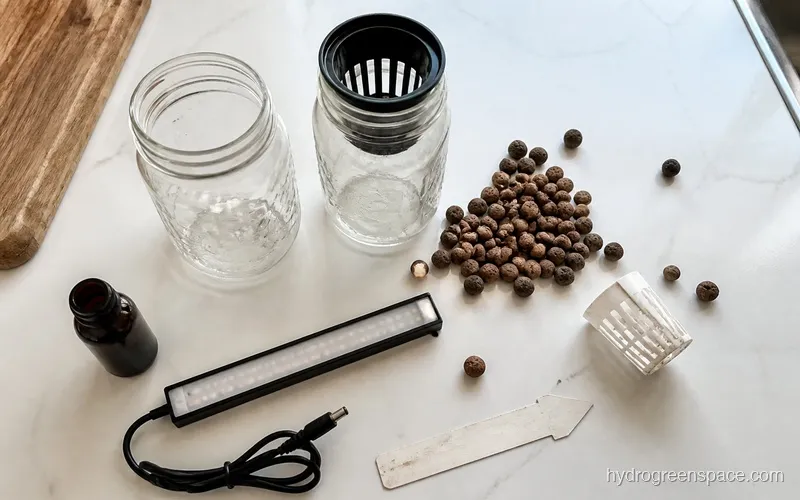
A genuinely functional apartment hydroponic setup doesn’t require a big investment. A 3-site Kratky setup using mason jars, net cups, clay pellets, and a basic nutrient solution runs under $50. Add a 45W LED grow light on a timer and you’re under $100 total.
A small DWC bucket with an air pump, air stone, and light is $80-$150 depending on the light you choose. How much it actually costs to start hydroponics breaks down both beginner and intermediate setups with real numbers.
The ongoing cost is nutrient solution (a $20 bottle lasts months for a small setup), electricity (under $5/month for a small grow light), and replacement net pots and growing media every few cycles.
Getting Your First Grow Right
If you want a step-by-step walkthrough of the full setup process, setting up your first indoor hydroponic garden covers every decision from seed to first harvest, including how to mix your first nutrient solution and how to tell when something is off before it becomes a problem.
Once you’ve had a few successful cycles and you’re ready to move beyond herbs and lettuce, the indoor hydroponic growing guide covers every indoor setup so you can see what a natural upgrade path looks like. Whether the investment is worth scaling up is worth reading before you spend more. That’s where apartment growing often gets interesting, because the same principles that work in a handful of Kratky jars scale directly into more productive systems without much learning curve.