
Mold on Hydroponic Sponge: What It Is and How to Fix It
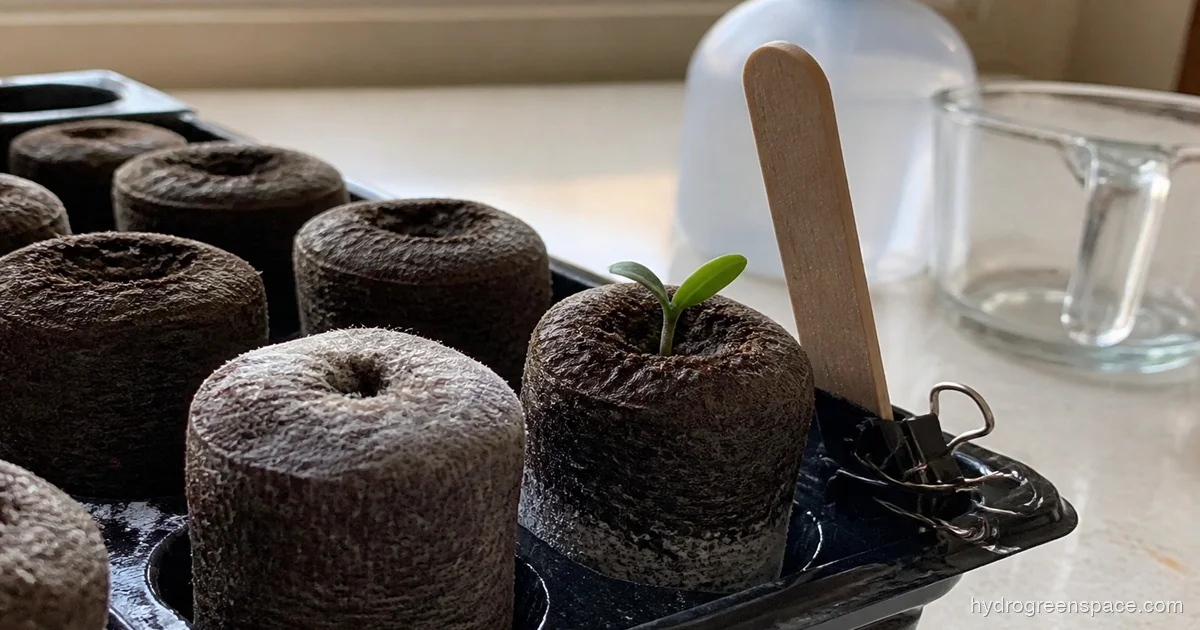
That white fuzz on your hydroponic sponge is probably not what you think it is. Most beginners see it and assume the worst, but nine times out of ten what you’re looking at is harmless mycelium, not a mold infection that’s going to kill your seedlings. Before you throw out your grow plugs or douse everything in bleach, take thirty seconds to figure out what you’re actually dealing with.
This article walks through how to tell the difference, what mold on hydroponic sponges actually looks like, and how to handle it if you do have a real problem.
White Fuzz vs. Real Mold: The First Thing to Figure Out
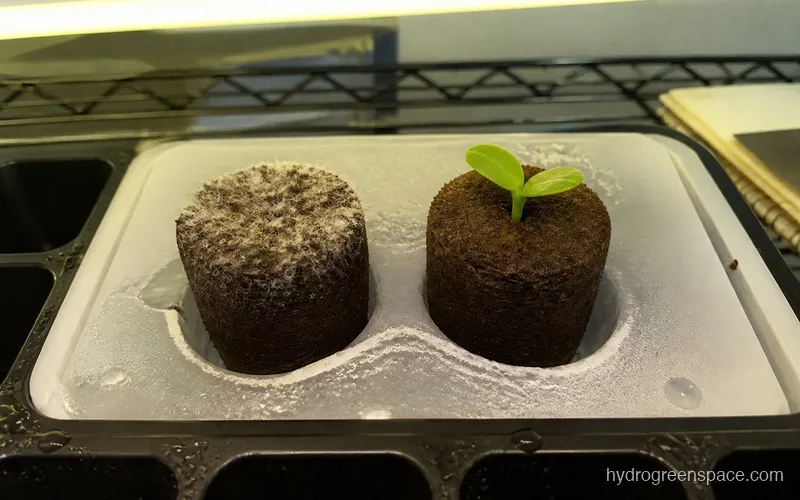
When growers post in forums asking about white fuzz on their hydroponic sponge, the replies almost always say the same thing: relax, that’s mycelium. And they’re usually right.
Mycelium is the thread-like root structure of fungi. A small amount of it growing on the surface of your grow plug or seed starting sponge is completely normal, especially in the first week of germination when the humidity is high and airflow is low. It looks like a thin, white, web-like coating. It doesn’t smell bad, and the seedling growing through it will typically look fine.
Real mold is different. Here’s how to tell them apart:
Signs you’re looking at harmless mycelium:
- Thin, white, cottony threads on the plug surface only
- No smell (or a faint earthy smell)
- The seedling above it looks healthy
- It appeared in the first 5-10 days of germination
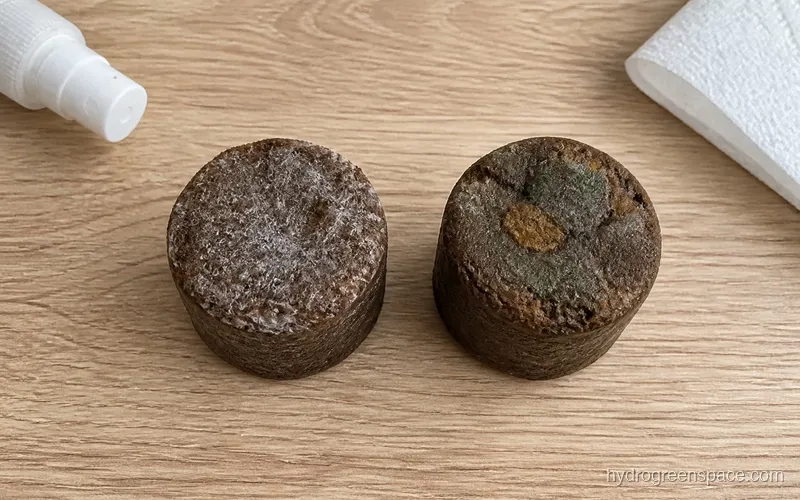
Signs you have a real mold problem:
- Green, gray, or black patches (Botrytis, or gray mold, starts as tan-gray and goes fuzzy)
- Yellow or brown areas on the plug itself
- A sour or musty smell from the reservoir or plug
- Seedling is wilting, damping off at the stem, or showing stunted growth
- White fuzz that’s thick, slimy, or spreading rapidly onto the stem
Pythium is the pathogen you really don’t want. It’s technically a water mold (an oomycete, not a true fungus) and it thrives in the same warm, wet, oxygen-poor conditions your germinating sponge creates. Pythium will cause roots to turn brown and mushy, and it usually appears as root rot rather than visible surface mold. If you see mold AND your seedling is collapsing at the soil line, you’re dealing with damping off and you need to act fast.
Why Mold Shows Up on Grow Sponges in the First Place
Grow plugs and seed starting sponges are basically designed to hold moisture, which is great for germination and terrible for mold prevention. Add a humidity dome, a warm environment, and low airflow, and you have a near-perfect environment for fungal spore germination.
A few specific causes that are easy to miss:
Too much water in the plug. Most beginners over-soak their sponges. If you squeeze a properly prepared plug and water streams out freely, it’s too wet. A pre-soaked plug should feel damp and hold its shape, not drip. Pre-soaking is actually a smart prevention step: soak the plug in pH-adjusted water (around 5.5-6.0), let it drain for a few minutes, and use it slightly damp rather than saturated.
Sponges that arrived moldy. This is more common than people realize. Grow plugs and Rockwool cubes can develop mold during shipping, especially in summer. If you open a fresh bag and see a fuzzy coating or notice an off smell, give the plugs a quick rinse or dip in a dilute hydrogen peroxide solution before use. You’re not using damaged goods, you’re just dealing with a storage and transit issue.
No light block on the plug surface. Light exposure to the nutrient solution encourages algae growth in your hydroponic system but blocking light from the grow plug surface also creates a darker, cooler microclimate that reduces mold pressure. Light isn’t causing the mold directly, but covering exposed plug surfaces does double duty against both problems.
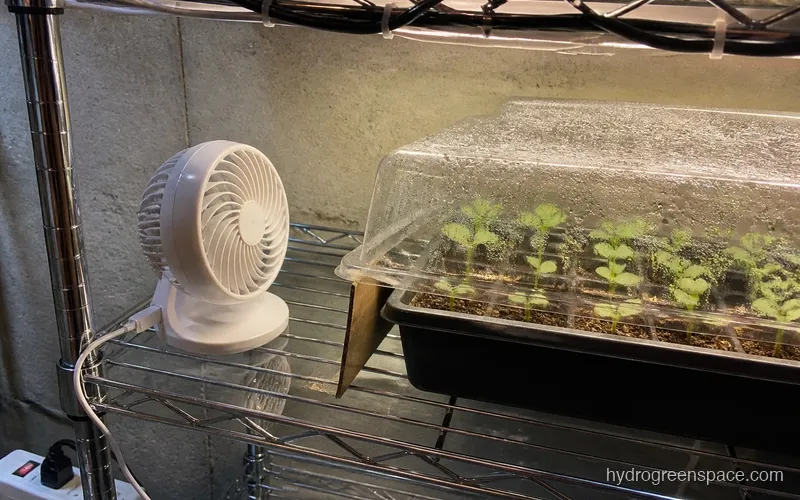
Stagnant air around the seedlings. Mold spores need moisture and stagnant air to establish. Running a small fan near your germination area dramatically reduces surface moisture on your plugs.
Tip: If you’re using an AeroGarden and you see white stuff on your AeroGarden pod, check whether it’s near the base of the pod or on the seed pod label side. A light coating on the bottom is almost always mycelium. A spreading growth on the top surface near the stem is worth treating.
How to Get Rid of Mold on Hydroponic Sponges
If you’ve confirmed it’s real mold (green, gray, or aggressively spreading white growth), here’s what actually works.
Hydrogen Peroxide Treatment
Hydrogen peroxide is the most reliable and widely used treatment for mold on hydroponic grow plugs. Use 3% hydrogen peroxide, which is the standard pharmacy concentration.
Mix a solution of 1 part 3% hydrogen peroxide to 10 parts water. Remove the affected plug from the system, hold the seedling clear, and pour or spray the solution directly onto the moldy surface. Let it sit for a few minutes, then rinse lightly with pH-adjusted water before putting the plug back.
Hydrogen peroxide works by releasing oxygen on contact with organic material, which kills mold cells and breaks down the mold structure. The same reaction also oxygenates the growing medium briefly, which can help if early-stage root problems are contributing to the issue.
A few caveats: hydrogen peroxide degrades quickly in light and heat, so don’t store diluted solutions. It also kills beneficial bacteria, so if you’re running a system with added microbial products, use it sparingly. One spot treatment is usually enough. If you’re having to reapply every few days, the underlying conditions haven’t changed and the mold will keep coming back.
Warning: Don’t use undiluted hydrogen peroxide on seedlings. Even 3% concentration at full strength can bleach and damage young roots and stems. The 1:10 dilution is sufficient to kill surface mold without harming the plant.
When to Cut Your Losses
If the plug smells bad, the seedling is collapsed or rotting at the base, or you can see brown mushy tissue in the root zone, the seedling is probably not recoverable. Pull it, dispose of the plug, and clean the pod or net cup with a dilute bleach solution before starting again. Trying to save a seedling that’s already damped off almost never works and risks spreading the problem to neighboring plants.
Choosing a Different Growing Medium
Some growers switch away from foam sponges entirely after a mold problem. Rockwool handles moisture differently and tends to have fewer surface mold issues because it drains more freely, though it needs to be pre-soaked and pH buffered before use. The comparison between Rapid Rooter plugs and rockwool comes down to airflow and moisture retention, which is directly relevant if mold is a recurring problem for you.
If you want to avoid compressed plug formats altogether, starting seeds in coco coir is a reasonable alternative with better drainage characteristics.
How to Prevent Mold From Coming Back
Treatment handles the current problem. Prevention handles the next one.
Control humidity during germination. You need high humidity to germinate seeds, but you shouldn’t be running 90%+ humidity for two weeks straight. Once seeds have sprouted and the first true leaves appear, vent the dome or remove it entirely. Most germination domes have small vent holes for exactly this reason.
Run airflow from day one. Point a small fan near (not directly at) your seedlings. Keeping air moving is the fastest way to break the stagnant-humid conditions mold needs to establish.
Pre-soak plugs properly. Let gravity drain the plug after soaking rather than squeezing it out. A waterlogged plug stays wet too long and gives mold the window it needs.
Keep your reservoir clean. Mold on the sponge and murky reservoir water often point to the same underlying problem: too many organics, not enough oxygen, and poor system hygiene. If you see cloudy water in your reservoir, that’s a signal to check your entire system, not just the plugs.
Block light from the growing medium surface. Use neoprene net pot inserts, reflective tape, or even a folded piece of aluminum foil to cover exposed plug surfaces. This reduces the warmth and the algae pressure simultaneously.
Start with a clean system. If you’re recycling net cups, pots, or reservoir lids from a previous grow, sterilizing that equipment between cycles is non-negotiable. Mold spores and Pythium survive on surfaces between grows and reinfect the next crop.
Mold and the Bigger Picture
Mold on a grow sponge is usually a symptom of the broader system environment, not an isolated problem. Once you’ve treated and adjusted conditions, it rarely comes back.
If you’re consistently dealing with mold, root rot from the same wet conditions, or even fungus gnats in your system (which love moldy, organic-rich media), it’s worth doing a full audit of your setup. The hydroponic troubleshooting guide covers all of these issues together because they share the same environmental causes.
Once your seedlings are past the germination stage and looking healthy, your next challenge is transplanting them out of the sponge without damaging the root system. That’s where a lot of the work from germination pays off.