
Aphids on Hydroponic Plants: How to Get Rid of Them
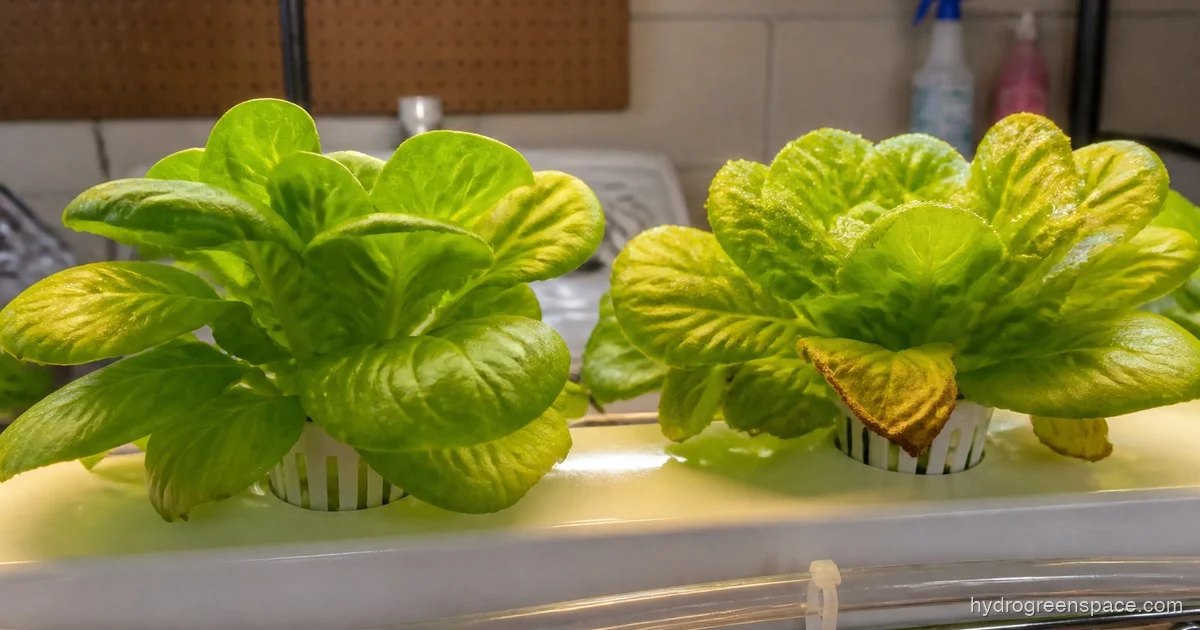
You bring a tomato seedling in from outside, set it next to your NFT system, and two weeks later your lettuce is covered in tiny soft-bodied insects and the leaves are shiny with sticky residue. That’s the aphid playbook, and it runs fast in a closed indoor environment. Unlike an outdoor garden where ladybugs and parasitic wasps keep populations in check, your grow room has no natural predators at all.
The good news is that aphids on hydroponic plants are completely manageable if you catch them early and treat with the right approach. The mistake most growers make is jumping straight to neem oil without identifying what kind of aphid they’re dealing with, and then wondering why it didn’t work.
What Aphids Actually Look Like (and Why It Matters Which Type You Have)
There are two very different problems that both get called “aphids,” and treating one like the other wastes time and lets the infestation grow.
Foliar Aphids
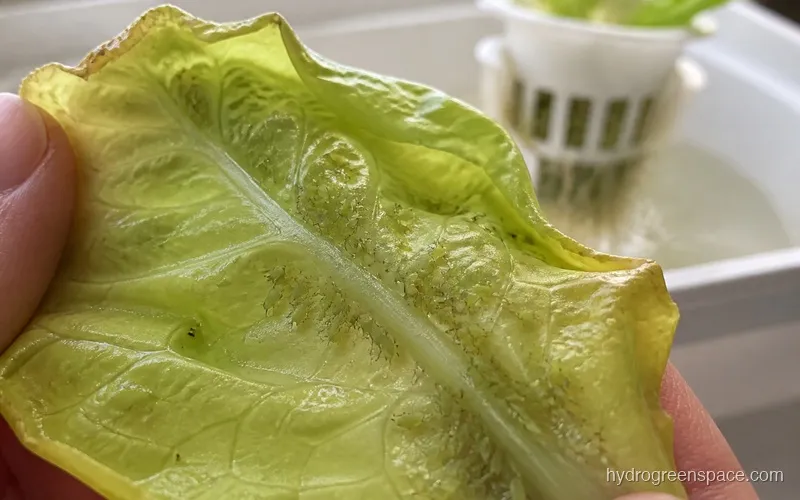
These are the classic ones. Soft, pear-shaped insects about 1-2mm long, usually green, yellow, or black depending on species. They cluster on the undersides of leaves, along stems, and at growing tips. You’ll often spot them because the leaves start curling or puckering, as the aphids feed by piercing plant tissue and extracting sap, which causes deformation. If you see a clear sticky film on leaves or nearby surfaces, that’s honeydew, the waste product aphids excrete while feeding.
Left alone, the honeydew becomes a problem on its own. It creates a growth medium for sooty mold, a black fungal coating that blocks light from reaching leaf tissue. If your plants have both a pest problem and what looks like mold in your system, the aphids likely came first.
Root Aphids
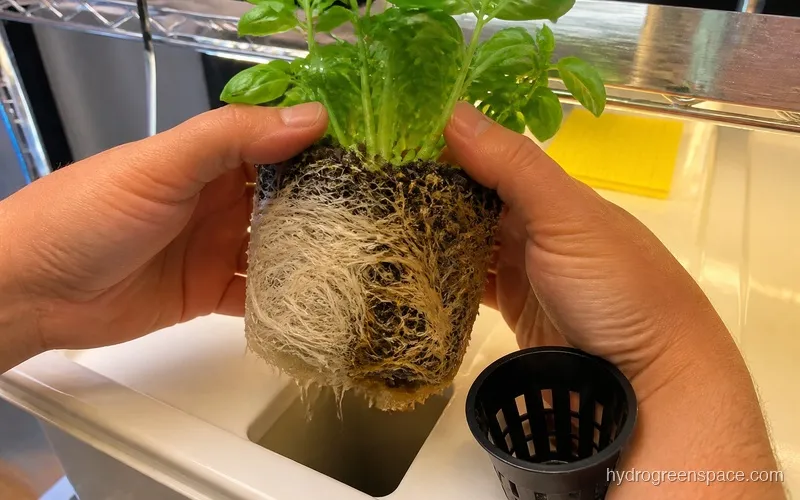
Root aphids are sneakier and more damaging. They feed on roots below the waterline or at the base of net cups, and they look similar to foliar aphids but are often lighter in color (white, cream, or light yellow). The surface symptoms are easy to misread: wilting, yellowing, and nutrient deficiency symptoms that don’t respond to pH or nutrient adjustments. If you’re chasing nutrient lockout symptoms, pull a plant and look at the roots.
Root aphids are harder to eradicate because water-based treatments can’t easily reach them, and they often survive on root fragments after a reservoir flush. They’re less common in well-maintained systems but much more serious when they show up.
Tip: To check for root aphids, pull one plant from its net cup and inspect the roots under a bright light or with a magnifying glass. If you also see brown sliminess alongside the insects, read up on root rot in hydroponics, because both problems can occur together.
How Aphids Get Into an Indoor Hydroponic Garden
The most common entry points are plants brought in from outside, contaminated growing media, and the grower themselves (aphid eggs can hitch rides on clothing after visiting a nursery or outdoor garden). New clones and seedlings from garden centers are a frequent source. Aphids also move through open windows and vents, which is how they find your system without you introducing a contaminated plant.
Once inside, reproduction is almost comically fast. Female aphids can reproduce without mating and give birth to live young in warm conditions. A single aphid can produce 40-80 offspring in a week. With no predators present and the stable temperatures of a grow room, populations double every few days.
This is why isolation matters. Any new plant should spend at least a week in a separate space before it goes near your main system.
A Tiered Treatment Approach That Actually Works
Don’t reach for the strongest option first. Aggressive treatments applied incorrectly can stress your plants, disrupt your nutrient solution, and kill off beneficial microbes in organic systems. Work through this in order.
Step 1: Rinse and Isolate
For a light infestation caught early, a strong water rinse handles more than you’d expect. Take affected plants to a sink and spray the undersides of leaves thoroughly, focusing on stems and growing tips. Remove visibly infested leaves. Isolate the affected plant from the rest of your system.
If you’re running a recirculating system like DWC or NFT, check your reservoir for aphid bodies floating on the surface. Do a partial water change and clean the reservoir walls. Aphids in the nutrient solution are a contamination concern but not a direct plant threat, as they need leaf tissue to feed.
Step 2: Insecticidal Soap Spray
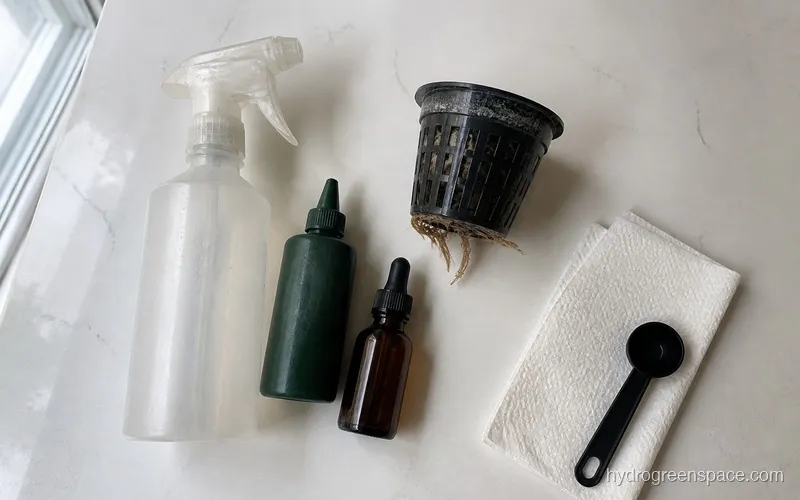
Insecticidal soap works by disrupting the aphid’s cell membranes on contact. It’s effective, breaks down quickly, and leaves no harmful residue on edible plants. Mix at the label rate, usually around 2 tablespoons per quart of water, and apply directly to affected foliage, making sure to cover undersides.
Warning: Keep insecticidal soap spray away from your reservoir and root zone. Even diluted concentrations can disrupt nutrient pH and harm roots. Treat foliage only, let it dry completely before plants return to a misting or recirculating system, and never spray directly into the system.
Apply every 3-4 days for two weeks. Aphids have a 7-10 day reproduction cycle, so a single treatment kills adults but not eggs. Multiple applications are required to break the cycle.
Step 3: Neem Oil (and Why It May Not Have Worked Before)
Neem oil works as both a repellent and a growth disruptor. It interferes with aphid molting and reproduction rather than killing on contact. This is why growers who use it once and check back the next day feel like it failed. Neem takes 3-5 days to show results.
The other common reason neem fails: improper mixing. Neem oil doesn’t dissolve in water on its own. You need an emulsifier, whether dish soap or a commercial horticultural emulsifier. Without it, the neem floats on the water surface and never makes real contact with the plant.
Mix 2 tablespoons of neem oil with 1 teaspoon of dish soap, then combine with one quart of warm water. Shake thoroughly before each use and apply during lights-off to avoid leaf burn. Like insecticidal soap, keep it away from your reservoir.
For organic hydroponic growing, neem oil is one of the few treatments that fits within organic guidelines while still being effective.
Step 4: Beneficial Insects
If the infestation is severe and repeated spray treatments haven’t controlled it, beneficial insects are the most effective long-term solution. Ladybugs get the most attention but they’re actually a mixed result indoors. They tend to fly toward light sources and away from your plants. Green lacewing larvae are a better indoor choice. They’re flightless in larval form, actively hunt aphids, and don’t have the disorientation problem ladybugs have near grow lights.
Parasitic wasps (Aphidius colemani) are highly effective and are used commercially in large-scale hydroponic operations. They’re tiny, non-stinging, and lay eggs inside aphids. You can order both lacewing larvae and parasitic wasps from biological control suppliers online.
Treating Root Aphids Specifically
Root aphids require a different approach because topical sprays don’t reach them. Your options:
- Hydrogen peroxide flush: A diluted solution (3% H2O2 at 1 part to 3 parts water) applied to the root zone kills root aphids on contact and oxygenates roots simultaneously. Do this as a standalone treatment, not mixed into your normal reservoir.
- Pyrethrin drench: Pyrethrin is a plant-derived insecticide that can be applied as a root drench. It’s more aggressive than soap or neem and should be a last resort on active crops.
- System teardown: For a severe root aphid infestation, the most reliable solution is a full system teardown. Remove all plants, scrub and bleach every surface and component, and restart with clean growing media and fresh nutrient solution. It’s painful, but trying to treat around a heavily infested system often just extends the problem.
Preventing the Next Infestation
Quarantine every new plant for at least 7 days in a separate space before it enters your grow area. Inspect it daily. If you’re using clones, dip them in a diluted insecticidal soap solution before introducing them to your system.
Keep your grow space sealed from outdoor air as much as possible. If you use a fan for fresh air exchange, run it through a fine mesh filter. Inspect the undersides of leaves weekly as part of your regular maintenance routine. Catching pests early is always faster and less disruptive than treating a full infestation.
Sticky yellow traps placed above your canopy will catch flying aphids before they land and establish. They’re also useful as an early warning system for fungus gnats and other flying pests that share the same entry points.
Keep your system clean and your reservoir fresh. Aphids aren’t attracted to healthy, well-maintained plants in the same way they zero in on stressed ones. Plants with balanced nutrition and stable pH are genuinely more resistant, which is another reason pH swings in your system are worth taking seriously beyond their direct nutrient effects.
Once you’ve handled the aphids, run through the rest of your system. Check your yellowing leaves and any leaf curl to separate lingering pest damage from new nutritional issues. Aphid feeding can leave symptoms that persist for a week or two after the insects are gone.
The next time you’re troubleshooting something your plants can’t shake, the full picture is in the hydroponic troubleshooting guide.