
3 Plant Hydroponic System: Build It for Under $100
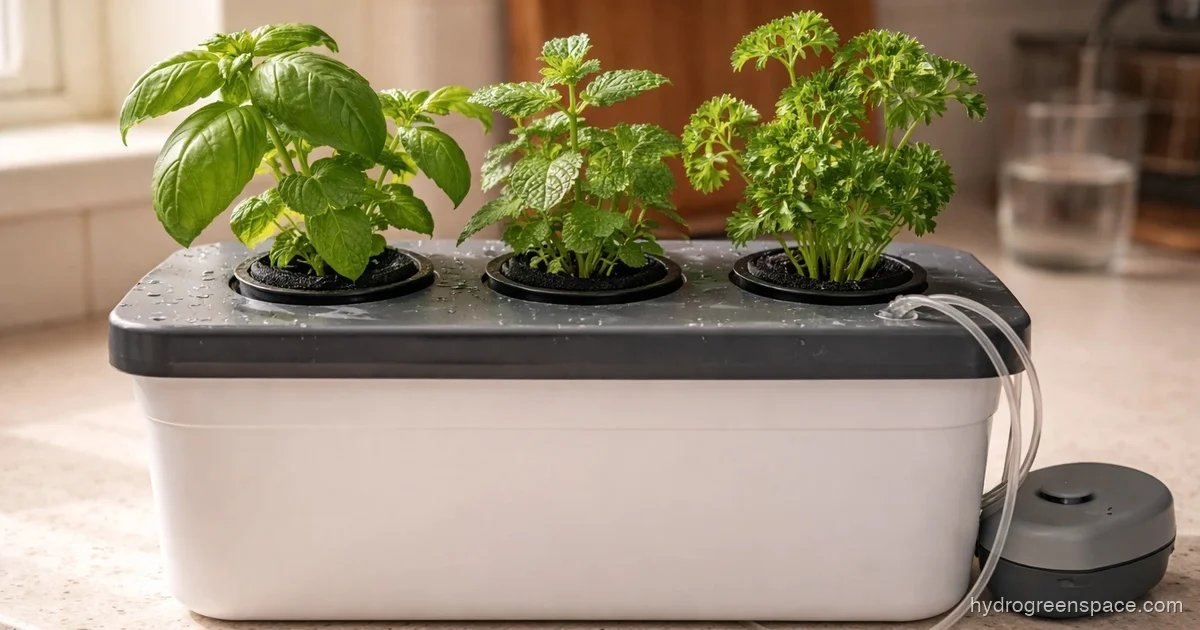
Three plants sounds small until you realize it’s the scale where hydroponics actually clicks. Small enough that you’re not managing a complex reservoir farm, big enough that you can grow meaningful quantities of herbs or leafy greens, and forgiving enough that when something goes wrong (and it will), you can fix it before losing your whole crop.
If you’ve already tried a single-plant hydroponic setup or a 2-plant hydroponic system and want to take the next step without overcommitting to a full rig, a 3 plant hydroponic system is the right move.
This guide walks you through exactly how to build one using deep water culture (DWC), why that’s the best choice at this scale, and what to grow in it.
Why 3 Plants Is a Practical Starting Point
The reason most beginners struggle with hydroponics isn’t the technique. It’s the scale mismatch. Either they start with a single mason jar and get bored fast, or they build an eight-site system before they understand how to manage a nutrient solution, and then one mistake wipes everything out.
Three plants sits in a sweet spot. Your reservoir stays small enough to change out in under ten minutes. You can fit the whole system on a 2x2 foot shelf or a windowsill. And the cost stays low, somewhere in the $40–$80 range for a first build, depending on what you already have.
There’s also a maintenance advantage that most people don’t think about upfront: with 3 plants sharing one or two reservoirs, you’re developing the habit of checking your pH and nutrients on a regular cycle without it becoming a second job. You top off water, check EC and pH every few days, and do a full reservoir change every two weeks. That rhythm is easy to maintain, and it trains you for larger grows later.
DWC vs Kratky vs NFT: The Right System for 3 Plants
There are three realistic options for a 3-plant setup: deep water culture (DWC), Kratky, and NFT. Here’s the honest breakdown.
Deep Water Culture (DWC)
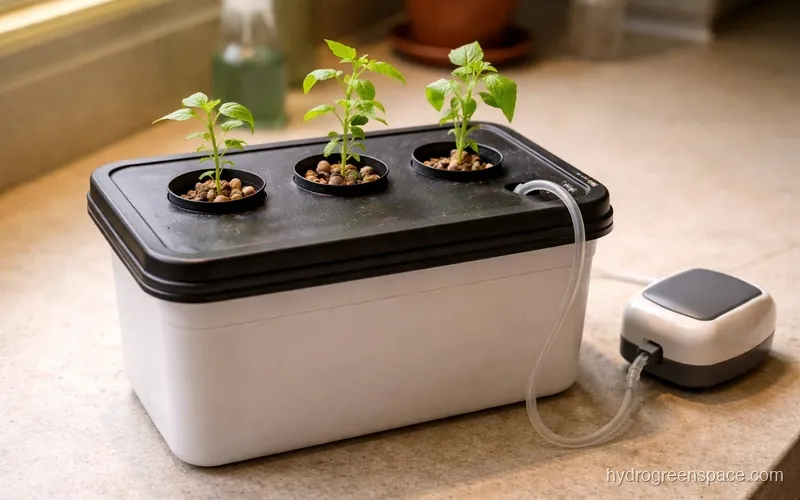
DWC suspends plant roots directly in oxygenated nutrient solution. An air pump pushes air through a stone at the bottom of the reservoir, keeping oxygen levels high enough that the roots won’t drown. It’s the most forgiving active hydroponic system you can build, and it scales from one plant to dozens using the same principles.
For a 3 plant hydroponic system, DWC is the best choice. The oxygenation handles a range of plant types, the setup is cheap and simple, and the learning curve is genuinely shallow. If you want to go deeper on the mechanics, building a DWC system covers everything from reservoir chemistry to root zone management.
Kratky Method
Kratky is DWC without the air pump. You fill the reservoir, let the roots grow down, and as the plant drinks the solution, an air gap forms naturally above the waterline. No electricity, no moving parts, almost zero cost.
The catch: Kratky is best for fast-growing plants like lettuce and herbs that don’t stay in the reservoir long. Slower-growing plants, or anything in vegetative growth for more than 4–5 weeks, will show signs of oxygen stress before harvest. If you want passive simplicity, the Kratky method is worth understanding. But for a 3-plant setup where you’re mixing crop types or growing anything with a longer cycle, add the air pump and do it properly.
NFT (Nutrient Film Technique)
NFT runs a thin stream of nutrient solution over the roots through a sloped channel. It’s efficient and scalable but genuinely unforgiving at small scales. A pump failure for a few hours means dead roots. The channel sizing matters, the slope matters, and dialing in the flow rate for 3 plants in a single tube is more fiddly than it’s worth for a first build.
Save NFT for when you’ve got a few grows under your belt.
The recommendation: go DWC for a first 3-plant system. If you want truly passive, go Kratky with fast crops only.
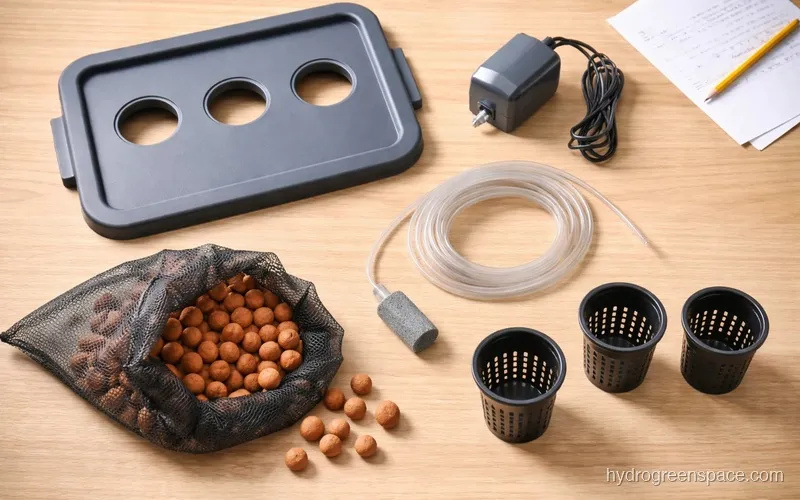
Parts List for a 3-Plant DWC System
This list is for a single-reservoir system using one tote. For a 3 bucket RDWC setup where each plant has its own bucket connected by tubing, the parts scale up slightly, but the single-tote version is simpler and works just as well for most home growers.
| Item | Purpose | Estimated Cost |
|---|---|---|
| 10–18 gallon opaque storage tote with lid | Reservoir | $8–$14 |
| 3x 2-inch net pots (or net cups) | Plant holders | $3–$5 |
| Air pump (for 10–30 gallon tanks) | Oxygenation | $8–$15 |
| Air tubing (3–4 feet) | Connects pump to stone | $2–$4 |
| Air stone | Diffuses oxygen in solution | $3–$6 |
| Hydroponic nutrients (3-part or all-in-one) | Plant food | $15–$25 |
| pH test kit or digital pH meter | Water chemistry | $10–$20 |
| EC/TDS meter | Nutrient concentration | $10–$15 |
| Clay pebbles (hydroton), 1–2 liters | Growing medium | $8–$12 |
| pH Up and pH Down | pH adjustment | $10–$15 |
| Seedling plugs (rockwool or rapid rooter) | Starting seeds | $5–$8 |
Total estimated cost: $82–$133 for a first-time build. If you already have a digital pH meter, spare tubing, or a nutrient kit from a previous grow, you’re likely looking at $40–$60.
What I’d do: Start with a simple all-in-one nutrient like General Hydroponics Flora Series or MaxiGro before moving to a custom 3-part mix. For 3 plants, the complexity isn’t worth it yet.
How to Build the System Step by Step
Step 1: Cut the Net Pot Holes
Mark and cut 3 evenly spaced holes in the tote lid sized to match your net pots, typically 2 inches in diameter. Space them so each plant has room to grow laterally without shading its neighbor. A 2-inch hole saw or a sharp utility knife works fine.
For a standard 18-gallon tote, three holes in a row with 5–6 inches between centers gives enough space for herbs or lettuce. If you’re growing larger plants like basil or dwarf tomatoes, increase that spacing.
Step 2: Set Up the Air System
Thread the air tubing through a small hole in the side of the tote near the bottom. Connect one end to the air stone (placed flat on the reservoir floor) and the other end to the air pump sitting outside the reservoir. The pump should always sit higher than the water level or have a check valve in the line, so water doesn’t siphon back into the pump if the power cuts out.
Check the best air stones for hydroponics if you’re not sure whether to use a cylinder stone, a bar stone, or a disc diffuser. For a 10–18 gallon single tote, a standard 4-inch cylinder stone is plenty.
Step 3: Mix and Fill Your Nutrient Solution
Fill the reservoir with water and let it sit for 24 hours if you’re on tap water, or use filtered water directly. Mix your nutrients according to the manufacturer’s chart for seedlings or early vegetative growth, then check EC and pH.
Target ranges:
- pH: 5.5–6.2 (5.8 is the sweet spot for most crops)
- EC: 0.8–1.4 mS/cm for seedlings; 1.4–2.2 for established plants
Adjust pH with pH Up or pH Down in small increments, waiting a few minutes between additions. For more detail on what to feed and when, the guide on feeding your hydroponic plants covers nutrient schedules for different growth stages.
Fill the reservoir so the bottom of the net pots is just touching or slightly submerged (about 1/4 inch) when the lid is on. As the roots grow down, you can lower the water level slightly and let the air gap form.
Step 4: Prepare Your Seedlings
Start seeds in rockwool cubes or rapid rooter plugs, not directly in clay pebbles. Once roots are visible at the bottom of the plug (usually 7–10 days), they’re ready to transfer.
Rinse your clay pebbles thoroughly before use. They come coated in dust that can raise your pH significantly if you skip this step. Soak them in slightly acidic water (pH 5.5) overnight if you have time.
Place the seedling plug into the net pot and fill around it with clean, rinsed clay pebbles. For more on which media works best in different systems, the guide on choosing a growing medium compares clay pebbles, rockwool, and coco coir in detail.
Step 5: Turn It On and Monitor
Once your plants are in the net pots and the lid is seated, plug in the air pump and check that bubbling is consistent. Check pH and EC daily for the first two weeks — pH can drift fast as the plants adjust and microbes in the media settle. Once the system stabilises, every 2–3 days is fine. Top off with plain pH-adjusted water (not nutrient solution) as the level drops between full changes.
Do a complete reservoir change every 2 weeks: drain, clean the reservoir walls with diluted hydrogen peroxide, and mix fresh nutrient solution from scratch.
Warning: Never let the reservoir go dark green or brown between changes. Algae growth competes with your plants for oxygen and nutrients, and it can harbor pathogens. The opaque tote lid prevents most light from reaching the water, so keep all openings covered.
What to Grow in a 3-Plant Hydroponic System
The practical rule: grow plants with similar nutrient needs and growth rates in the same reservoir. Mixing a heavy feeder like tomatoes with basil and lettuce will force compromises on nutrient concentration that hurt at least one of the three.
Best options for a single-reservoir 3-plant system:
- Lettuce (any variety): Thrives in DWC, fast turnover, low EC requirements. Three heads is a meaningful harvest.
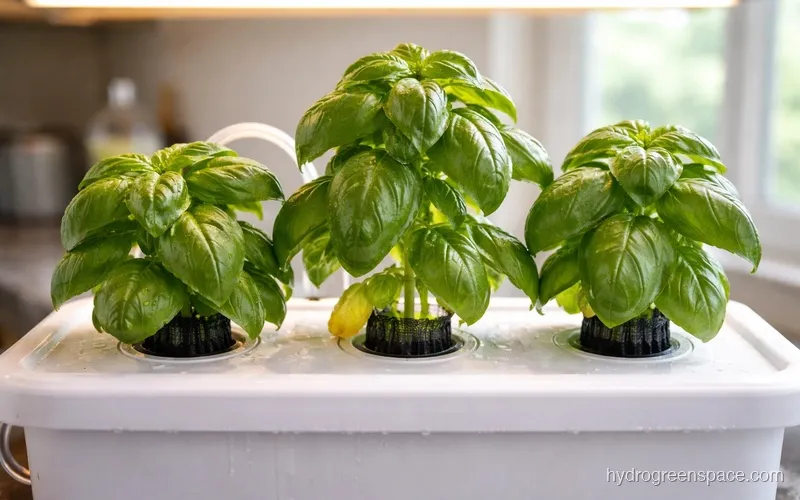
- Basil: Grows fast, high demand for nutrients, but consistent with lettuce in a shared reservoir at moderate EC.
- Spinach or chard: Similar feeding profile to lettuce, tolerates slightly lower temps.
- Herbs together: Mint, cilantro, and parsley at similar EC levels work well side by side.
- Dwarf pepper varieties: Slower, but manageable in a 3-site system if you’re patient and can let them run 8–10 weeks.
Avoid mixing fruiting plants (tomatoes, cucumbers) with leafy greens in the same reservoir. The EC and pH windows are different enough that you’ll end up chasing a compromise.
Tip: If you want to grow 3 different plant types and they have genuinely different needs, consider a single bucket system for the outlier and keep the other two in the shared tote.
Common Mistakes at This Scale
Running the reservoir too warm. Water above 68°F (20°C) holds significantly less dissolved oxygen, which is exactly what your roots need. In a small 3-plant tote, ambient room temperature can push the reservoir well past that, especially under grow lights. Keep the room cool, insulate the reservoir if needed, or use a small aquarium chiller.
Starting with too high an EC. The instinct is to feed aggressively because the plants look healthy. At EC 2.5+ for seedlings or early veg, you’ll see tip burn and stunted growth before you figure out what’s wrong. Start low and work up as the plants develop.
Ignoring the air gap. A lot of first-time DWC growers keep the water level topped up constantly, which is actually counter-productive once roots reach the solution. Let the air gap form as the plant drinks. Roots need both oxygen from above and nutrition from below.
Not tracking pH daily for the first two weeks. Once the system is stable, checking every 2–3 days is fine. In the first two weeks, pH can drift fast as the plants adjust and microbes in the media settle. Catch it early.
Scaling Up From Here
Once you’ve run 3 plants through a full cycle and feel confident in your reservoir management, the natural next step is a connected system. A 5-gallon bucket setup for individual plants gives you more root volume per plant and makes it easier to manage different crop types independently. Or you can expand the tote method to 5 or 6 sites using a larger reservoir, using the same principles you’ve already learned.
The habits you build at 3 plants, consistent pH checks, proper nutrient mixing, reservoir changes on schedule, are the same habits that keep a 10-plant system running cleanly. Get those locked in first, and the bigger builds become straightforward.
Pick your three plants, get the tote running, and keep your first notes on what EC and pH you’re hitting each week. By your second grow, you’ll be adjusting on instinct. When you’re ready to explore every system type beyond a tote, the DIY hydroponic systems guide covers every build from Kratky to RDWC.