
How to Build a Cheap Hydroponic System (3 Tiers)
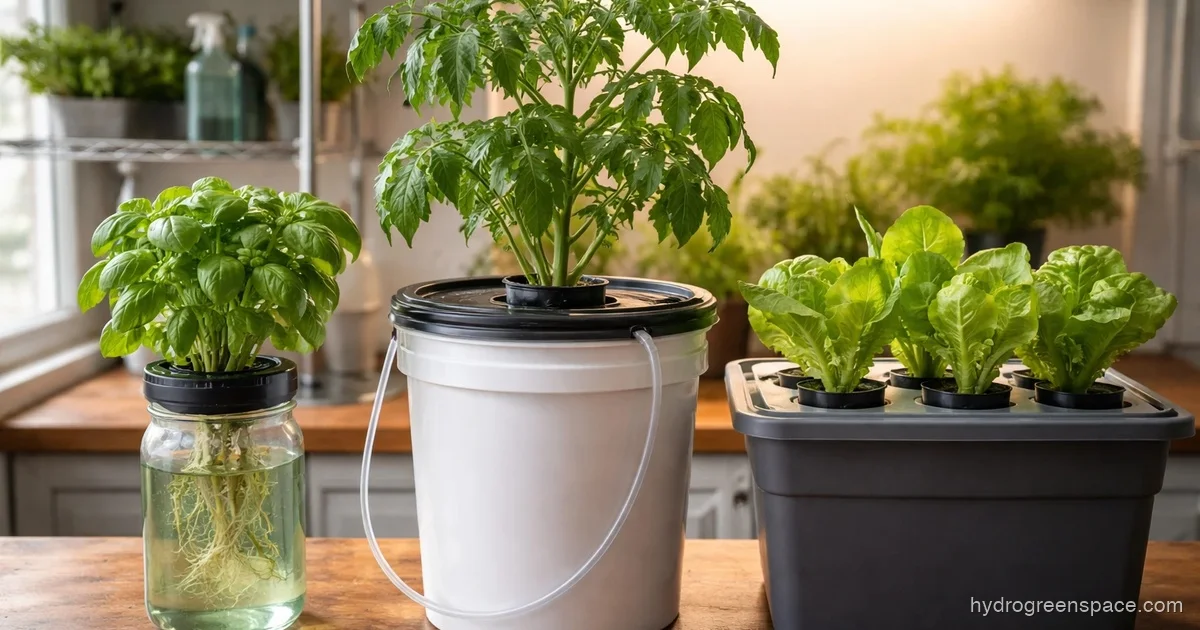
You can build a working hydroponic system for less than the cost of a bag of potting mix. This article gives you three real options ranked by cost, from a $10 jar setup you can finish in an afternoon to a multi-plant tote system that grows full-size vegetables. Pick the tier that fits your budget, follow the steps, and you will have plants in nutrient solution before the weekend is over.
Hydroponics sounds technical until you understand how hydroponics works: plants sit in water loaded with dissolved nutrients instead of pulling food from soil. That is the entire concept. Everything else is just engineering around that idea.
What You Actually Need (and What to Skip)
Before looking at any specific build, here is the short list of things every cheap system needs:
- A container that blocks light completely (algae needs light to grow)
- Net pots to hold your plants and growing medium
- A nutrient solution mixed to the right concentration
- Some way to get oxygen to the roots
The light-blocking reservoir is the one item most beginners underestimate. A clear plastic tub with black tape over it is not good enough. Use paint, a purpose-built opaque container, or a food-grade bucket in black or dark blue. Algae blooms in a light-contaminated reservoir will choke your roots and crash a crop fast.
You do not need: a timer, grow tent, pH dosing pump, expensive grow lights for a windowsill herb setup, or any of the kits sold as “starter systems.” Understanding the different types of hydroponic systems before you spend anything will save you from buying equipment for the wrong method.
What I’d do: Before buying anything, decide what you want to grow. Herbs and lettuce can run on a completely passive system with zero electricity. If you want tomatoes or peppers, you need at least an air pump. That single decision determines your whole budget.
Tier 1: The Kratky Jar (Under $15, No Electricity)
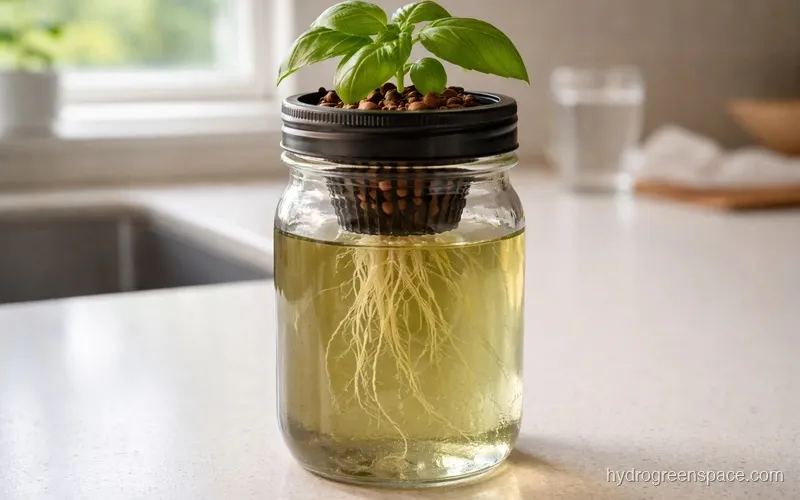
The Kratky method is the entry point for anyone who wants to grow hydroponically without spending much or running wires. It is a fully passive system: no pump, no electricity, no moving parts. A plant sits in a net pot above a nutrient solution, and as it drinks the water down, an air gap forms naturally below the net pot. The roots grow down into the solution and the upper portion of the roots stays in that air gap, getting oxygen.
How to make a Kratky hydroponic system is genuinely one of the simplest builds in the hobby, and it works reliably for herbs, lettuce, spinach, and other leafy greens.
Materials and costs:
| Item | Approximate Cost |
|---|---|
| 1-quart or half-gallon mason jar (opaque or painted) | $2–$4 |
| 2-inch net pot | $0.50–$1 |
| Small bag of clay pebbles or rockwool | $4–$6 |
| Bottle of hydroponic nutrients (makes many batches) | $8–$12 |
| Total (first grow) | $10–$15 |
After the first grow, you only re-buy nutrients. The jar, net pot, and growing medium are reusable.
Build steps:
- Paint the outside of a mason jar black, or use a dark-colored jar. Light must not reach the solution.
- Cut or drill a hole in the lid sized to hold your net pot snugly (the net pot should sit in the lid with the basket hanging down into the jar).
- Fill the net pot with rinsed clay pebbles or a soaked rockwool cube holding your seedling.
- Mix your nutrient solution according to the label. For leafy greens, aim for an EC around 1.2–1.6 and a pH between 5.5 and 6.2.
- Fill the jar so the bottom of the net pot is just touching the solution, about 1 cm of contact.
- Set it near a bright window or under a cheap grow light and let the plant drink down the reservoir on its own.
The jar method has one real limitation: it does not scale. If you want six plants, you have six jars to fill and check individually. That is where Tier 2 takes over.
Tier 2: The DWC Bucket (Under $50, One Plant to Four)
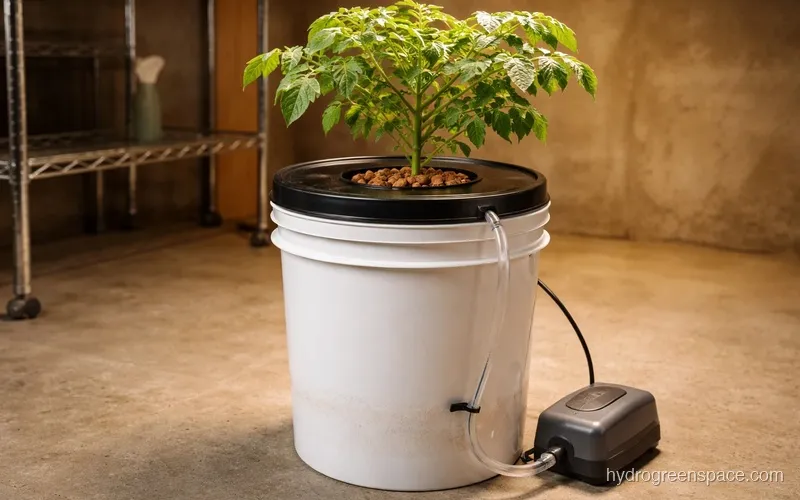
A single 5-gallon bucket DWC (deep water culture) system is the most common cheap hydroponic setup for a reason. Roots hang in oxygenated nutrient solution, the air pump keeps oxygen levels high enough to prevent rot, and the bucket holds enough volume that pH and nutrient levels stay stable between top-ups.
Read the full breakdown of a single 5-gallon bucket system if you want to go deep on the mechanics. Here is the fast version for someone who wants to get building.
Materials and costs:
| Item | Approximate Cost |
|---|---|
| 5-gallon black bucket with lid | $5–$8 |
| Small air pump | $8–$12 |
| Air stone + 3 feet of tubing | $3–$5 |
| 3.5-inch net pot (to fit lid hole) | $1–$2 |
| Clay pebbles (small bag) | $5–$8 |
| Hydroponic nutrients (if not already owned) | $10–$15 |
| pH test kit or drops | $5–$8 |
| Total | $37–$58 |
At the $50 mark you are buying everything new. Check dollar stores and thrift shops for buckets. The air pump is the one item worth buying new since cheap used pumps fail quickly.
Build steps:
- Cut a hole in the bucket lid sized for your net pot. The net pot should lock in without falling through.
- Drill a small hole near the rim of the lid to pass the air pump tubing through.
- Connect the air stone to the tubing, drop the air stone to the bottom of the bucket, and run the tube out through the rim hole to the air pump outside.
- Mix your nutrient solution in the bucket to about 4 gallons. Target pH 5.8–6.2, EC 1.4–2.0 depending on what you are growing.
- Set the net pot in the lid with your seedling and growing medium in place.
- Fill so the bottom of the net pot sits about 1 cm into the solution. After roots develop (usually 10–14 days), lower the water level so 2–3 cm of air gap forms between the solution and the bottom of the net pot.
- Check the reservoir every 2–3 days. Top up with plain pH-adjusted water between full nutrient changes, which you do every 7–14 days.
Warning: Never let the solution level drop more than an inch below the net pot before your roots are long enough to reach down. Young roots exposed to air before they have grown into the solution will dry out and kill the plant.
For anyone who wants to scale up without re-engineering everything, this bucket method links directly to Tier 3.
Tier 3: Multi-Bucket or Tote DWC (Under $100, Four or More Plants)
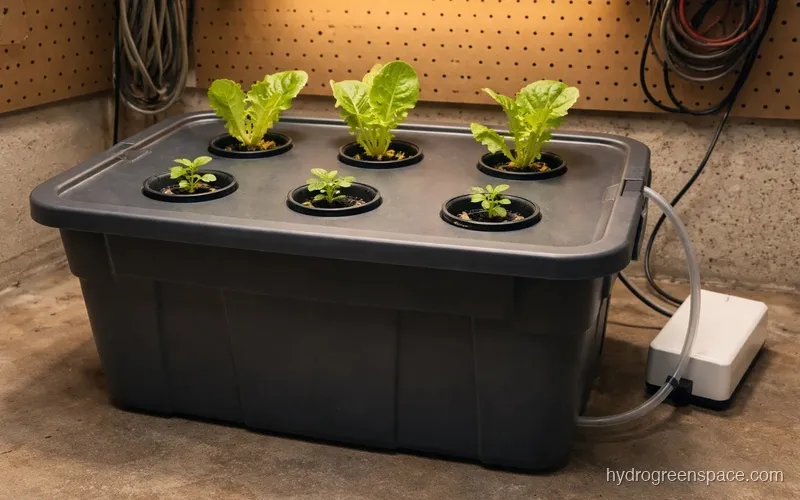
Once you have one DWC bucket working, adding plants is mostly a matter of adding buckets and connecting them with tubing. A shared reservoir approach (using one large Rubbermaid tote as the main reservoir) is the cheapest way to run multiple plants from one system. It cuts down on individual monitoring and keeps nutrient levels more stable because the total solution volume is higher.
This is the build for someone who wants to grow vegetables (tomatoes, cucumbers, peppers) or run six lettuce plants at once.
Materials and costs:
| Item | Approximate Cost |
|---|---|
| 18-gallon opaque storage tote (black, or painted) | $10–$14 |
| 4–6 net pot holes cut into lid | Included |
| Air pump (larger, dual outlet) | $12–$18 |
| 2 air stones + tubing | $5–$8 |
| Net pots (pack of 10) | $4–$6 |
| Clay pebbles (larger bag) | $10–$14 |
| Nutrients | $10–$15 |
| pH kit | $5–$8 |
| Total | $56–$83 |
The tote system runs between $60 and $85 built from scratch. If you already own nutrients and a pH kit from Tier 2, the build itself is under $50.
Build steps:
- Paint the outside of the tote black if it is not already opaque, or use a purpose-made black tote. The lid usually needs painting too.
- Mark and cut net pot holes across the lid, spaced at least 6 inches apart for leafy greens, 10–12 inches for fruiting vegetables.
- Run dual airline tubing to two air stones placed at opposite ends of the tote.
- Mix a full reservoir of nutrient solution. With 15–18 gallons, you have more stability and less daily drift. Target the same pH and EC ranges as the bucket build.
- Seat your seedlings in net pots with clay pebbles, set the lid, and adjust solution level to just kiss the bottom of the net pots.
- Check every 2–3 days. With a large volume reservoir, pH is easier to manage and nutrients last longer before a full change.
For which vegetables grow best in a basic system, stick to fast-growing crops in your first tote run. Tomatoes and cucumbers work, but they demand more maintenance than lettuce or herbs and a bigger nutrient budget.
The One Thing Every Budget Build Gets Wrong
Beginners almost always underbuy on the nutrient side and overbuy on the container side. A $5 bucket with a proper nutrient solution and calibrated pH will outperform a $40 kit system with a bottle of generic “plant food.”
Learn how to mix and feed your nutrient solution before your first grow. Nutrient concentration and pH are where 80% of beginner problems start. Checking those two numbers takes two minutes and solves most crop failures before they happen.
If you want to cut costs on containers, recycled food-safe buckets work well. Five-gallon buckets from restaurant supply stores or bakeries are often free. Just confirm they are food-grade and rinse them thoroughly. Avoid anything that held chemicals or non-food products.
For anyone wondering whether pool noodles as a free net pot replacement are worth the effort, the answer is yes for a Kratky setup or a simple tote. Cut them to size, slice them halfway to wedge around the stem, and they hold plants in place without spending anything.
Comparing the Three Tiers
| System | Cost | Electricity | Plants | Best For |
|---|---|---|---|---|
| Kratky jar | Under $15 | None | 1 per jar | Herbs, lettuce, small greens |
| DWC bucket | Under $50 | Yes (small pump) | 1–4 | Lettuce, herbs, one fruiting plant |
| Tote DWC | Under $100 | Yes (larger pump) | 4–8+ | Vegetables, multiple crops, scaling up |
All three systems use the same core inputs: net pots, nutrient solution, and a light-proof container. The difference is oxygen delivery and how many plants you can run at once.
Starting With the Right System
If this is your first grow, start with the Kratky jar. Build one, grow one plant to harvest, and understand what you are managing before scaling up. The number of people who buy a multi-bucket system for their first grow and abandon it after one difficult crop is high. One jar of basil that makes it to harvest teaches you more than any guide.
If you already have a grow under your belt and want to expand, the DWC bucket or tote is the right call. Understanding what it actually costs to start growing before committing to a larger build will help you plan without surprises.
The build is the easy part. The results come from paying attention to your water. If you’re starting completely from scratch and want the full context before you build anything, the beginner guide to hydroponics covers system selection, costs, equipment, and what to expect in your first 30 days.