
Hydropickers Hydroponic Grow Box: Honest Review
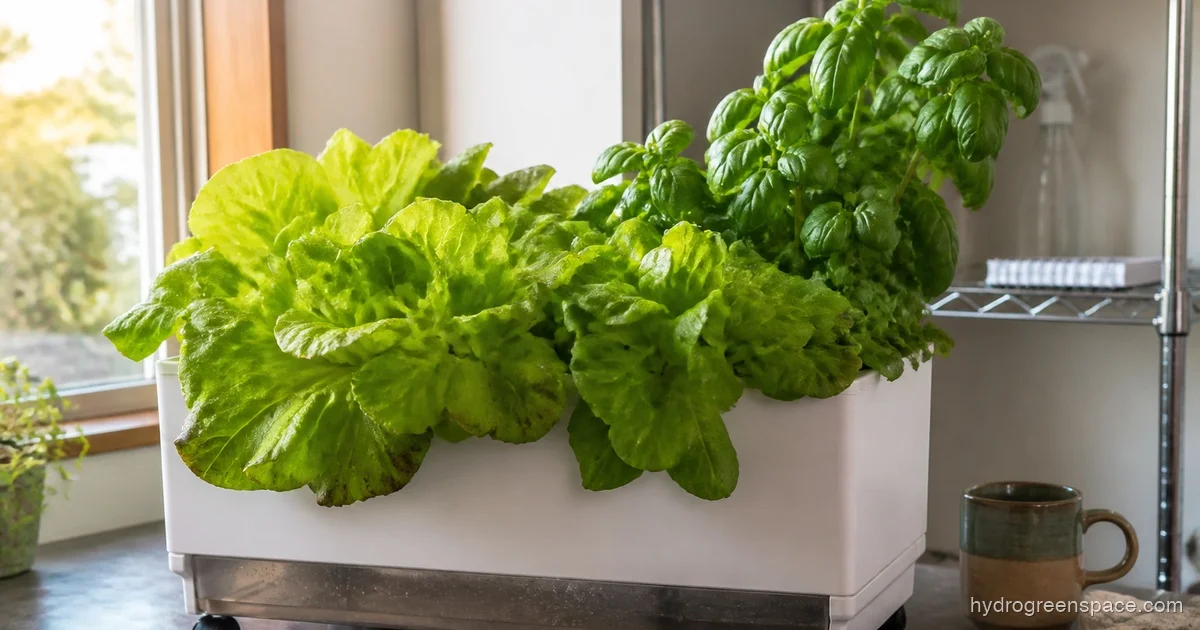
The Emsco Hydropickers is one of the only hydroponic grow boxes you can pick up at Home Depot or Tractor Supply that requires zero electricity, zero pump, and zero timer. For a nervous beginner who sees “hydroponics” and immediately imagines tubing diagrams and nutrient reservoir math, that alone is worth paying attention to.
But there’s a catch, and if you go in expecting tomatoes or peppers, you’ll be disappointed. Here’s the honest picture.
What the Hydropickers Grow Box Actually Is
The Emsco Group 2370 Hydropickers is a self-contained passive hydroponic grow box. Passive means no pump, no air stone, no electricity at all. It uses capillary action (the same wicking principle that pulls water up a paper towel) combined with a bottom reservoir to deliver water and nutrients directly to the roots through a coconut coir growing medium.
The system ships with the grow box itself, a bottom reservoir tray, pre-formed coconut coir growing blocks, a small pH test kit, and growing instructions. The box sits on casters, which sounds minor but matters a lot in a small apartment or patio where you need to rotate the unit toward a light source or roll it to a sink for refilling.
Emsco Hydropickers Hydroponic Grow Box
A passive Kratky-style grow box that needs no electricity, pump, or timer. Just nutrient solution and a sunny windowsill.
Best for: Herbs and leafy greens
Check price on Amazon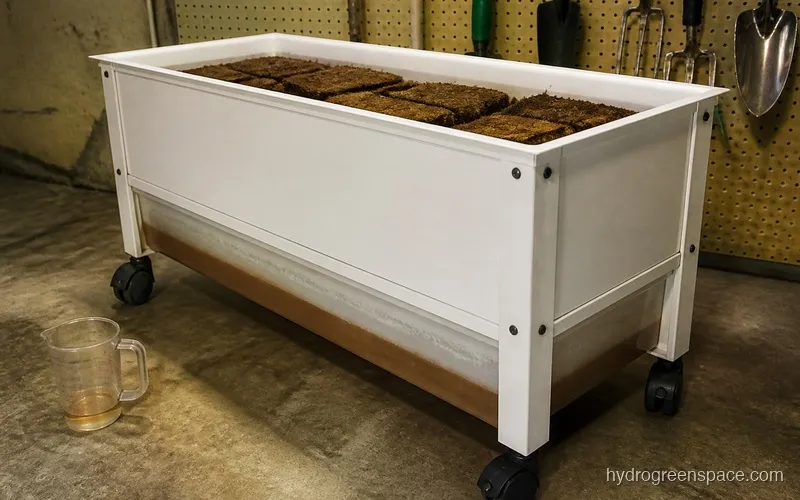
This is essentially a retail-packaged version of the Kratky method, a technique where plants sit above a nutrient solution and the gap between roots and water grows as the plant drinks, which keeps the upper roots oxygenated. The main difference is that Hydropickers uses coconut coir as a wick bridge instead of open air, and it comes in a neat box instead of a 5-gallon bucket.
How It Works Without Electricity
This is the question I get most often, because “hydroponic system” and “no electricity” feel like they shouldn’t go together.
The root zone stays moist because coconut coir holds water well and pulls it upward through capillary action. The reservoir below the growing blocks contains your diluted nutrient solution. As the plants transpire (lose water through their leaves), they pull more water up from below. No pump required.
The air gap matters here. You want the bottom of the coir block to touch the nutrient solution at the start, and as the plant grows and drinks, the water level drops, leaving a small air gap that keeps the lower roots from drowning. This is nearly identical to what makes the Kratky method work for herbs and leafy greens. Don’t overfill trying to give plants more water. Fill to the line and let them drink it down naturally.
Setup: What to Expect the First Time
Setup takes about 20 minutes. Here’s the actual sequence:
- Hydrate the coconut coir blocks. Drop them in a bucket with water (pH 5.5–6.5) and let them expand. They’ll roughly triple in size. Don’t skip the pH step, because tap water often runs alkaline, and coconut coir performs best slightly acidic.
- Mix your nutrient solution. The Hydropickers doesn’t include nutrients. You’ll need a basic hydroponic nutrient solution (a two-part or three-part mix works fine). Follow the label for the starting concentration (usually half-strength for seedlings).
- Fill the reservoir. Pour nutrient solution into the bottom tray until it reaches the fill line.
- Load the coir blocks and plant your seeds or seedlings. Seeds go directly into the moistened coir. Seedlings get nestled into a small hole you press into the block.
- Roll it to your light source and done.
The included pH test kit is a basic liquid drop test, not a digital meter. It works, but if you’re going to grow hydroponically long-term, a digital pH pen is worth the upgrade. pH management in hydroponics is a bigger deal than most beginners expect. See how to avoid pH fluctuation problems once you’re up and running.
For a deeper look at what coconut coir brings to a passive system like this, this overview of coco coir for hydroponics covers its water retention, buffering capacity, and why it’s a solid choice for a wick-style setup.
What Plants Actually Work (And What Don’t)
This is where the Hydropickers either fits your goals or doesn’t.
What thrives in it:
- Lettuce (any variety: butterhead, romaine, oakleaf)
- Spinach and arugula
- Basil, cilantro, parsley, mint
- Chives and green onions
- Kale and Swiss chard
These plants are shallow-rooted, don’t need deep nutrient uptake, and are happy with the passive wicking rate the system provides. Lettuce in particular grows almost embarrassingly well in a Kratky-style setup. I’ve pulled harvest-ready butterhead in 35 days in a setup almost identical to this one. If you want to try it with vegetables, check the best indoor hydroponic systems for vegetables to see what active systems handle fruiting crops better.
What won’t work:
- Tomatoes
- Peppers
- Cucumbers
- Beans or peas
- Any fruiting crop
Fruiting plants have a high nutrient demand and root mass that overwhelms a passive wick system. The wicking rate can’t keep up with what a tomato plant needs once it starts setting fruit, and you’ll end up with wilting, blossom drop, and frustrating yields.
How Often Do You Add Water?
In a typical home environment (65–75°F, moderate humidity), expect to top off the reservoir every 7–14 days for mature plants. Seedlings drink less, so you may go 2–3 weeks at the start.
One thing to watch: don’t just add plain water. Each top-off should be diluted nutrient solution at roughly the same concentration as your original fill. If you only add plain water, you’ll dilute your nutrients over time and see yellowing leaves around weeks 3–4, a sign of nitrogen deficiency. This is one of the most common beginner mistakes in hydroponics regardless of which system you’re using.
Every 4–6 weeks, do a full reservoir flush: drain completely, rinse the tray, and refill with fresh nutrient solution. This prevents salt buildup in the coir and keeps your pH stable.
Footprint and Portability
The Hydropickers measures roughly 18 inches wide by 14 inches deep by 14 inches tall assembled. The casters add about an inch of clearance underneath and make a real difference for maneuvering in tight spaces.
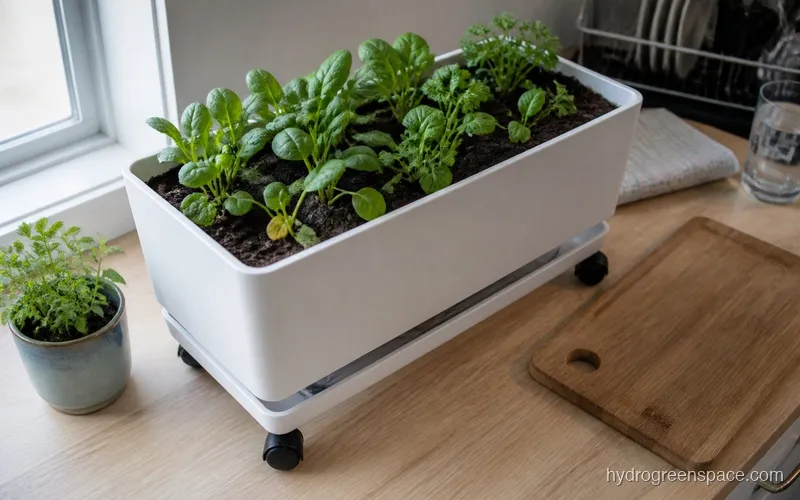
If you’re growing in an apartment, balcony, or a small kitchen corner, this fits. It’s not tiny (roughly the size of a small filing cabinet) but the footprint is manageable. The casters let you roll it to a window during the day and back against a wall at night if needed.
Compare that to the AeroGarden Sprout, which is much smaller but requires a power outlet and uses a pump. The Hydropickers trades compactness for no electricity at all.
Hydropickers vs. DIY Kratky: Honest Comparison
If you’re comfortable with a 5-gallon bucket, some net cups, and 10 minutes of setup, DIY Kratky will cost you $15–25 and grow just as well as the Hydropickers. The principles are identical.
So what does the Hydropickers buy you?
| Factor | Hydropickers | DIY Kratky |
|---|---|---|
| Setup effort | Almost none | Low (15–30 min) |
| Included medium | Yes (coconut coir) | No, buy separately |
| pH test kit included | Yes (basic) | No |
| Casters / mobility | Yes | No |
| Aesthetic | Clean, self-contained | Functional bucket |
| Cost | ~$50–60 retail | ~$15–25 DIY |
| Scalability | Single unit | Stack as many as you want |
If you’ve never done hydroponics before and the idea of sourcing net cups, hydroton, and nutrients separately feels like too much, the Hydropickers is worth the premium. It reduces the setup friction to near zero. If you’re comfortable shopping for parts, build a Kratky setup instead and spend the savings on better nutrients.
The CRZDeal indoor hydroponic garden is worth a look too if you want something with an active pump but still at the beginner-friendly end. It’s a different experience but serves a similar audience.
Is It Actually Good for Beginners?
Yes, with one caveat: manage expectations about what you’ll grow.
The Hydropickers removes every intimidating element from hydroponics. No electricity means no pump noise, no power strip management, no worry about what happens if the pump dies while you’re on vacation. No timer means no programming. The coconut coir handles the moisture balance better than hydroton for a first-time grower because it’s more forgiving if you get the reservoir level slightly wrong.
For someone who’s read about getting started with indoor hydroponics and wants to dip a toe in without committing to a full active system, this is a legitimate first step.
Where it falls short for beginners is the nutrient learning curve. The system doesn’t come with nutrients, and if you’ve never mixed a hydroponic solution before, you’ll need to spend some time understanding EC (electrical conductivity) and pH before your first grow. How to feed hydroponic plants is worth reading before you start so you’re not guessing.
What You’ll Need That Isn’t Included
- Hydroponic nutrient solution (General Hydroponics Flora Series or similar): →Check price on General Hydroponics Flora Series
- A digital pH pen (the included drop test works but a meter is faster and more accurate): →Check price on Apera PH20
- Seeds or seedlings
- A grow light if your space doesn’t get 6+ hours of direct sun (herbs need it, lettuce is more forgiving): →Check price on Barrina T5 Grow Lights
Total additional spend: roughly $30–50 depending on which nutrients you buy and whether you need a grow light. Factor this into the real cost of the system before buying.
The Honest Bottom Line
The Hydropickers Hydroponic Grow Box is a genuinely useful product for a specific grower: someone who wants herbs and lettuce on their counter or balcony with no electricity, minimal fuss, and a system they can buy at a physical store this weekend. For that person, it delivers.
For someone hoping to grow tomatoes, peppers, or anything with real fruit set, this isn’t the right tool. Look at active systems with air pumps and higher nutrient delivery capacity. The best hydroponic systems for beginners compares your options across passive and active systems at different price points.
If the no-electricity angle appeals to you and you want to build some hydroponic confidence before moving up to something more complex, the Hydropickers is a reasonable starting point. Grow two rounds of lettuce and basil in it, dial in your nutrients and pH routine, and by the time you outgrow it you’ll know exactly what system to buy next.