
How to Start Bare Root Strawberries in Hydroponics
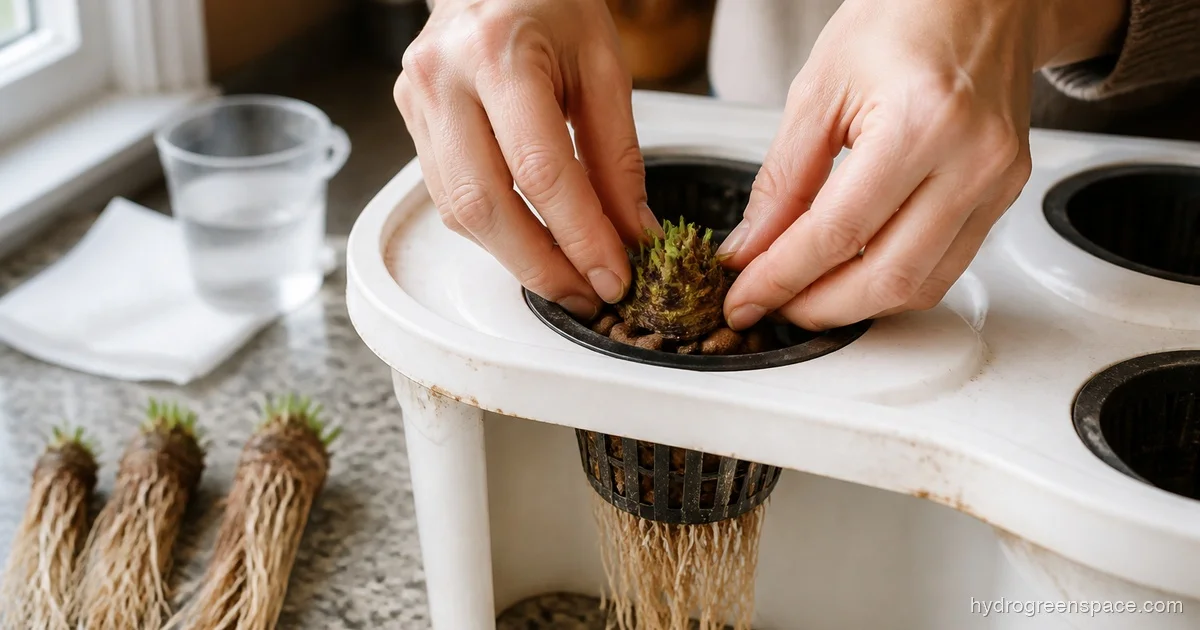
Bare root strawberry crowns are how most serious hydroponic growers start their plants, and for good reason. You get faster establishment than tissue culture plugs, lower cost than potted transplants, and the ability to start a large number of plants at once. The catch is that bare roots are also where most beginners make their first mistake, and it usually comes down to three things: improper soaking, wrong crown placement, or a growing medium that holds too much moisture around the base.
Get those three things right, and you’ll have healthy, rooted plants within two weeks. Get them wrong, and you’ll be dealing with crown rot or stalled growth before your system ever really gets going.
What Are Bare Root Strawberry Crowns and Why Do They Work in Hydroponics?
A bare root strawberry is exactly what it sounds like: a strawberry plant that has been harvested, trimmed, and shipped without any soil or growing medium around its roots. What you receive is a crown (the thick, knobby stem section between the leaves and roots) with a bundle of roots hanging below it and a few leaves or leaf stubs above.
They’re popular in hydroponics for a few practical reasons. First, there’s no soil to wash off, which means no contamination risk when you’re dropping them into a recirculating system. Second, bare root plants have already developed a mature root system, so you’re not waiting for seeds to germinate or cuttings to root. Third, they’re inexpensive when bought in bulk and are easy to find in early spring from strawberry nurseries.
For hydroponics specifically, day-neutral varieties like Albion, Seascape, or Monterey are the right call. They produce fruit continuously regardless of day length, which is exactly what you want indoors where you control the light cycle. June-bearing varieties will sit there all season and throw one crop at the end. That’s not what you’re building a system for.
Preparing Bare Root Strawberries Before Planting
Inspect and Trim First
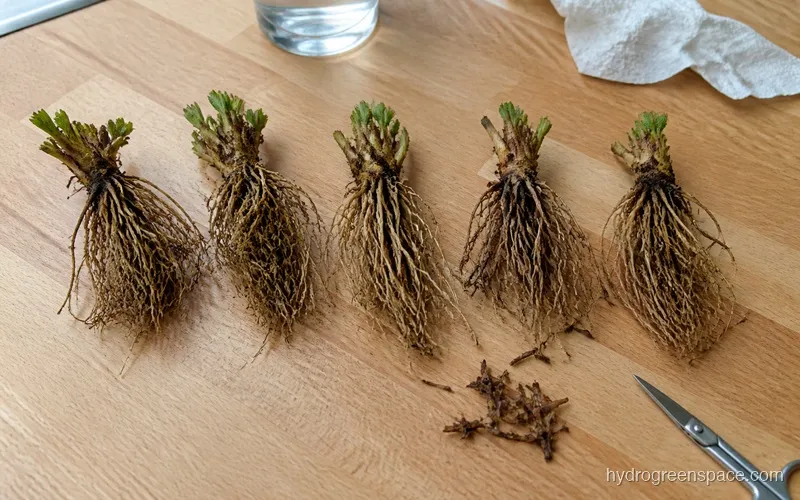
When your bare roots arrive, unpack them and look at each one individually. You’re looking for healthy, cream-colored or tan roots. Dark brown, mushy, or slimy roots are rot, and that plant is already compromised. Discard it rather than introducing it to your system.
Trim away any dead, dark, or mushy root sections with clean scissors. Also remove any dead or yellowing leaves from the crown. Live leaves can stay, but anything brown or wilted is just dead tissue that could harbor pathogens once it’s wet.
Tip: Keep the crown itself dry during trimming. Only the roots need hydrating at this stage. Moisture sitting in the crown’s folds is where rot starts.
The Soaking Protocol
Yes, bare root strawberries should be soaked before planting, but the how matters. The goal is to rehydrate the roots after shipping stress, not to waterlog the entire plant.
Fill a clean container with plain water or a very dilute nutrient solution (EC around 0.4 to 0.6) at room temperature. Submerge just the root portion, keeping the crown and any leaves above the waterline. Soak for 30 minutes to an hour. Some growers add a few drops of 3% hydrogen peroxide to the soak water as a precautionary rinse for surface pathogens, which is a reasonable move, especially if the roots look stressed.
Do not soak overnight. Extended soaking does not help establishment and increases the risk of oxygen deprivation to the roots.
Crown Placement: The Most Important Thing You’ll Do
More bare root plants die from incorrect crown placement than from any other cause.
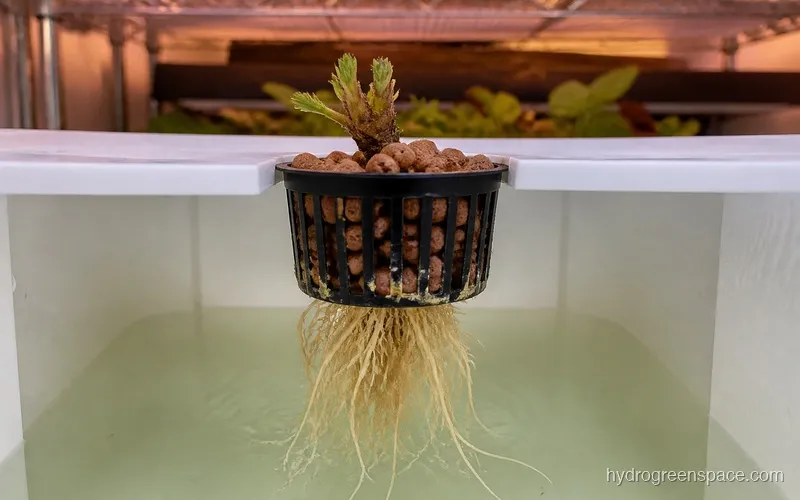
The rule is simple: the crown goes above the waterline, always. The crown is not a root. It’s the growing point of the plant, and it needs air circulation around it. Submerge the crown and you get crown rot. It’s not a slow decline either; it’s usually fatal within a few days.
In practice, this means:
- In a net pot with growing media, position the plant so the base of the crown sits just at or slightly above the top of the media
- In an NFT channel, the roots feed into the thin film of nutrient solution while the crown and leaves sit completely clear of the channel
- In a tower system, the crown faces outward through the planting port with the roots inserted into the tower interior
What you want is roots touching or approaching the nutrient solution while the crown stays dry and exposed to air.
Choosing Growing Media for Bare Root Crowns
The media you use affects how well the crown stays positioned and how much moisture sits around it. You want something that anchors the plant without waterlogging the base.
Clay pebbles (hydroton) are the standard choice. They drain completely between cycles, allow excellent airflow around the crown, and are easy to work with bare roots. Rinse them well before use to remove dust.
Coco coir works well as a medium to anchor bare root crowns but retains more moisture than clay pebbles. If you use it, pack it loosely around the roots and make sure the crown is sitting clear of the surface. This is one of the common mistakes covered in more depth in the beginner mistakes guide.
Rockwool is worth understanding if you’re starting from seeds or plugs, but for bare roots, using rockwool with established root systems takes more effort than it’s worth. Clay pebbles or coco coir are easier starting points.
Whatever growing medium you choose, the goal is the same: support the plant, let water drain freely from the crown area, and let the roots reach down toward the solution.
Which Hydroponic System Works Best for Bare Root Starts?
Bare root crowns adapt well to most systems, but they’re not all equal during the establishment phase.
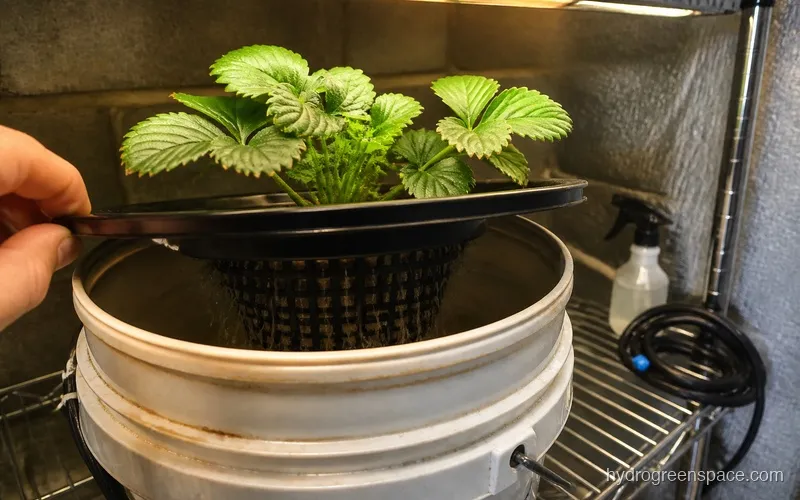
DWC (Deep Water Culture) is one of the most forgiving systems for getting bare roots established. The roots hang freely in oxygenated nutrient solution, and as long as your air pump is running and the crown is above the waterline, the plant has everything it needs. If you’re building a simple DWC setup, strawberries are a great first crop. The main thing to manage in DWC is keeping the water level slightly below the bottom of the net pot during the first week so the roots are reaching down rather than sitting in a puddle.
NFT (Nutrient Film Technique) works well for established strawberry plants but can be tough during the initial bare root phase because the thin film may not reach newly planted roots right away. Some growers hand-water with a dilute solution for the first few days until the roots make contact with the channel floor.
Tower systems are popular for strawberries and work fine with bare roots. Just make sure you’re not jamming the crown into the port; it should sit at the opening with the roots inside and the crown facing outward.
If you’re still deciding on your setup, the breakdown of different types of hydroponic systems covers how each one handles fruiting plants specifically.
What the First Two Weeks Actually Look Like
Set realistic expectations here. The first week after transplanting bare root strawberries, things will look rough. Leaves may wilt, some outer leaves may yellow and die, and the plant will look like it’s struggling. This is normal transplant shock and does not mean you’ve failed.
What you’re waiting for are new white root tips emerging from the root mass. This usually starts between days 5 and 10. Once you see those, the plant has established and is actively taking up water and nutrients. New leaf growth follows shortly after.
What I’d do: For the first week, run a very dilute nutrient solution (EC 0.8 to 1.0) and keep the reservoir temperature between 65 and 72°F. Cooler water holds more dissolved oxygen, and that’s what stressed roots need most during establishment. Don’t bump the nutrients up to full strength until you see active new root growth.
If you’re not seeing any new root growth by day 14, check the following: Is the crown above the waterline? Are the roots actually reaching the solution? Is your water temperature under 75°F? Is there adequate dissolved oxygen (air stone running)? Usually the issue is one of these four things.
Preventing Crown Rot From the Start
Crown rot is the most common cause of failure with bare root starts, and almost all of it is preventable.
The two causes are moisture sitting on the crown and poor airflow. Once you’ve got crown placement right (above the waterline, clear of wet media), the other piece is making sure your grow room has adequate air circulation. A small oscillating fan on low, pointed near the plants, does a better job of crown protection than most people realize.
If you see dark discoloration developing at the base of the crown, act immediately. Remove the plant, trim the affected tissue back to clean white or light-colored tissue, rinse the roots in a dilute hydrogen peroxide solution (1 part 3% H2O2 to 5 parts water), and replant with improved drainage and airflow. Caught early, plants can recover.
Once your plants are established and feeding well, dial in your nutrient solution for hydroponic strawberries to push toward your first flowers. If you’re curious about what kind of output to expect, the breakdown of hydroponic strawberry yield per plant gives realistic numbers based on variety and system type.
Getting bare root crowns into a hydroponic system isn’t complicated once you understand why each step matters. Soak the roots, keep the crown dry, position it correctly, and give it two weeks of patience. That’s the whole thing. From there, you’re just a grower managing a healthy plant. If you’re still mapping out your setup, the complete guide to hydroponic strawberries covers everything from choosing your first variety to pulling your first harvest.