
How to Build an Indoor Hydroponic Garden (Step-by-Step)
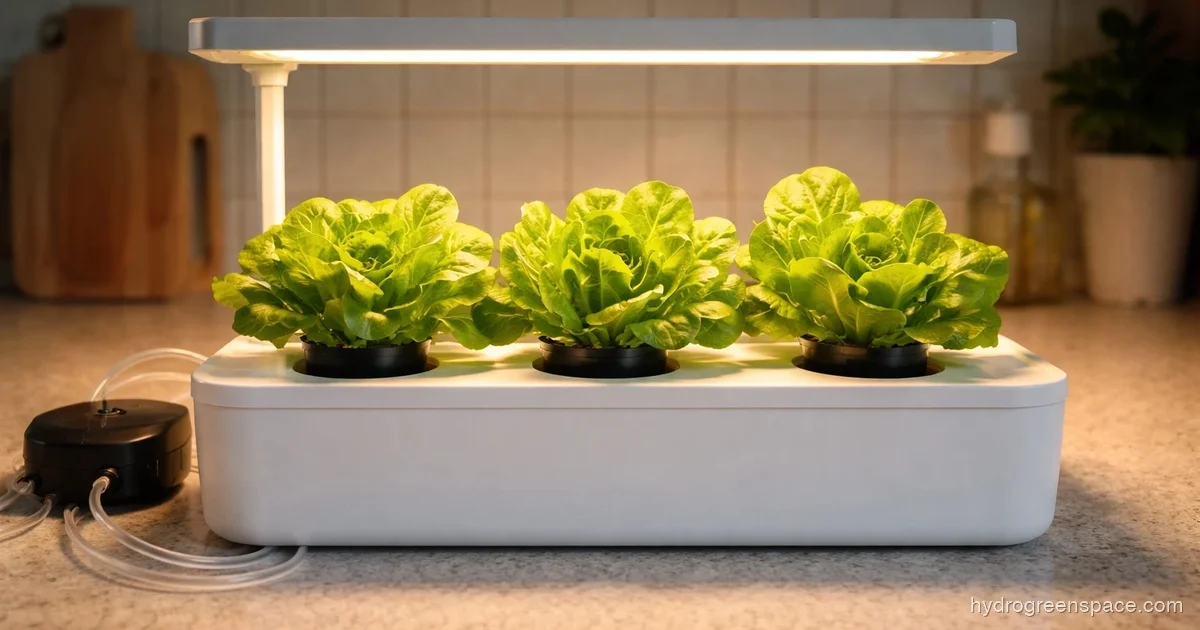
Building a hydroponic garden indoors sounds like a big project, but the core setup is just a container, some water, nutrients, light, and a way to hold your plants. The complicated part is knowing which system to start with and what order to do things in. That’s what most beginners get wrong: they buy parts before they know what they’re building.
This is a step-by-step guide to building your first indoor hydroponic garden, starting with picking the right system for your space.
Pick Your System Before You Buy Anything
The biggest mistake beginners make is ordering a grow light and a bag of nutrients before deciding what kind of system they’re actually building. There are several types of hydroponic systems, and choosing the wrong one for your space or skill level is the fastest way to end up frustrated.
For apartment growers and complete beginners, you have two realistic options:
Kratky method is the simplest entry point. No pump, no electricity for the reservoir, no moving parts. You fill a container with nutrient solution, suspend your plant above it using a net pot, and let the roots drink as the water level drops. It’s not ideal for fast-growing crops like tomatoes, but it’s excellent for lettuce, herbs, and spinach. If you want to verify that hydroponics works before committing money, start here. You can follow a complete Kratky method setup with almost no upfront cost.
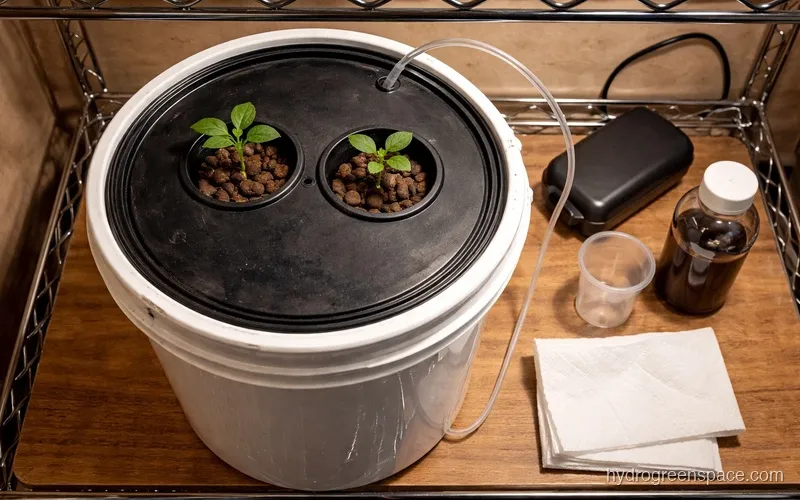
Deep water culture (DWC) is the next step up and my personal recommendation for a first “real” system. Your plants sit in net pots above a reservoir of nutrient solution, and an air pump keeps the water oxygenated. It’s almost as simple as Kratky, but it handles a wider range of plants, grows faster, and scales easily. A 5-gallon bucket hydroponic system is the classic DWC build: cheap, easy to source, and forgiving enough for beginners.
If you’re tight on space, a DWC setup in a 3–5 gallon container fits on a countertop or shelf. You don’t need a basement or a garage. I’ve grown a full cycle of lettuce in a 3-gallon DWC bucket on a kitchen shelf under a single LED panel.
What You Actually Need to Build One
Here’s the honest equipment list for a DWC build. This is not an aspirational setup with commercial-grade gear. These are the items you need to get plants growing.
Reservoir: A 5-gallon bucket or a dark-colored storage tote. Dark color matters because light hitting the nutrient solution triggers algae growth. If you’re using a clear container, wrap it in foil or tape.
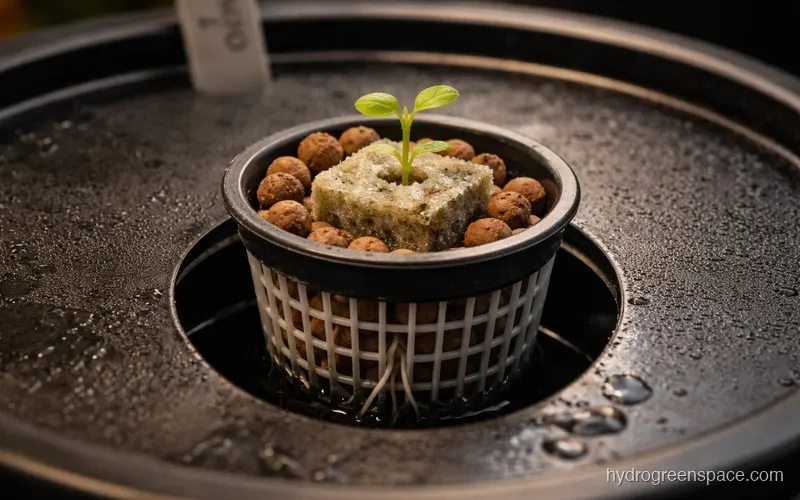
Net pots: 2-inch or 3-inch net cups that sit in holes cut or drilled in your reservoir lid. These hold your growing medium and root the plant above the water.
Growing medium: Hydroton (clay pebbles) or rockwool. Either works. Clay pebbles are reusable. Rinse them thoroughly before use because they come coated in alkaline dust that will throw off your pH.
Air pump and air stone: A cheap aquarium pump with airline tubing and a small air stone dropped into the reservoir. This oxygenates the water and prevents root rot, which is the most common killer in DWC.
Hydroponic nutrients: A two- or three-part liquid nutrient solution formulated for hydroponics. Do not use soil fertilizer. General Hydroponics Flora Series and MaxiGro are both solid starter options. Start at half the recommended dose with seedlings.
Grow light: For a small countertop setup, a 45–100W LED panel is enough for lettuce and herbs. Tomatoes and peppers need more. You can go deeper on choosing grow lights for your indoor setup once you’ve built your first system.
pH testing kit or meter: Non-negotiable. Hydroponics fails or succeeds based on pH, and you cannot eyeball it.
For a realistic breakdown of what this costs to assemble, check out how much does it cost to start hydroponics.
What I’d do: Start with a 5-gallon bucket DWC for your first build, grow lettuce or basil, and don’t add a second plant until you’ve run one full cycle. The goal for month one is understanding the system, not maximizing yield.
Step-by-Step: Building a Basic DWC System
Step 1: Set up your reservoir
Fill your 5-gallon bucket or tote with water. If you’re using tap water, let it sit for 24 hours to off-gas chlorine, or use a dechlorinator. Your water temperature should stay between 65–72°F. Warmer water holds less dissolved oxygen and invites root rot.
Step 2: Mix your nutrient solution
Add nutrients to your water following the manufacturer’s directions, but use half the recommended dose for your first run, especially if you’re starting from seedling. Over-fertilizing seedlings is one of the most common first-time failures. The symptoms look like nutrient deficiency (yellowing leaves), so growers add more nutrients and make it worse. Start low and raise gradually.
Step 3: Check and adjust pH
Target a pH of 5.5–6.5 for most vegetables and herbs. After mixing nutrients, test the pH with a meter or drops. Use pH Up (potassium hydroxide) or pH Down (phosphoric acid) in small increments. Add a few drops, stir well, retest. Don’t try to correct pH in one big adjustment.
Step 4: Start your air pump
Drop the air stone into the reservoir, connect the airline tubing to your pump, and run the pump continuously. Roots need oxygen as much as water. The bubbling you hear is the system working.
Step 5: Place plants in net pots
If you’re starting from seed, use a rockwool cube or a rapid rooter plug. If you’re transplanting a seedling, gently clean soil from the roots, rinse them, and nestle them into clay pebbles in the net cup. The bottom of the net pot should sit just above the waterline, not submerged. The roots will grow down into the solution.
Step 6: Position your grow light
For lettuce and leafy greens, a 45W LED panel positioned 12–18 inches above the canopy is a good starting point. Seedlings need 14–16 hours of light per day. Use a timer so you’re not managing this manually.
Your First Week: What to Watch
More hydroponic gardens fail in week two than at any other point. Here’s what to monitor so you don’t become a Reddit cautionary tale.
pH drift is normal. When you add nutrients and plants start drinking, the pH shifts. Check it every 2–3 days and adjust. Don’t panic if it moves; just bring it back to range.
Reservoir top-offs: Your plants will drink water faster than you expect. When the level drops, add plain pH-adjusted water (not nutrient solution) to top off. Adding more nutrients every time you top off leads to salt buildup and toxicity.
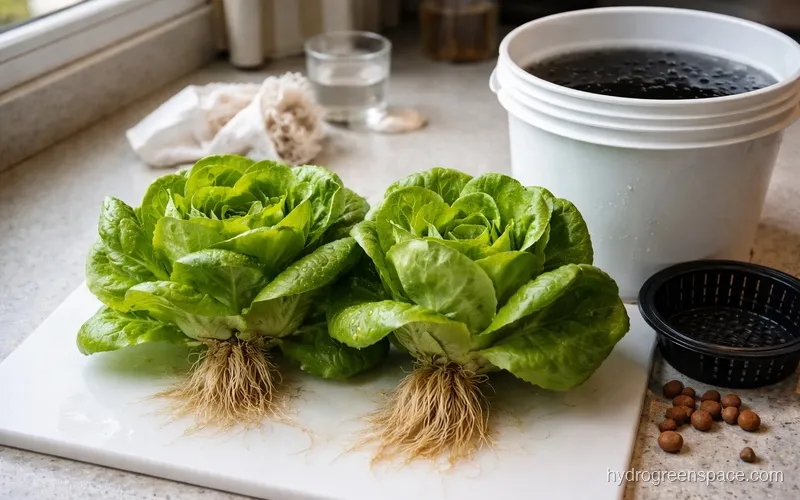
Root color: Healthy roots are white or cream-colored. Brown, slimy roots with a bad smell mean root rot. Add a few drops of hydrogen peroxide (3% solution) immediately, increase aeration, and lower water temperature.
Leaf color: Pale or yellowing leaves in week one are almost always a light problem or a pH lockout, not a nutrient deficiency. Check your light height and test your pH before adding more nutrients.
If you want a longer read on how to feed plants correctly through different growth stages, the guide on how to feed hydroponic plants covers this well.
What Plants to Grow First
Lettuce is the classic first crop for a reason. It’s fast (harvestable in 4–6 weeks from transplant), tolerant of beginner pH swings, and genuinely useful. Basil, spinach, and kale are also strong first choices.
Avoid tomatoes, peppers, and cucumbers for your first build. They’re not impossible in DWC, but they have longer grow cycles, heavier nutrient demands, and they need more light than a compact LED can reliably deliver. Once you’ve run two or three lettuce cycles and understand how your system behaves, you’ll be ready. The full list of best vegetables to grow hydroponically can help you plan what to grow next.
Is It Worth It for an Apartment?
This question comes up constantly in hydroponics communities, and the honest answer is: yes, with realistic expectations.
A countertop DWC setup doesn’t produce the same yield as a dedicated basement grow room. But it will grow more fresh herbs and greens per square foot than any windowsill pot, with no soil, no pests, and significantly faster growth. The value is in the consistency and speed, not volume.
If you’re working with more vertical space, a dedicated grow tent lets you add more plants without taking up extra floor area. And if you have a basement available, growing hydroponics in a basement gives you much more environmental control.
For a complete list of what to source and where, the full hydroponic equipment checklist covers everything from the basics through more advanced builds.
What Comes After Your First Cycle
After your first harvest, the system changes from something you’re figuring out to something you’re refining. You’ll have a baseline: how fast your particular water drifts in pH, how quickly your plants drink, how your light performs at different heights.
That’s when it makes sense to experiment: a second plant variety, a larger reservoir, or a more structured nutrient schedule. The indoor hydroponic growing guide is a good next read for seeing every indoor setup option and how your current build compares. The indoor hydroponic garden for beginners guide covers the foundational concepts in detail if you want to go deeper on how the system works and where to take it next.